 Makes 2 - 11/12 inch Stromboli pies 2 cups finely ground Einkorn flour ½ tsp salt Approx. ½ Tbsp raw honey 1 Cup sour dough starter (I used cold from the fridge, let it set out for 30 min, took 1 Cup then re-fed) Preheat oven to 425-50 F degrees. (Our 3,000+/- elevation often determines the temperature for us! I used 425 F degrees for the first 15 minutes, then 450 for 5-10 minutes.) Place flour and salt into mixing bowl. Add the raw honey and sourdough starter (can use discard if desired). Start mixing with a large spatula. If needed, add a little water – I added ¼ Cup water. Do not add too much at once or dough will be super sticky! You want a stiff but elastic dough that will be easy to press out with fingers. If needed add a little more water, 1 Tbsp or two at a time until you have the stiff but elastic dough. Ensure all flour is mixed in. In the bowl or on a lightly floured surface, knead for just a few minutes (I did 3-5 minutes by hand). Roll into a ball on the center of the board. Cover with damp towel and let rest 30 +/- minutes. After resting, cut dough in half, setting one ball aside. Then, on parchment paper, sprinkle a little cornmeal or flour so the dough does not stick. Press out to a 11-12 inch diameter circle. Fill one half with desired fillings. Lightly wet the filled edge with a little water, spreading around the edge with fingers. Fold over the other side, gently, so that you don’t poke big holes in your dough. You CAN use your parchment to hold it as you flip, if you would like. Be careful it does not stick to the parchment. Pinch the edges together, then press with a fork to seal. Using a sharp knife, poke a few holes in the top to allow steam to escape while cooking. Place the parchment and first Stromboli onto baking sheet. Repeat with the second piece of dough. Brush tops with egg and water mixture. Place baking sheet into preheated oven (425 F degrees). Bake for 15 minutes at 425, then check status. If it is not cooked through the dough, cook for an additional 10-15 minutes on 425. OURS were browned on top after an additional 5-10 minutes at 450 degrees. You want to ensure the dough is cooked through. Serve hot with additional sauce for dipping. ENJOY!!! NOTES: Don’t over fill or you won’t be able to seal it. OR it could pop open in baking. Be careful no holes form after filling, while folding. You may be able to pinch them shut, or if small enough, you can leave them as your steam holes. I used a thick sauce inside with the fillings. It was on the thick side by boiling it down some while mixing the dough and adding the fillings.
 This fall we received a cast iron 10 inch tortilla press for our kitchen - what a great blessing it has become. In our rural area, we can't always find Tortillas with the best ingredients. Now we don't need to worry about that and can make our own whenever we want. Whether flour or corn, our new press works great. I have two favorite recipes that we truly enjoy for making tortillas - a corn recipe from inspiredtaste.net and a sourdough recipe a friend shared with me on social media. By clicking the link provided for the Corn Tortilla recipe, you can easily print a copy for your home library, and for the flour tortilla recipe, click the PDF link below to print that one for your library! And remember, I always recommend printed copies for times when the electricity or internet are down and out! These aren't the only goodies we make with the press either - find out more by watching our video on Youtube.
Boston Market Style Creamed Spinach Growing up, my kids used to love getting that creamed spinach from Boston Market whenever we ordered chicken meals. When I moved to another area where there was no Boston Market, I created a recipe that is close enough to perfect for me! I am sharing this recipe with you today and even have the video available on YouTube to see how quick and easy it is! - Judith
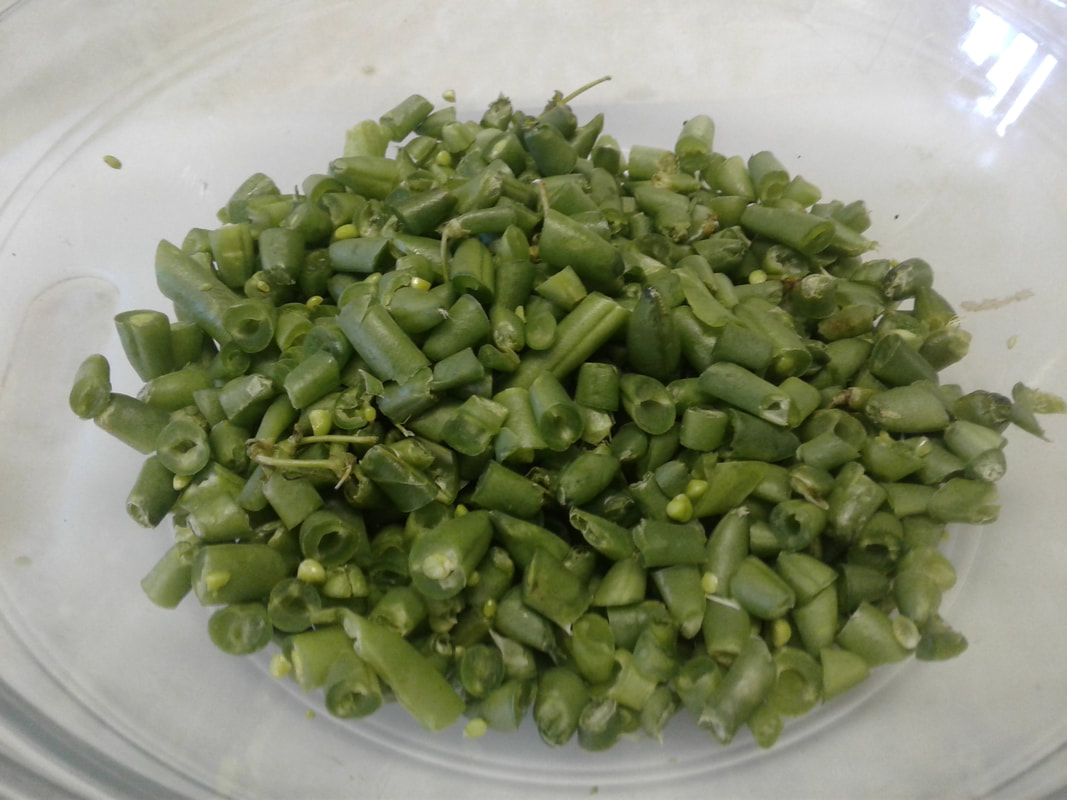
This year's garden has had some difficulty - first seeds did not want to sprout because they just didn't want to! We had our soil tested this year, and that delayed some of the planting so that we could add nutrients we needed. Then the nights were too chilly way past the first of June, and finally seeds popped! By then it was already mid to end of June. Add to that the plants seemed stunted in spite of all the nutrients we added to the soil. Through July I was beginning to believe we wouldn't get ANY Produce this year from our garden. It is now mid-August and we have gotten one zucchini (who ever gets only ONE zucchini?), about 20 small cucumbers (many I have eaten!), one and a half vacuum seal bags of green beans for the freezer, several green onions, and that is about it! Kind of worrisome and sad. My prayer, DEEP prayer, is that ll this work WILL bring forth some amazing soil for NEXT year, but this year is slow. What can I do when everything is coming in as dribs and drabs? I can still put things up as they roll in, even if small batches. Our latest videos show two examples of small batches that I can do and still be able to be prepared for winter. One is to blanch the green beans as they come in and when enough are ready in the freezer, I can vacuum seal a meals worth for longer term storage. The other idea is refrigerator pickles. In this note you will find the PDF recipe for my refrigerator pickle recipe I have used for 2 or 3 decades. It is in a printable format so that you, too, can enjoy! Blessings to you and may your crops be plentiful! - Judith Garton
 Simplicity in the kitchen makes my life much easier as well as more organized. Simplicity, for ME, is key!!! Because of this I love to regularly peruse new recipes and techniques on various foods we enjoy eating. A few years ago, one of the kids gave us a treat of trying a few of those boxed meals to see if we would enjoy them. BOY! DID WE! We kept the program for about a year and gathered a lot of really easy recipes to cook on busy days. I LOVED how they tried to use as few ingredients as possible, while creating the most delicious meals. Around that time, I also started to learn how to make REALLY GOOD sour dough breads with a nice oven spring in the top. However delicious sour dough bread is, it is also very time consuming to make. Although I truly love the flavor of it, I often don't have the amount of time needed to deal with creating a whole loaf. My tried-and-true simple bread recipe is my go-to for just about anything yeasty. Check out my video on YouTube to get some ideas - OR share some of your own in the comments section! Don't forget the printable PDF version below so you, too, can tuck it into your home storage recipes! And ENJOY! - judith Ingredients: 5 Cups Hard White Whole Wheat Flour (I use Wheat Montana Prairie Gold) 1.5 tsp sea salt (I use pink Himalayan) 1 Tbsp Fast-rise yeast (I buy the Kroger Brand in a jar - with bread flour you might need to cut this down to 3/4 Tbsp) Place all dry ingredients into mixer bowl, and mix with dough hook until evenly dispersed. Ingredients Cont’d: approx. 2 to 2.5 Cups milk, heated to 95 degrees or so. With mixer running, pour milk into flour mix, and allow to mix through. If dough seems too stiff, add approx 1/2 Cup water, a little at a time. (I find at our elevation of 3400 feet, I need 1/2-3/4 additional water depending on room humidity). You want a soft, lightly sticky to the touch dough. Knead dough from 5-10 minutes depending on type of flour used (for 100% whole wheat, I do 10 minutes). Roll into ball, lightly greased and place in bowl. Cover with damp cloth to let rise approx 45 minutes. Shape into desired loaf (I used a loaf pan lined with parchment), and place the loaf into your pan. Cover again with damp cloth until 3/4 of an inch or so above the top edge of your pan. Preheat oven to 450* F. When ready, place loaf into oven, then reduce heat to 375 and bake for 35-45 minutes. Serve hot, or allow to cool slightly to slice more evenly. Notes: This one is the simplest of my bread recipes and I have a habit of tossing it together first thing in the morning so bread is usually done by lunch. OH!!! AND you can use this recipe to make soft pretzels, bagels, dinner rolls, garlic knots, pizzas, Galette, HB and HD buns and…SO MUCH MORE! ANYTHING you would use a yeast dough for, you can use this dough. We even use it for sweet rolls because we are not heavy into sugars.
In June of 2022, we had the opportunity to meet our new grandson, John, who was only a few weeks old at the time! What an adorable little baby - with cute pudgy cheeks and the sweetest eyes! We ALSO got to visit with our daughter and son-in-law AND our toddler grandson, Thomas, the best big brother in the world! (Yes, I am definitely biased!) He loves his little brother so much. But life with a 17 month old and newborn can be overwhelming sometimes. And even the best laid plans of grams and gramps cannot outdo the number of hours in a day! Time got away from us and we needed something QUICK! We were supposed to have some kind of chicken dinner that evening, but we all just looked at each other and thought: how nice grilled cheese and tomato soup would be instead! Our daughter instructed us from the couch as to where we could find all the things we needed and I used a recipe from my head to create a quick tomato soup. Jim and I have had something like this before a number of times, and I even have a recipe on this site somewhere as well. But THIS time was different! Our daughter had a can of Muir Glenn Fire Roasted Tomatoes in her cupboard and I had never seen them before. Off I went to make the recipe and it turned out better than ANY tomato soup I had made in the past! Thomas ate not only his sandwich dipped in his mommy's soup, but he ate pretty much all her soup as well! He LOVED this new recipe! So in honor of Thomas and his appetite, we present HIS SOUP! We hope you enjoy it as much as he did and we do. We have made it twice since, and Jill has made it again as well! He still likes his soup as much as that first time! Blessings and Shalom! -Judith Thomas' Tomato Soup 1/3 Cup chopped onions 2 Tbsp butter 1.5 Cups Chicken Broth (I used water + Knorr Chicken Liquid Concentrated Stock Base) Cook onion in butter until clear. Add broth. Stir well. Heat through then add: 14 oz can Muir Glenn Fire Roasted Tomatoes, pureed (Or ½ of a 28 oz can) ½ tsp dried Basil (more if desired for taste) Cook to blend flavors. I brought to a gentle boil, then reduced to simmer for about 20 minutes. When ready to serve, whisk in: ½ Cup Sour Cream Heat through but do not allow to boil, sour cream might separate. Serve hot with grilled cheese sandwiches!!! This recipe is dedicated to our little grandson, Thomas, who fell in love with it when we made it for him on our visit in 2022! He ate not only his sandwich, BUT soup right from the spoon it was so good!
Cow Pie Cookies (Also called Oatmeal Fudgies) ½ Cup milk 2 Cups sugar 1/3 Cup Cocoa 1 stick of butter 1 tsp pure vanilla ½ Cup peanut butter 2 ½ Cups oats (I use old fashioned; either works) 1/3 Cup raisins Prepare a cooling rack with a sheet of parchment paper (if making smaller cookies, tear two and set up TWO cooling racks!). Make sure to do this in advance of starting the cooking. In 2 quart saucepan, mix together sugar and cocoa. Add milk while whisking, then add butter and turn heat on to medium. Heat on medium heat, stirring constantly, until boiling. If necessary, reduce heat a little to prevent scorching. (Our stove top can run hot some times). When mixture begins to boil, stop stirring and allow to boil 1 minute. Remove from heat and stir in peanut butter and vanilla. Mix well then add oats and raisins. Mix thoroughly. Quickly drop by large spoonfuls onto parchment paper. Cool to set. NOTE: Please ensure you set out the parchment covered rack(s) in advance or they might slow you down. You might need to move very quickly when dropping by spoonfuls! These CAN harden in the pan very swiftly, and then you will have no way to get them out! About 2 dozen Cow Pies!
This taste treat uses a couple of recipes we have posted before on Biblical Prepping, so get ready for a virtual scavenger hunt so you can track down what you will need to assemble your breakfast pizzas. Easy Flat-breads Dry Soup Mix Enough scrambled eggs for the number of people you are serving. 1/2 to 1 lb of turkey sausage meat, raw. Cheese - Kroger slices worked easy for this recipe. Step 1: Mix together a small batch of creamy soup mix according to your jar instructions. For ours, I made 14 ounces of milk plus 1/4 Cup of dry soup mix. I was looking for a thick sauce that wouldn't run off under the broiler later! Step 2: In a small saucepan, brown together a little bit of diced onion or rehydrated diced onion and your ground turkey sausage meat. Once the meat is cooked through, add the soup mixture. Bring to a boil, boil until thickened, stirring constantly. Reduce heat to low and allow to stay hot. Stir occasionally to keep from sticking. This may also thicken the gravy a bit more as it cooks down. It will also allow the sausage flavor to more thoroughly permeate the gravy mixture. Step 3: Scramble your eggs and cook them thoroughly. Turn off heat, but allow them to stay hot on the burner. Step 4: To whip ours up, we had Flat breads left over from the night before. We placed the breads on a baking sheet. Then spread a little sausage gravy on the breads, ensuring you save enough to put on top of the eggs in a moment. Place scrambled eggs on top of the first layer of gravy. Make sure to split evenly among your bread rounds. Top the eggs with a dollop of sausage gravy, ensuring to give each serving a nice dollop. Spread lightly over the eggs. Now, top each with a slice of cheese. Turn on the broiler and pop the baking sheet under the broiler just until the cheese is melted. Serve hot! And Enjoy! - Judith Garton, Author A quick note: Did I take any photos? Of course not! I forgot - until it was too late and we had eaten our brunch! Maybe next time I will remember.
A friend recently shared a FANTASTIC recipe for an easy-to-whip-up flatbread that has become something we throw together several times a week. This recipe is yeast free and turns out great every single time - well, at least for us it does!
After sharing the recipe with others, I discovered a lot of people who eat Weight Watchers or keto are familiar with a similar recipe. I love recipes where you are able to take one food or product and use it through the week or even longer. This often makes your life easier and provides you with quick and easy solutions. This is great especially during spring and summer when people are involved in a lot of activities and family events. You may have already seen me share my all time favorite Dry Soup Mix recipe from Make-A-Mix Cookery. This flat bread recipe is in the same category as the soup mix - just think of the possibilities! We have already used these flat breads for wraps, tuna melts, quick pizza crusts, grilled chicken sandwiches, dipping in soups, even for making breakfast pizzas. One morning we even ate them as a simple peanut butter sandwich! I often think of something like this being what they would have eaten as part of the Feast of Unleavened Bread during the Exodus in the Bible. However, in their case it would have been TWO ingredient bread as they didn't have baking powder around then! I have included at the bottom of this article, the original THREE Ingredient recipe we used. However, we did change things up a little bit to fit the ingredients we keep available in our kitchen. These changes made ours into FOUR ingredient flat breads! - 1/3-2/3 Cup Kefir used instead of Yogurt - 3 Tbsp full fat sour cream - 1 Cup Whole Wheat flour, instead of white - 3 tsp baking powder, increased from 2 because we used whole wheat flour First mix together the sour cream and 1/3 Cup of Kefir in a small bowl. Mix well. Set aside. Also set aside the additional 1/3 Cup of Kefir, in case you need added liquid. In a large bowl, mix the baking powder and whole wheat flour. Gently pour the Kefir mix into the dry mix, and stir together with a rubbery spatula. Mix until it all pulls together and kefir mix is absorbed into the flour mix. You may need to get into that dough with both hands to be able to work it to the right consistency. It should be slightly sticky, but easy to work for rolling out. If dough is too dry, add a little of that reserved kefir mix. Ensure you have it all mixed in and then, divide dough into 6-8 pieces. With a rolling pin, place one ball of dough on parchment, and roll into a round, about 6-8 inches diameter. Remember to roll thin enough to cook through when placed in hot skillet. This will also help form nice air bubbles in the dough while cooking. You DO want those bubbles! Heat a large skillet on medium heat. If you have a cast iron skillet, I did feel this worked the best. I did try a non-stick griddle as well as a stainless steel pan. But the cast iron seemed to cook most even and swiftly. Remember the cast iron can run hotter, so you may need to lightly lower the temperature to stop any oil from scorching. Brush both sides of the dough flat with EVOO, toss into hot skillet. Allow the bread to brown nicely and bubble up. Takes 2-3 minutes, then gently flip it in the skillet and allow 2-3 minutes on the second side, until lightly browned and cooked through. Remove from hot pan to cooling plate. Repeat this process until all dough balls have been cooked. Stack them gently on a plate and keep warm to serve. Repeat this process with each dough ball. Can be stored in room temperatures for up to 3 days. To reheat, Place on flat pan in pre-warmed oven. These were delicious, too, smeared with pressed garlic mixed with a little EVOO, then sprinkled with a little Parmesan cheese! Give them a try when you have time and ENJOY! - Judith Garton, author ~~~~~~~~~~~~~ https://www.biggerbolderbaking.com/flatbread-recipe-3-ingredients-easy/  Last year I did a video on one of my favorite kitchen staples - Dry Soup Mix. I love to keep this recipe mixed up in a jar in the fridge because it is so versatile and comes in very handy. Think of anything creamy that you serve in the kitchen, and this recipe is the perfect go-to replacement for the sauce part of your recipe. This is the base for most of my Pot Pie recipes, but it also works great for: Potatoes Au Gratin, Scalloped Potatoes, creamy chicken casserole, tuna casserole, creamed chip beef on toast, sausage-gravy and biscuits, as well as creamy soups. I list a number of creamy soup options in the recipe/blog to stir your ideas. I have even known some to use it to make Alfredo sauce. Just add a little sour cream for richness, and cheese! I invite you to mix up a jar of dry mix, store it in YOUR fridge, then imagine the possibilities! Dry Soup Mix 2 Cups Dry Milk 1 Cup Flour 1 Tbsp Bullion of choice (Chicken, vegetable, or beef) 1 Cup butter, softened (or 1/3 Cup EVOO) Mix dry ingredients together thoroughly. Cut in butter or oil until well mixed. Place in a jar or container in the refrigerator – labelled. Store for up to 3 months in the refrigerator. Eliason, Karine, et al. “More Make-a-Mix Cookery.” Amazon, H.P. Books, 1980, www.amazon.com/Make-Mix-Cookery-Make-Mixes/dp/0895860074. UPDATE: I had several families ask if there is an alternative to making such a large batch of soup mix. Concern was expressed about the shelf storage in the fridge being only 3 months. For this, I have three suggestions: a) PLEASE look at where you are already using creamy sauces, and try this mix in place of your regular sauce. If you get used to using it, you will use it more quickly. This is why so many ideas are included in this recipe page - to spark your imagination! b) Feel free to split the mix into storage containers, and freeze it. Freezing it can help you increase your shelf life - stored in the freezer, this mix can last up to one year. Please remember things like power outages or defrosting your freezer may decrease the time you can store. c) OR Cut the recipe in half to start with. Making it smaller will help you use it faster. Hope these ideas help! Creamy Soup 2 ½ Cup broth or water, boiling 2 Tbsp Dry Creamy Soup Mix mixed into ¼ Cup water, add to boiling liquid, and stir. Bring to rolling boil, and boil to thickened. Reduce heat to low, add 1 Cup milk, if desired. Heat through and add your favorite veggies or use to make a pot pie. ~~~~~~~ This base recipe may be used to create various types of creamy soups. For example: Cream of Asparagus – add 1 Cup of frozen asparagus to the finished cooked soup Cream of Broccoli and cheese – add 1 Cup frozen broccoli to the cooked soup. Cream of Mushroom – this soup is best when you add a bit of powdered, dried mushrooms to the dry mix, then dried mushroom chunks to the soup (add a bit more liquid to the soup). Creamy Potato Soup – add 1-2 Cups cooked potatoes to the cooked soup. Creamy Corn Chowder – add 1-2 Cups frozen corn to the cooked soup. For these soups, you can easily use dehydrated or freeze-dried vegetables in place of frozen. Either re-hydrate first or add additional liquid to the soup and allow them to re-hydrate as they cook and absorb liquid. They are better in the soups if they are re-hydrated first. Pot Pie Filling Make the basic recipe above. Add mixed vegetables of your choice. A bag of mixed frozen veggies is quick and easy. Add diced meat of choice, too, if desired. Pour into your prepared crust, top with second crust, and bake as usual. Potatoes Au Gratin or Scalloped Use this mix to make the base for your scalloped potatoes or Au Gratin potatoes. Base recipe also great for making Creamed Chip Beef on Toast Creamy Tomato Soup 1 – 28 oz can of crushed tomatoes, pureed 1 ½ to 2 Cups water or broth Add these to a pot and mix well. Bring this to a boil over medium-high heat. Add 1-2 Tbsp sugar to taste. Take 2 Tbsp of dry Creamy Soup Mix and add into ½ Cup water. Mix well. Add to the hot soup in the pot and whisk well. Allow to boil and thicken. Turn off heat and stir until boiling stops. Gently stir in 1 Cup milk. If necessary, gently reheat to heat through. For a Casserole If using this mix in a recipe where you would normally use creamy canned soup, you can easily substitute the prepared creamy soup, and then just reduce the amount of liquid. This may take a little bit of practice to get your casserole the way you like it, but it is well worth it.
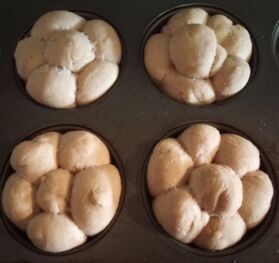
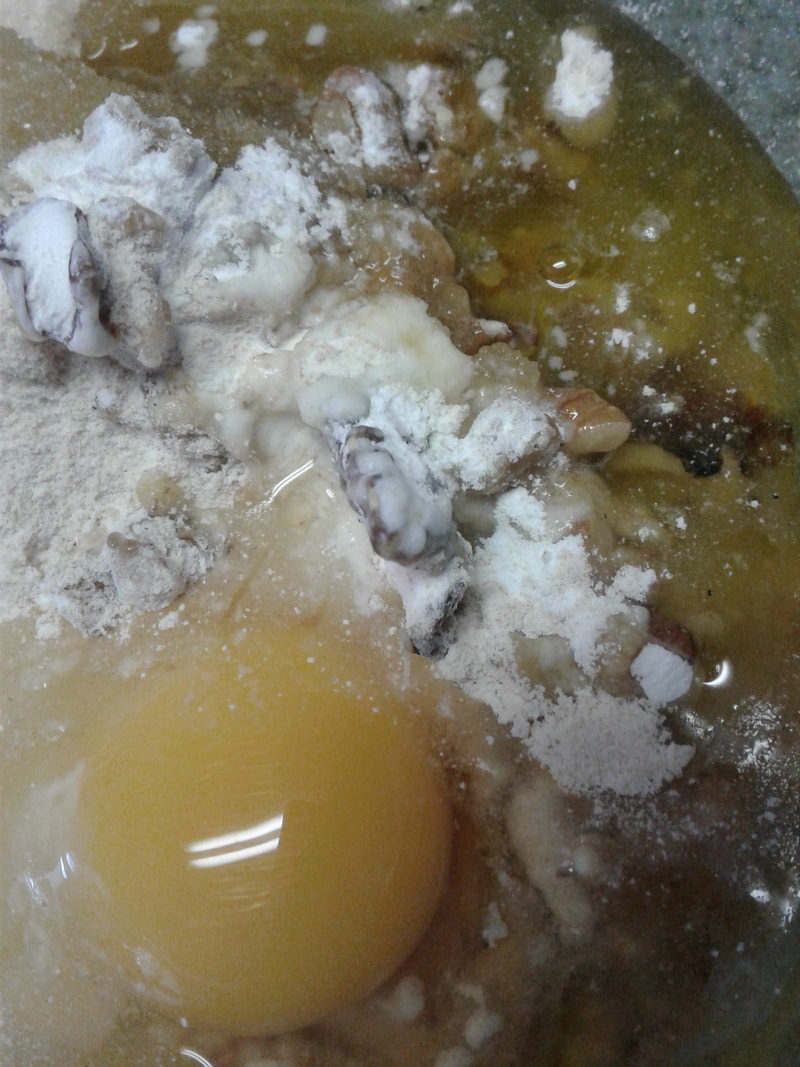
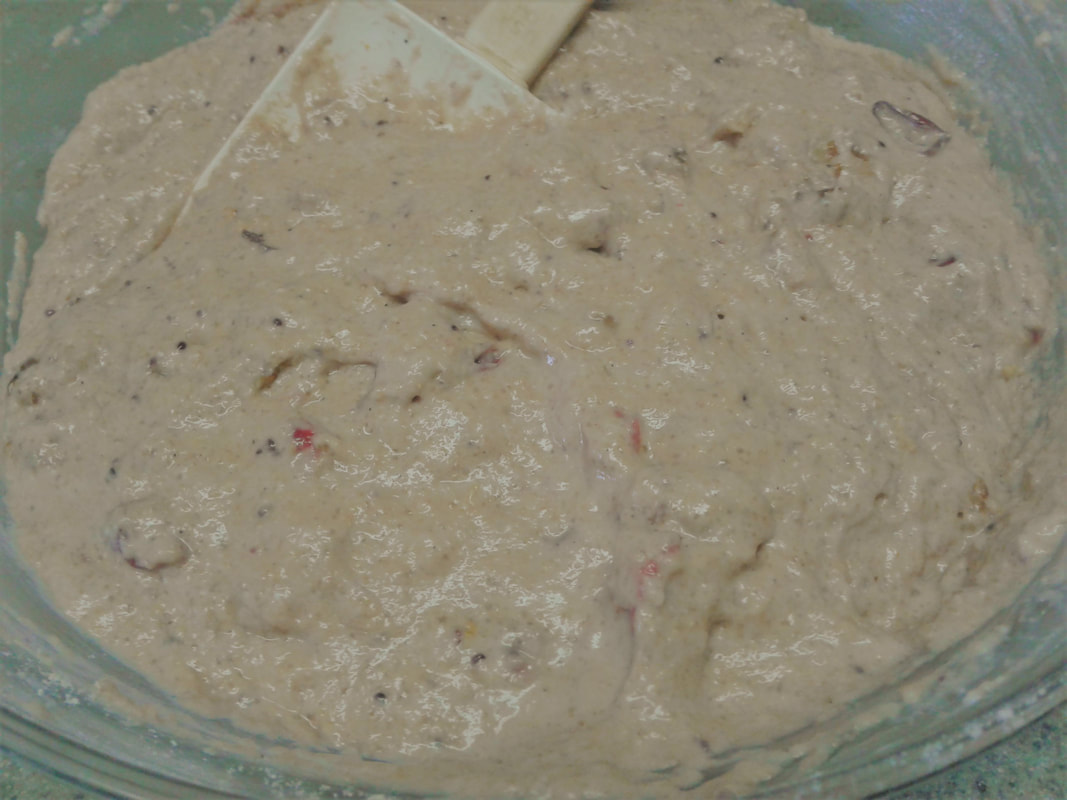
A long time ago, in the Depression era, many people learned to use everything they possibly could from their kitchen, not wasting a single thing. It was a necessity to do so. As times change for each of us, we will find we need to start thinking more like families did back then. For some time now I have been wanting to pass along ideas that will reduce your waste from your kitchen by using things you might normally toss in the trash. One big idea we do reduces the waste going out to the trash and to your compost. One of my favorites we covered in a blog and video. If you have seen my video or read our blog about Garbage Soup, then you know exactly what I am talking about. We don’t waste anything from our kitchen if we can avoid it. From sticking half-way fresh bags of greens into the freezer to dehydrating those greens for use in soups; from tossing veggie scraps into a bag for homemade broth to saving apple cores to make vinegars; you will always find something “from the trash” turning into something NEW in our kitchen. Because of this, and because many people do not think of doing these things at all these days, I have been wanting to create a series based on that old saying, “Waste not, want not.” Although we already have three messages that could fit into this series, today’s message will be the first official one, and it involves cranberry mash. About two weeks ago, I started to feel a bit off and recognized I needed a good cleanse of my body. We won’t go into HOW I recognized it! I just did! To accomplish what I needed, I knew I needed cranberry in my system. Having bought several super-sized bags of them in the fall, I grabbed a handful, tossed them into a pot, boiled them, crushed them, and allowed them to steep until cool. After a couple of hours (I got distracted as usual!), I strained the juice and put the mashed cranberries into a bowl in the fridge. I was able to take the juice and add it to my daily water intake as desired and drank the cranberry water for several days. I did need to make a second batch a couple of days later since I wasn’t quite “there” yet. After two big batches like this, I had over 2 cups of crushed cranberries sitting in the fridge in a covered dish. The funny thing is the recipe I use to make the cranberry water/juice, tells you to throw away the cranberry mash! NO WAY!!! I LOVE cranberries, for one, and WASTE NOT, WANT NOT!!! There are SO MANY things you can do with that cranberry mash. Why someone would tell you to throw it away, I cannot fathom!!! What ideas can we come up with? To start: 1) Make a cranberry sauce by adding apples, oranges, walnuts, or whatever else you enjoy in your cranberry sauce in the fall. I have even seen people mix blueberries, strawberries and cranberries together as a sort of sweet and sour “fruit salad.” Serve it as a side dish, a little snack in the afternoon, or as a condiment for a meat-meal you are preparing! You could also pour it over a lovely bowl of fresh, homemade vanilla ice cream! The possibilities are amazing, and that is just to start! 2) How about a semi-sweet, hot cranberry sauce and pour it over top some freshly baked chicken or turkey! Put the mash back into a little saucepot and add a touch of honey or organic sugar. Heat and allow to thicken to form a syrupy sauce. 3) Puree it and add it to smoothies. 4) Separate it into 1/2 or 1 cup serving sizes to be added to other recipes in the future. For now, freeze these dollops in pre-measured portions for use as needed. 5) Fruit roll-ups or leathers 6) Dehydrate the mash for use later. 7) But HERE is what I did this week with ours!!! MUFFINS!!! Muffins are SO SIMPLE! I just tossed together 2 Cups whole wheat flour, 3 tsp baking powder, 1 egg, 1/2 Cup sugar (you can add up to 1 Cup, but we don’t eat things terribly sweet!), plus some oil, 1 Cup of the cranberry mash, a touch of vanilla and cinnamon, then some chopped walnuts. I mixed lightly to combine everything evenly. Because it was still way too dry, I added milk, a little bit at a time, until the batter was the right consistency for baking into muffins. I scooped the batter into 12 greased muffin cups and baked at 350 for about 20-23 minutes. Make sure to check them with a toothpick for doneness. Remove from oven when ready and SERVE! These would be great with butter, cream cheese, orange marmalade, lemon curd, or your favorite topping or spread! The mashed fruit becomes a part of the liquid you used to make these lovely, tasty and very moist muffins! That is why you wait to add the milk until you find out how moist the mixture is. Using the cranberry mash was very similar to using apple sauce or pumpkin puree in the recipe. The best part is you don’t just have to make muffins. You could make cranberry bread, pancakes, cookies, and so much more! The possibilities for eating your “trash” can be endless if you just imagine what you can do with it! No, I am not advocating for you to go out and pick through your trash today and bring scraps back inside! But I AM asking you, before you throw it out, stop, think, and imagine – imagine what you COULD make with what you are tossing. Are there some scraps that just end up in the trash or compost anyway? DEFINITELY! An example of this would be any spoiled products, especially bad or moldy produce! The other day I pulled out a bag of carrots that had a few blackened, slimy gross things growing in it! THIS ended up in the trash! There was NO HOPE in saving those “creatures.” Yet, for those things you CAN re-purpose? Please, think ahead and try it! You will find amazing ways that you can expand your food storage possibilities and extend the life of your home storage. We ended up not only with my cleansing tea for almost a whole week, but also 2 breakfasts worth of muffins! There is still one full cup of cranberry mash in the freezer, too, for another creation in a week or two. It will be fun over the next blogs to show you how we make our food supply stretch. Do you have any ideas you would like to share? Please feel free to send them to me! Blessing and Shalom….Judith First we have the cranberry mash used in the recipe. Next, I have to say, on this particular day I had the small bits and pieces left in the bag of walnuts that I had been saving for such an occasion as this! Once all the ingredients were added into the bowl, I mixed it thoroughly and look at that batter! Perfect!  NOM-NOM-NOM!!!!
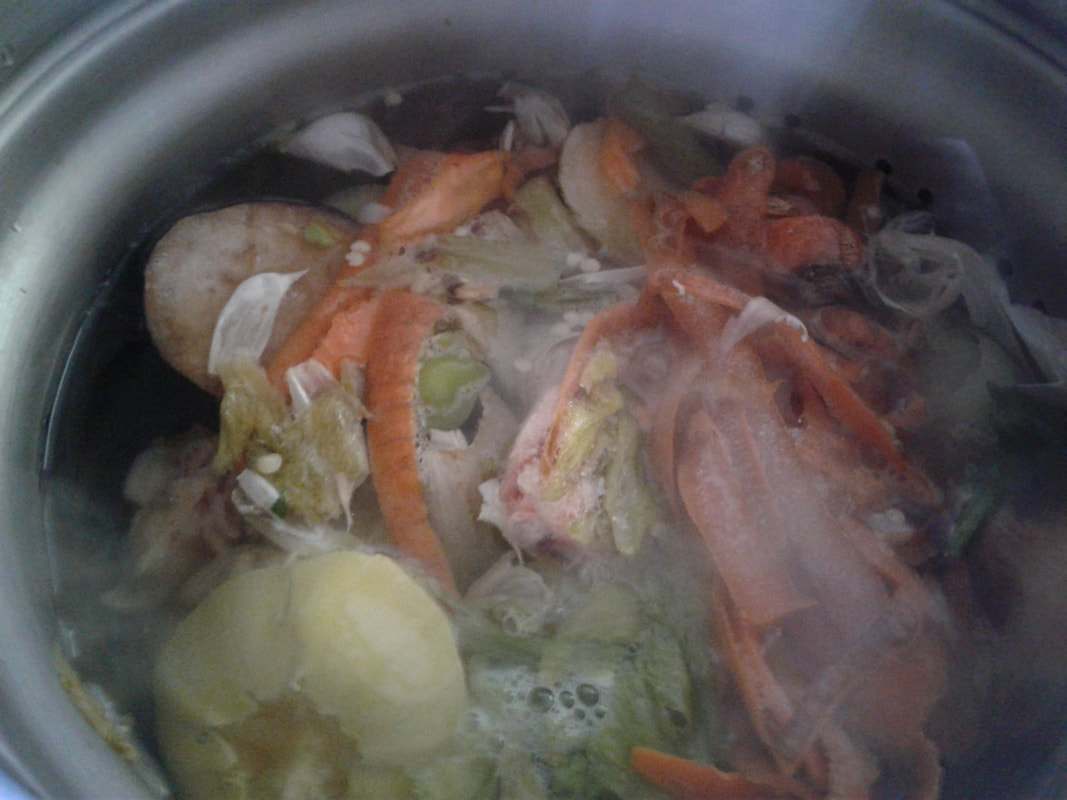
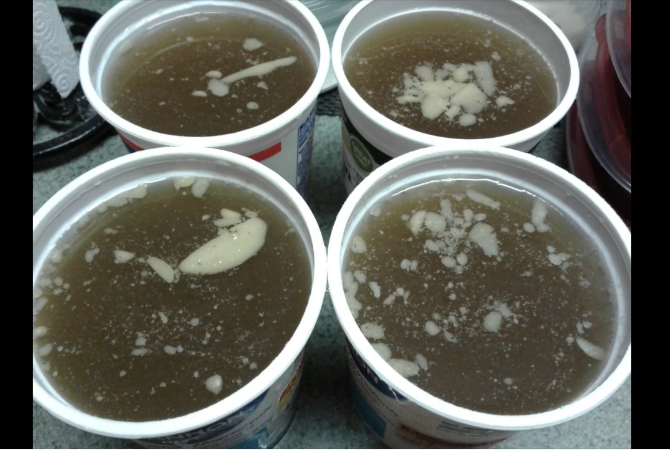
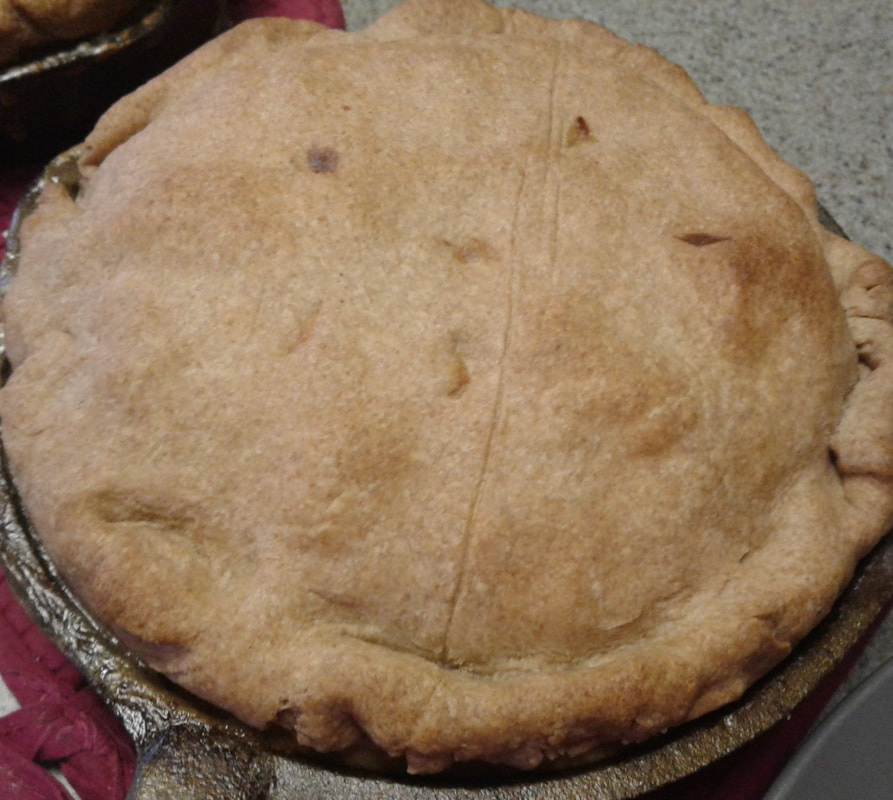
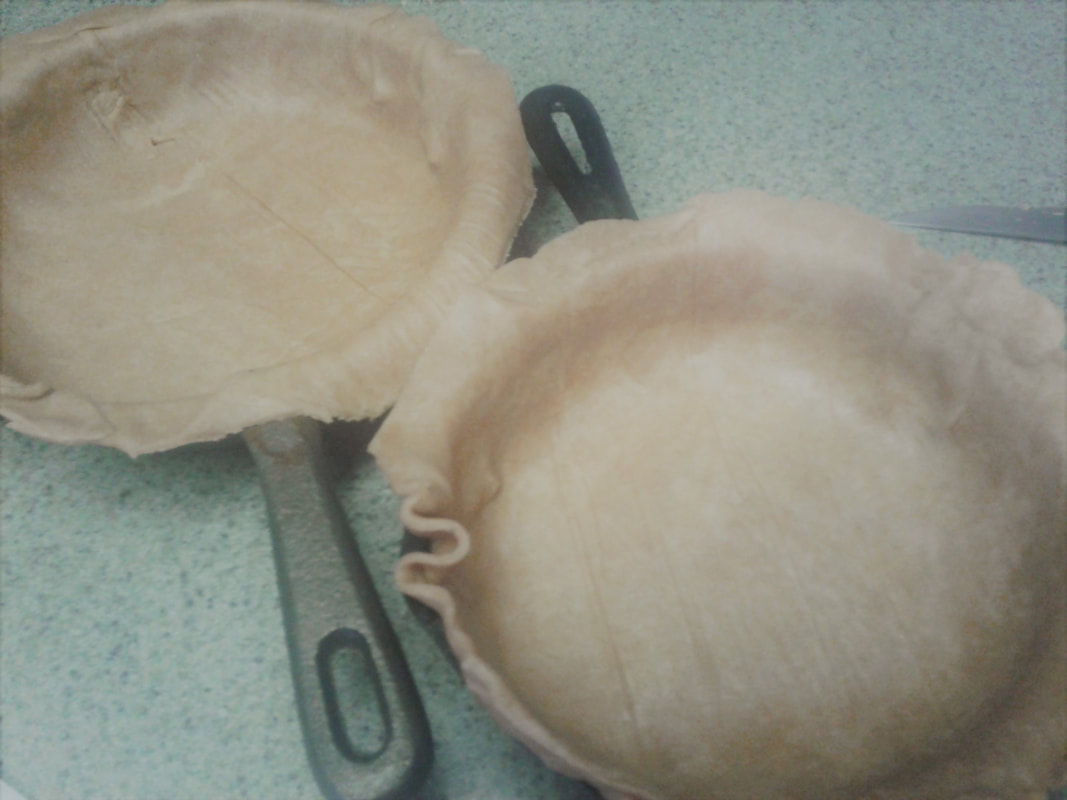
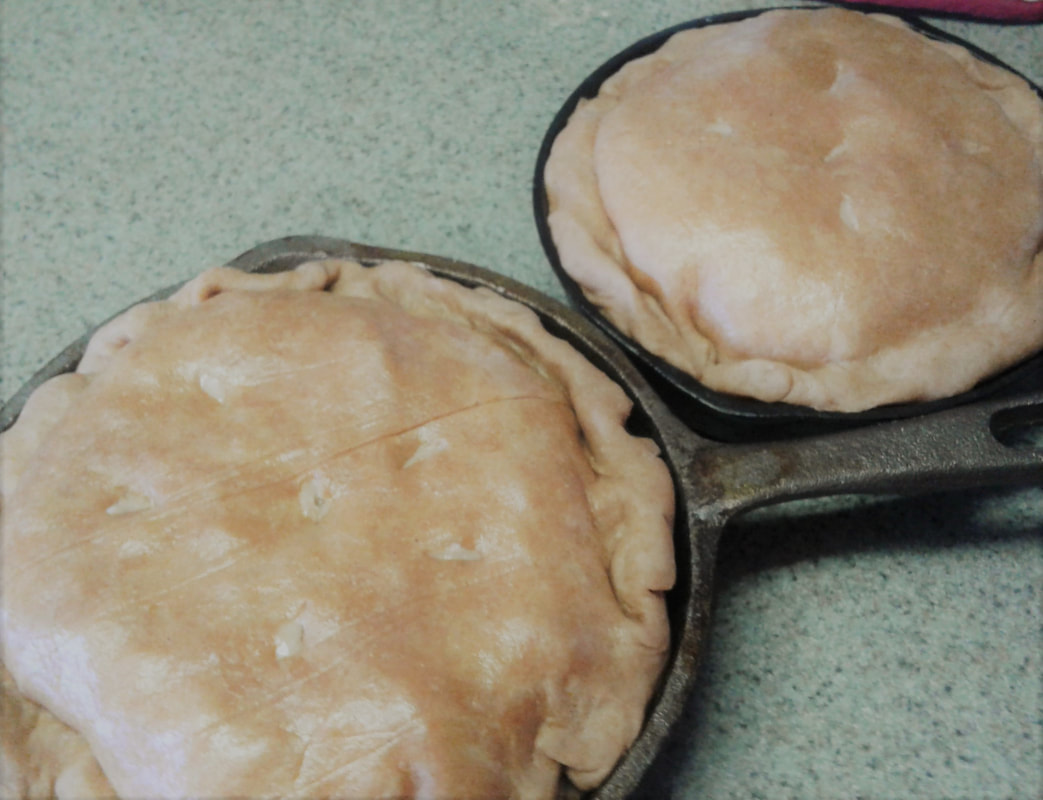
Cranberry Walnut Muffin Noshing time!!! If you hit any search engine and ask that question, you may find different explanations or recipes for what Garbage Soup is. In our house, it is the name given to what is left after you simmer a pot of vegetable scraps all day long with a handful or two of herbs. It is actually a simple product to make and then reserve or preserve for use later in the kitchen. Especially if you save your vegetable scraps in the freezer over a period of time. This is what we do for a month or two, and sometimes we will even throw in some chicken bones for a bone broth. It is so simple to do – we keep a gallon sized zipper storage bag in the freezer and then, whenever we cut up vegetables, any pieces of scrap that are not moldy or rotting get tossed into that bag in the freezer. We toss in literally every type of vegetable we can: eggplant, green beans, squash of any and every kind, corn, tomato, potato, carrot, onion, garlic, celery, pea pods, peppers, broccoli, cauliflower, and more. I have even tossed in some hot pepper scraps like jalapenos, too. This is particularly delicious if we have a cold or sore throat! It helps clear the head and heal our throats! When the bag is full, I will take a large soup pot, fill it with water, pour in the bag of vegetable scraps, bring the water to a good rolling boil, and reduce to simmer. This is the time I tend to throw in any herbs that I want to add. Oregano, basil, salt, pepper, cilantro, parsley, and even garlic powder (especially if there isn’t any garlic scrap in the bag). I like to start this whole pot in the morning so that it has plenty of time to simmer all day long. In the evening, I strain the vegetable chunks out and any bones if we have added them. One trick I tend to do is use the strainer for the pasta pot for this because it is very easy to just lift out the basket full of scraps and dump them! To do this, you simply pour your scraps from the bag right into the strainer and then very gently lower the strainer into your soup pot when you are starting in the morning. If you commonly compost your scraps, you CAN still do that when the broth is done simmering – there are some who recommend dumping it all, including animal bones, into the compost heap. We do not – bones can attract rodents, bears, and coyotes to the yard which we prefer to discourage (for OBVIOUS reasons!!) The broth is allowed to cool and then we pack it into containers for the freezer. I like to store it in 2-3 cup containers because that is often the amount of broth we need in any recipe we make. Then the containers are placed in the freezer until needed! Remember to label them with the date and contents so that you remember to rotate your freezer storage. Some people do pressure can various broths as well – for this, you should check with your local co-operative extension for the current recommendations on this topic. Checking with them will help ensure your family’s health and safety. Garbage soup is a wonderful treat if you are chilled in winter, maybe instead of an afternoon snack, or in place of a cup of tea or coffee. Also great for anyone feeling a bit under the weather. It is a wonderful comfort food and packed full of deliciousness with all that vegetable flavoring and herbs. Blessings and Shalom. Judith Garton For a video on how I made one big batch of Garbage Soup, visit our channel through the video below - and remember to subscribe and click notifications! For details or description of each photo, please click to reveal the caption. 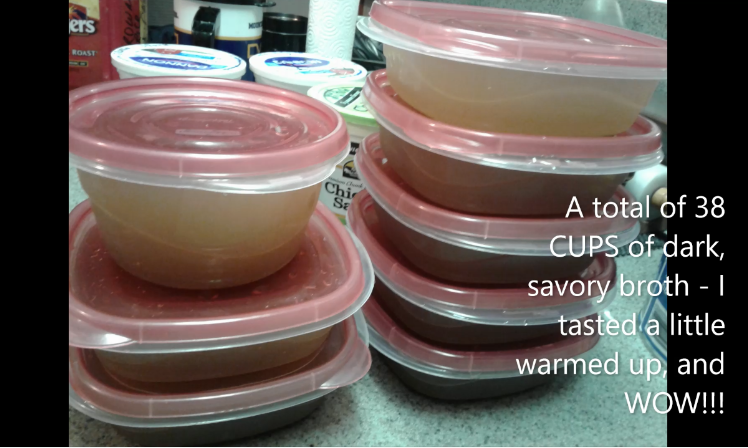  4-8 servings, depending on appetite and sides (Salad, fruit, etc) 1-batch double crust pie crust dough Filling: 1/3 Cup butter 1/2 diced onions 1/3 Cup Flour (I use Whole Wheat in all our cooking) 1/4 tsp Black Pepper Salt to taste, if desired 1 3/4 Cups Broth 2/3 Cup Milk (I have been known to use 2 1/4 cups of broth, plus enough powdered milk to make it creamy! Makes a richer filling) 1 1/2 Cups Chicken Chunks 1 Cup Corn 3/4 to 1 Cup Peas 1/4 Cup diced Carrots 3/4 Cup cut green beans 1/2 Cup diced Celery 1 Cup Potato Chunks, lightly cooked. NOTE: I prefer frozen vegetables, less squishy. I also take a short cut and use a bagged mix from the grocery store that has a balance of green beans, peas, carrots and corn. Sometimes I throw in a little extra corn. Then just add celery and diced potatoes. If desired, play around with your veggie and chicken amounts, depending on tastes. I prefer to have MORE veggies and meat, so that the filling doesn't run out when cut! Directions: Preheat oven to 425 degrees Fahrenheit. In a large saucepan, melt the butter, then add the onions and cook till onions are “clear.” Remove from heat. Add 1/3 Cup Flour and black pepper, stir to mix well. May seem dry, but try to mix in all the flour with the butter. Then add broth. Mix well. Replace pot on burner and cook on medium-high until mixture thickens like gravy. Remove from heat and add milk. Mix well. Then add vegetables and chicken. Stir until well combined. Separate dough into two pieces: 1 - a little over 1/2 of the pie crust mixture, and a slightly smaller piece for the top crust. Roll out the larger piece, then place into baking dish. Ensure there is enough of an overlap on the top edge to be able to close your top when placed on pie. Roll out the top crust to the proper size for your baking dish. Pour filling into prepared crust, then carefully place top crust on top of pie. With damp fingers, seal edges well to prevent dripping into oven as it bakes. Poke holes in top crust to release steam while cooking. Place in a 425 oven and bake for 30-45 minutes, until crust is golden-brown and filling is hot and bubbly. Remove from oven and let sit for 10-12 minutes to allow filling to set before serving. NOTE: Experience shows it is best to place a drip pan below the pie as it bakes, just in case filling oozes out, and to hopefully prevent smoking up your kitchen! :-) Pie may ALSO be made in individual serving sizes!!! We have started doing it this way by using two smaller sized cast iron skillets - I deeply love the crispy bottom created by using the cast iron skillet! It also pops out easily onto a plate for easy serving.
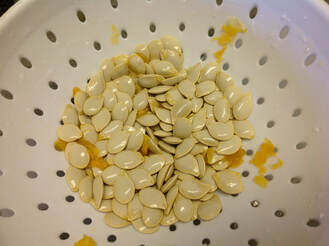
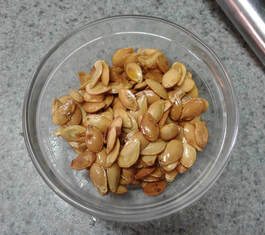
Are you looking for something to do with leftover squash seeds? Each year when I harvest the pumpkins and butternut, we end up with more than enough seeds to save, share, and trade with others.
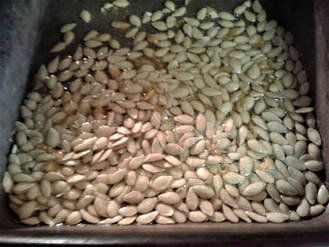
Another idea to do with those seeds is to make toasted seeds to snack on. They are simple and easy, as well as tasty. First, rinse the seeds well. Then strain them. I will remove all the large chunks of strings, but some of the thinner ones also are tasty when they are done toasting. I often leave a few of those behind. Once drained, allow them to air dry just a little, then drizzle with EVOO or melted butter. Just enough to lightly coat the seeds. I stress lightly because the batch I did in the photos had a bit too much oil on them. They WERE tasty, but very greasy! They wouldn't last long before the oils could go rancid. Carefully stir the oil throughout to fully coat the seeds. Then sprinkle with a little sea salt. Spread evenly on a cookie sheet that has a rim all the way around so the seeds don't slide off into the oven when you are place them in or removing them from the oven. Place them into a 300 degree F preheated oven, on the middle rack. Toast the seeds until crisp and lightly browned. This could take from 20-45 minutes depending on dampness of seeds. Be careful to stir them every 10-15 minutes to toast evenly. Allow to cool, and store in a cool dry place for up to 6 weeks. These seeds are NOT good snacking for children or those with an inability to chew fully. Best for adults only. Not all seeds are safe for consumption. We only use pumpkin and butternut seeds. Roasted vegetables are one of the easiest side dishes to make. They are simple enough to make for one, two, three or more people. It is one of the recipes I wish that I had known about back when I was trying to teach my mom how to cook for one after dad had died.
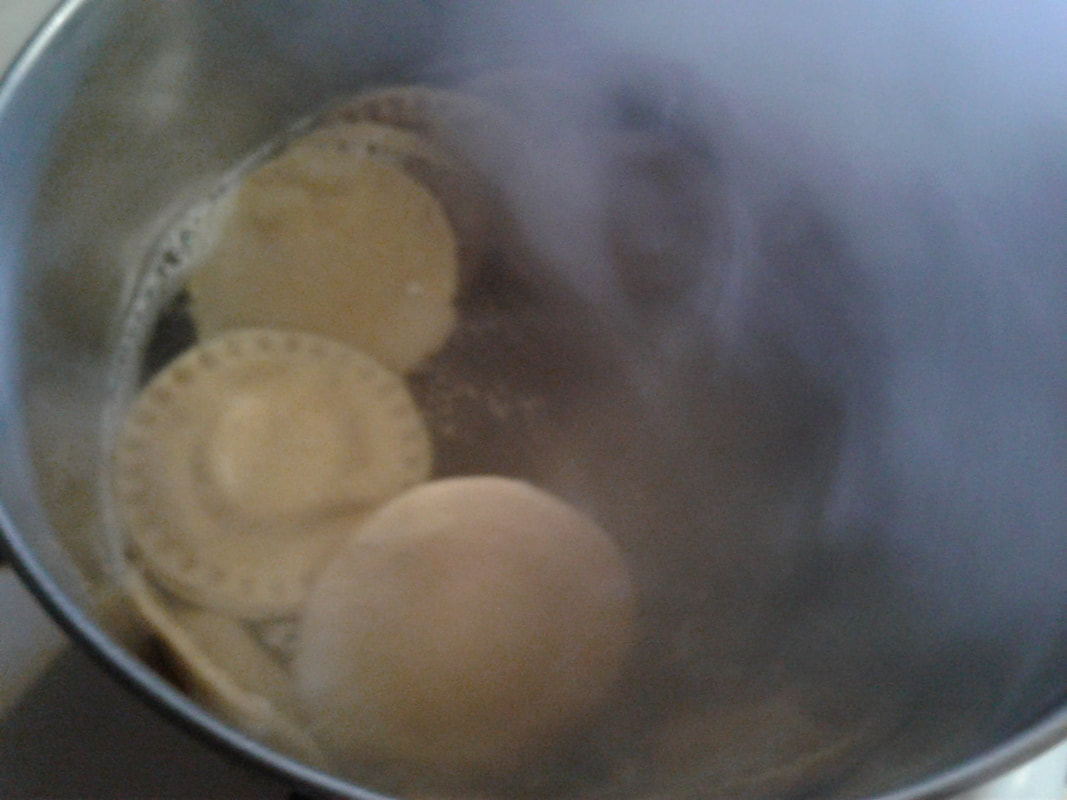
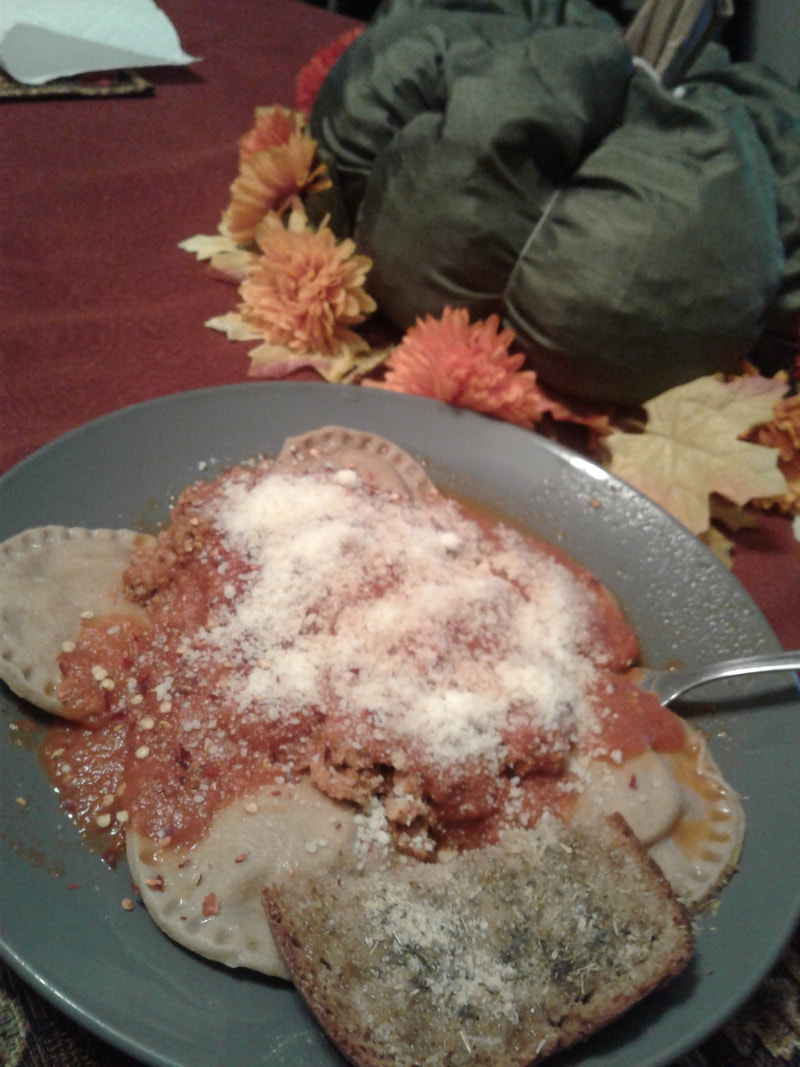
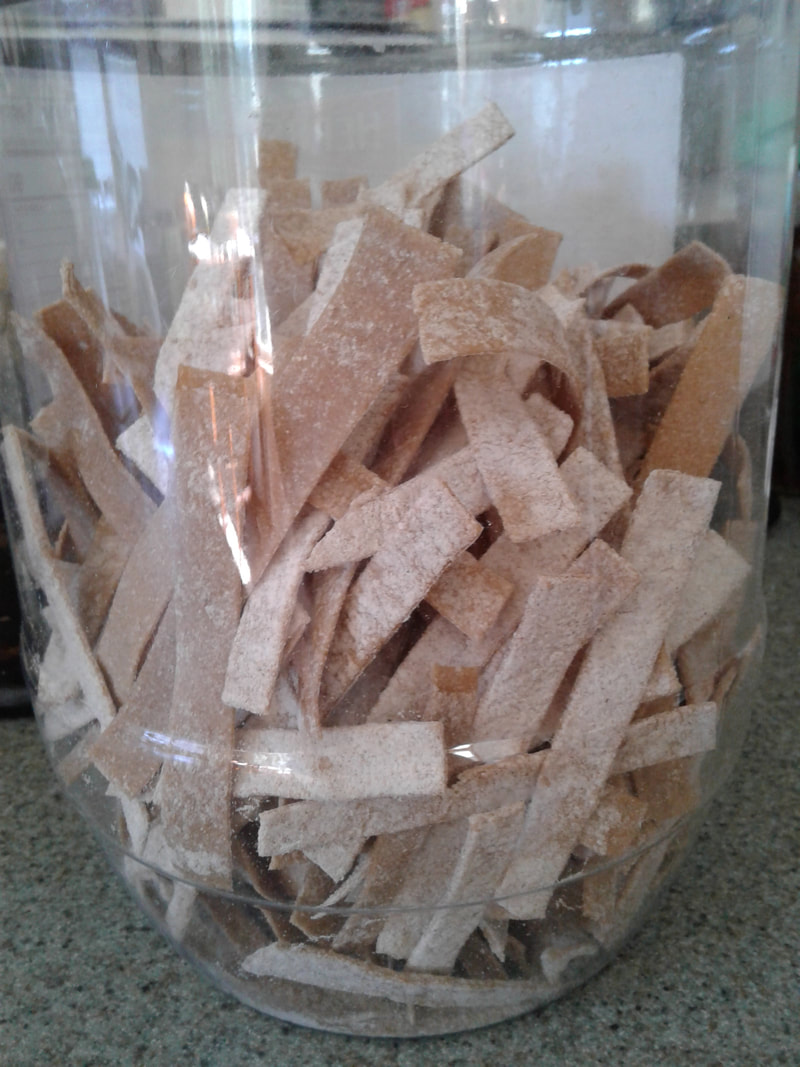
What you need is simple, too. Raw vegetables such as carrots, turnips, onion, asparagus, whole green beans, cherry tomatoes, pepper slices or chunks, and of course the traditional potato. These are available in every variety you can imagine from dark blue or purple, to red, and yellow potatoes. If you are a traditionalist a simple bag of regular potatoes will do. I find that carrots roast better when they are on the larger size, while all the others are much more flexible. However, I will mention here that asparagus is much better roasted when it is on the smaller size, plus asparagus and the green beans do not take as long as some of the root vegetables might. You will need your favorite oil - we prefer EVOO (extra virgin olive oil). However, melted butter does also impart a WONDERFUL flavor as well. But it does tend to scorch a bit at the higher temperatures. Salt, pepper, and herbs of every variety, including herb blends like Italian seasoning, Garam Masala, or even Cajun seasoning blends work wonderful. Next you will wash all your produce. Enough for a serving size for each person. For the two of us, I would use about 3-4 carrots per person, or 6-8 large carrots. I don't peel the vegetables, except for turnips and, of course, onions. Slice the carrots on the diagonal to make bite sized slices, about 1/4 inch thick. For other root vegetables, potatoes, turnips and onions, for example, Slice about 1/4 inch thick slices. If necessary with the turnips and potatoes, cut the slices into thirds or quarters, for bite sized pieces. Smaller potatoes are very nice to use for this because you can just cut them into slices. Toss the vegetable slices into a bowl deep enough to toss them with oil and herbs. Drizzle with oil of choice, just enough to coat the veggies. Gently toss them to coat evenly. Then sprinkle with spices and herbs. I like to choose an herbal mix that matches our meal for the evening. Having a curry? Use a Garam masala spice or Harissa mix. Seafood? Make some "crab" veggies by tossing with some Old Bay Seasoning. These ARE Kosher, too, because there is NO seafood in the Old Bay. Tonight we are having Cajun Stuffed Chicken thighs and some cajun rice. If I were making roasted veggies tonight I would either use the Cajun spice mix, OR for a little variety, simply some garlic and paprika. Use your imagination - especially if you are planning to use these roasted vegetables as a nice afternoon snack. Next, evenly spread the veggie slices onto a baking sheet with a low side. You don't want the oils to drip down into your oven and cause the smoke alarms to go off!! Place the baking sheet into a 400 to 425 degree PREHEATED oven (I prefer 425), on either the top rack or the second one down. This may depend on how close your heating elements are to the top rack setting. Bake for 15-25 minutes, until cooked through and lightly browned. Serve immediately. And Enjoy! Roasted Vegetables Fresh vegetables of choice (carrots, turnips, onion, asparagus, whole green beans, cherry tomatoes, pepper slices or chunks, and of course the traditional potato) Herbs and Spices Oil of choice (EVOO, Avocado oil, etc.) Wash produce. Cut into servings size pieces (asparagus into spears, green beans trimmed ends, peppers into long-wise slices or chunks, 1/4 inch slices of root veggies). Place pieces into bowl large enough to toss. Drizzle with oil, toss. Sprinkle with herbs, salt and pepper and toss. Spread onto baking sheet, and bake 400-425 for 15-25 minutes, until cooked and lightly browned. Serve hot! Enjoy. Homemade Pasta Dough 2 Cups whole wheat flour 2 Eggs, room temperature Pinch of salt Enough water to make a soft dough, not too sticky. Place flour in a bowl and make a dimple in the middle of the flour. With a fork, mix the eggs well in the dimple, drawing a little flour in at a time. As the flour starts to get mixed in, add a little water at a time until the flour is all mixed in, and the dough is soft, but not sticky. CAUTION: When using whole wheat flour to make whole wheat pasta, be careful to only mix until ingredients are mixed together. Do not knead! This releases too much gluten and may make the pasta tougher. This dough can be used for making all types of pasta. “Amish Pot Pie Noodles” are great from this simple dough as are homemade egg noodles for soups. We also use this dough for making homemade ravioli. It may be hand rolled with a rolling pin or through a pasta machine. I prefer a pasta machine as it gets the dough much thinner and smoother than I have ever been able to accomplish with a rolling pin! NOTE: For homemade ravioli you will need a batch of Farm Cheese, too. It makes the filling wonderful! We mix ours with steamd and well-drained spinach, a pinch of sea salt and pressed garlic to taste. We add a lot because we LOVE garlic! http://www.biblicalprepping.com/survival-recipes-blog/making-farm-cheese
This Banana Bread recipe has evolved over the years from loaf after loaf coming out a bit flat or too heavy. It is easily made with regular flour or with a cup-for-cup gluten-free flour. Hope you enjoy this tasty treat as much as we do! Banana Nut Bread - Regular or Gluten-free 2/3 Cup sugar 1/3 Cup oil (We use EVOO) 2 Large eggs 2 Tbsp milk 1 Cup mashed, very ripe bananas (about 5 regular sized, or 4 large) 1 3/4 Cups flour (may use equal portions of cup-for-cup gluten free) 2 tsp. baking powder 1/2 tsp salt 1/4 Cup chopped nuts In mixer bowl, beat sugar and oil with electric mixer or wire whisk, mix until light and fluffy. Add eggs and milk, then mix well. In a separate bowl, stir together dry ingredients. To mixer bowl add the flour mixture and mashed bananas intermittently, mix until combined. With spatula, fold in chopped nuts. Turn batter into prepared pan - lightly greased and, if desired, lined with parchment paper. Bake at 350 F degree oven for 50-60 minutes, or until toothpick inserted into the center comes out clean. Remove from oven, then cool 15 minutes in the pan. Turn out onto wire rack to cool completely. Cover and store. NOTE: I find that it is much easier to cool the Gluten-free version on a plate, cutting board or other flat serving surface. It has broken easily when cooled on a wire rack.
That is what my husband said after he ate a piece of the pie I made from our fresh pumpkin. When someone pays you a compliment like that you just have to write down the recipe and make it your new favorite! This is how it all started:
For our fall feast this year, I found myself running short on eggs while at the same time wanting a delicious pumpkin pie for dessert. What to do? Experiment as usual! I figured that I have used chia seeds for so many other recipes as an egg substitute, why not try it for pumpkin pie? Worst case scenario, we would be eating the pie as custard with a spoon instead of as pie with a fork. Either way, it would be a win. Using my traditional recipe, I decided my best idea might be to try something similar to a pumpkin chia seed pudding, baked in a pie shell. I whipped up my whole wheat pie crust, shaped it into my 11-inch stone casserole dish, and set to mixing up the filling. Ingredients Pastry for pie crust. (Use your favorite recipe) NOTE: This recipe makes a nice, THICK 9-inch pie, but I used an 11-inch round stone casserole dish. If making a larger pie as I did, it tends to take a pie crust recipe that is one and a half times normal. In a small bowl, mix well: 3 Tbsp ground Chia seeds 9 Tbsp water Set aside for at least 15 minutes. Place the following ingredients into a blender jar (if jar is large enough!!! Some are not), or large bowl, 4 Cups cooked pumpkin 12 ounces whole Milk 1 Cup Sugar 4-5 tsp Pumpkin Pie Spice Mix together well, then add the chia seed mixture. Mix again thoroughly and pour into your prepared pie shell in the pie plate. Be careful not to overfill. If you have leftover liquid, you can pour it into a small baking dish and bake as a crust free pie, if desired. May also be frozen for later use. Keeps frozen up to three months. Place pie in a preheated 425 oven and bake for 15 minutes. Lower the temperature to 350 and bake for another hour. You may need to cover the pie crust edges with foil so that they do not over-brown of burn in baking. Pie may not be set as firm after baking as a regular pumpkin pie. In fact, the knife test normally used will not work with this pie. Bake until the filling is no longer runny, and is almost set. This may take a total baking time of 1 hour and 30 minutes. Allow to cool enough to place in the refirgerator. Refrigerate 6-8 hours or overnight. In our experience, this pie was the richest and creamiest pumpkin pie we have ever had. It was softer than normal, but after the 8 hours in the refrigerator, it was set enough to serve. The key was baking it until all the liquid was gone. It had a pleasant velvety texture, similar to a cheese cake. Another variation I sometimes make with a pumpkin pie recipe is Maple Pumpkin PIe. It's simple as pie, made by adding 1-2 tsp of 100% genuine maple flavoring for a wonderful fall treat. Pour this into the blender as those ingredients are mixing. Bake as directed. One of Jim's favorite types of rolls is the restaurant style Garlic Knots. We have learned to make them ourselves, now, at home with the sourdough bread recipe. This one is a tasty one to create to go with soups, Italian dishes, or just with eggs in the morning.
Garlic knots are simple - take 1/2 batch of the Sourdough Bread Recipe. Cut this into 12 equal pieces. Roll each piece into a rope, about 6 inches long. Tie it in a simple knot. Place each in a greased baking pan large enough to fit all 12 rolls while they rise. Cover with a warm, damp cloth and allow to rise 1-4 hours, until doubled in size. I find that the pan needs to be sized just right - too small and they mold together into one blob, too large and each roll rises too wide, and not upward enough. There should be about 1/2 inch of space between each roll before rising so that they force each other upward as they rise. Once risen, bake for 18+/- Minutes in a preheated 375 F oven. Immediately after removing from the oven, brush with olive oil that has a large number of crushed garlic cloves added to it. I like to crush the garlic into the oil before baking the rolls as it gives the oil a good chance to absorb the natural oils from the garlic. Serve hot. NOTE: If you really LOVE garlic as much as we do, you can also add crushed garlic directly into the dough to up the garlic flavors! YUM!!! You can also use the full batch of dough and make enough to share, freeze or eat the next day. Everyone seems to remember those sticky buns Gramma used to make or that cinnamon swirl bread the diner used to serve. Why not bake up some old memories with some delicious sourdough bread dough and introduce your children to a time honored tradition? Here are my two favorite recipes for making a batch of either. The nice thing about these taste treats is that they start out pretty much the same. It just depends on how it rolls! CINNAMON ROLLS Yield: 18-24 Sweet rolls Prepared baking pan. 13X9X2 May also use two 9“ square pans or two 9 inch pie plates. I prefer pie plates because all my serving dishes are round and it is easier to tip out the completed rolls after baking. Rolls: 1 batch of Whole Wheat Sourdough Bread dough 1 Tbsp cinnamon mixed with 3 Tbsp sugar (Sometimes we use a double batch of this for two loaves!) Topping: In a small saucepan melt 1/2 Cup Butter, remove from heat and add 1 Cup Packed brown sugar, 1 cup chopped nuts (Pecans or Walnuts), mix well Split between 2-9 inch square pans, 2-9 inch pie plates, or pour over the bottom of a 13X9X2 pan. Taking freshly kneaded dough, cut it into two pieces. Set one aside. Taking the first batch, roll it out onto a floured counter into a large rectangle. Dampen the dough with a pastry brush and a thin brushing of warm water. Sprinkle with 1/2 the cinnamon sugar mix. starting on the LONG SIDE, roll the dough up evenly into a swirled roll of dough. Slice into 9-12 equal slices. Place each slice into the prepared pan. Repeat with the second half of the dough. Cover and let rise until doubled, approx 2-4 hours. When risen, preheat oven to 375 degrees F, place rolls into preheated oven and bake for 20-30 minutes. Remove from oven and allow to sit for 5 minutes. BEING CAREFUL NOT TO FLING HOT STICKY GOO ONTO YOURSELF, place a serving dish over the pan and gently flip the pan over onto the serving dish. Allow the rolls to gently fall from the pan onto the dish, and the topping to drizzle over the hot rolls. Allow to cool for a few minutes more, serve warm. Or cool, for a few hours and serve room temperature. Either way - ENJOY!!! NOTE: This recipe is great made with raisins in the center, too. Or even sprinkled with some pecans or walnuts on the inside and also in the caramel topping. Some people enjoy adding powdered sugar icing on top, but we are not that into such high sugary sweets, so we only use the caramel topping. CINNAMON SWIRL BREAD Grease two bread pans. Set aside Taking freshly kneaded dough, cut it into two pieces. Set one aside. Taking the first batch, roll it out onto a floured counter into a large rectangle. Dampen the dough with a pastry brush and a thin brushing of warm water. Sprinkle with 1/2 the cinnamon sugar mix. Starting From the SHORT SIDE, roll up the dough into a loaf, pinch the two ends shut so that the sugary center does not ooze out during baking and burn to the pan. Place the loaf, seam side down, into a prepared baking pan that has been greased. Allow to rise until doubled, 4-8 hours, then bake for 45 minutes in a preheated 375 degree F oven. Remove from oven and allow to cool for 10 minutes. Loosen the sides of the bread from the pan, flip onto a serving dish. Allow to cool fully and slice. Serve with or without powder sugar icing. NOTE: I like to brush ours with olive oil right after removing from the oven and I place something over the top of loaf to keep the steam in. It seems to make for a more moist loaf for us. You may or may not need to do this. This recipe uses our Whole Wheat Sourdough dough and provides one more addition to the family menu planning to utilize a basic recipe, from basic ingredients. We find that for our tastes, we tend to like to use about 2/3 - 3/4 of a batch of dough for pizza crust. This gives a nice, fluffy thick crust pizza. Mix your dough according to the main recipe, found here. Before shaping dough into your desired pizza crust, grease one or two pizza pans, depending on desired thickness of crust. Whether making pizza crust or the focaccia, you can take a few minutes here to knead in some garlic and herbs, OR if you were on top of things, you already did that when you first made your batch of dough. It IS much easier to add those ingredients earlier with one of the additions of flour before kneading takes place. Roll out dough to the appropriate size ON THE PAN. It makes it easier than trying to transfer! For Pizza: Brush the crust with olive oil, if desired, cover and allow to rise until doubled. 2-6 hours depending on room temperature. Before baking, brush with olive oil and garlic. Bake in the preheated oven for 10 minutes. Remove crust from oven but do not turn off the oven. Spread the crust with pizza sauce, sprinkle with toppings, replace in the hot oven and continue to bake for approx 10-15 more minutes until baked through and toppings are hot, cheese melted. Remove from the oven and allow to sit for 5 minutes before slicing. Slice and serve! For Focaccia: Once the dough is rolled onto the pan(s), using your fingertips, poke down into the dough at intervals to make “dimples” to allow the dough to cook more evenly throughout. Cover and allow to rise 1-4 hours. You DON’T want it to rise until fully doubled or it may puff up, or be too thick. When risen, brush generously with olive oil, sprinkle with herbs and parmesan or romano cheeses, bake in 425 oven for approx 15 minutes. Remove from oven, allow to rest 5 minutes, slice and serve! Focaccia goes great with soups, pasta dishes, or just as an appetizer served with some marinara or other dipping sauces on the side We often get recipe requests for normal everyday items that you used to buy at the store, but that people might like to learn to make at home. If you have perused our recipes already, you can see we have one recipe for prepper mayonnaise posted that uses freeze dried eggs. It is my all time favorite mayo recipe as it is the closest to how I remember mayonnaise from when I was a child. The store bought jars these days just are not what they used to be. With the various changes to increase shelf life and to remove certain fats from the American diet, it just doesn’t taste the same. The other problem people mention are the strange thickeners that are now added that weren't there 30 years ago.
There are times, though, when families need an egg free solution, for whatever reason. Whether health issues or you ran out of powdered eggs, having an alternative may be something you would like to keep tucked away. We don't have health issues, so my dilemma was running out of powdered eggs and wanting to whip up a batch to go with sandwiches for the Sabbath. I perused the internet and could not find a recipe that used the only ingredients I happened to have on hand. Suddenly I found myself in a pickle, with no condiments! Through reading and studying various recipes, I was able to piece together a basic idea of the process for making a batch of vegan mayonnaise. Then I went through the pantry to piece together what I might have to experiment with. Off I went to create. I had just a few goals in mind: Must taste yummy, no weird textures, the consistency of mayo, use as few ingredients as possible, and ALL from my food storage! No grocery runs allowed. What you are seeing here is a recipe tried and true many times, plus one failure! Not to worry, though. I also provide at least one solution that may help fix yours if it turns out too runny. As time goes on, I will edit and add to this recipe as I find ways to make it better. I also welcome your input! Have you tried a vegan recipe? Any suggestions on how to make it taste the way your family enjoys? Send us a message. Homemade No-Egg Mayonnaise - Vegan 3 Tbsp water 1 Tbsp finely ground flax seed 1 to 1 1/4 Cups oil (I have used olive oil alone or in combination with other oils such as avocado or sunflower) 1 1/2 Tbsp Vinegar Salt, garlic powder, onion powder, paprika to taste (Start with a dash of each) pinch of sugar Heat the water on the stove or in the microwave. Remove from heat and mix flax seed in. Allow to sit until reaches room temperature. Place in food processor or blender with 1 Tbsp oil, personally I prefer my stick blender. Whirl until blended well, and thick. Add 1 tbsp of olive oil, ONLY ADD ONE NO MATTER HOW TEMPTED, and whirl until mixed well, and mayonnaise consistency. Add another 1 tbsp of oil and whirl until mixed. Continue to mix oil in ONLY 1 Tbsp at a time until 1 Cup is mixed in. If you would like a little softer consistency add the additional 1/4 cup of oil 1 Tbsp at a time. NOTE: Only mix in 1 Tbsp at a time. Any more tends to cause the recipe to fail!! Experience shows that failure can happen at any time during the mixing process if you add more than one Tbsp., OR if you don't whirl it enough. Once it is mixed well and is the mayonnaise consistency, add the vinegar, salt, garlic powder, onion powder, and paprika to taste. Add a pinch of sugar and make sure it is all well mixed for about 30 to 45 seconds. Chill and serve. I have used this recipe to make chicken and egg salads and as a sandwich condiment. When mixed well, the flax seed is not even noticeable. NOTES: -- I rushed this recipe one day, and it failed horribly. It was just a runny, oily mess. I hated wasting what I had made, and thought about mixing up a soft dip with it. It just didn’t seem the right consistency for that either. While trying to figure out what to do, I decided to try to redo it with a new batch of flax and water to see if it would work. I re-mixed a new portion of 3 Tbsp boiled water and 1 Tbsp ground flax and let it cool. When cool, I whirled it with the stick blender again and slowly added the first batch of runny mayo to the new flax mixture, one tbsp at a time, mixing very well with the stick blender after each addition. I was surprised to see that it worked! I had mayonnaise! It didn’t seem any different than a normal recipe, which was a great relief. After this fix, I was able to use the mayonnaise as usual. Nice to know that it can be fixed in a pinch. -- I have not tried doubling the recipe as yet. This would make an awful lot for the two of us, so we are waiting until we have to make and take a dish somewhere or have company where I need the added amount. Because of this we are unsure whether just doubling would work. I have learned though, that any changes to a mayonnaise recipe CAN make it fail horribly. Something to consider before attempting a double batch. Personally, if I need a larger amount, I may make two different batches. -- Adding the additional spices will make it taste more like store bought mayonnaise. Over the years I have noticed that different brands may be a little stronger on one spice while lighter on another. You can adjust these all to taste. I have also added a pinch of mustard powder or a squirt of brown mustard after it is set properly. This makes the flavor even more like what I prefer. Experiment with these and enjoy! BAGELS
Yield: Approx. 8-18 bagels, depending on size Preheat oven to 425 degrees F. Ingredients: 1 batch of our Whole Wheat Sourdough Bread dough Kosher salt or other toppings Bagels are made similar to the pretzels and will need to be par-boiled before baking. Taking your dough, divide into equal pieces. From one full batch of dough I generally get 12-24 bagels, depending on size. Take each piece, roll between the palms of your hands to get a nice ball shape. Take the ball, press one thumb into the center, going all the way through to form your hole. Stretch the bagel out a bit making the hole a decent size to allow for rising, while still leaving a hole. Place each bagel on a greased cookie sheet that has been sprinkled with corn meal. Cover with a damp, warm cloth and allow to rise until doubled. About 1-2 hours, more if the room is chilly. After rising is complete, bring a pot of water to boil on the stove. Place 3-4 bagels into the water and allow to pre-cook on one side for approx. 60 seconds. Flip the bagel for another 60 seconds. Remove with a strainer or slotted spoon to a baking rack. Allow to drip a minute or two while you place the next ones into the water. While the next round of bagels boils, take the drained bagels and move them to the baking sheet. Sprinkle with toppings, if desired. We like kosher salt. Do this with each small batch as they are removed and drained, until all bagels have been pre-cooked. Turn off the pot. Place the baking sheet of bagels into the preheated oven and bake for 20-25 minutes. Serve hot, or allow to cool. Be careful when slicing! This recipe is one of our favorites to make with the Traditional Whole Wheat Sourdough batch. It is quick and easy for the 'kitchen staff', while also an enjoyable taste treat for everyone!
Serve with your favorite pretzel toppings for snacks, or as a fun addition to the kids usual soup recipe. They also pack nicely in lunch boxes with some fresh fruits, veggies and dip for a nice "rounded" meal. Use your imagination and spice them up in different ways, too. Add fresh pressed garlic or finely diced onions, or one of our favorites: spice them up with some Cajun Spices mixed with just a touch of salt before baking. Fresh or dried herbs added before kneading make for a taste sensation, too. Yield: Approx. 24-60 pretzel nibs depending on size. Yield: Approx. 12-30 soft pretzels depending on size. 1/2 to 1 full Batch of our Whole Wheat Sourdough Bread (depending on desired yield) Kosher Salt for topping Grease a cookie sheet, and sprinkle with corn meal. Taking your sourdough fully mixed and before rising, shape into the pretzel shape you prefer. We like to do Pretzel Nibs, so we make a rope and cut them to size. You may prefer the traditional pretzel shape. As you shape each pretzel, place them on the greased and sprinkled cookie sheet. Once finished shaping your pretzels, cover with a damp warm towel or damp linen napkin, and allow to rise 1-3 hours. Once risen, preheat over to 425 degrees. While oven is preheating, in a deep frying pan, (ours is almost 3 inches deep) place enough water to be almost 3/4 full. Add 1 tsp salt. Bring water to a boil. Gently place pretzels into the boiling water and allow NIBS to pre-cook for 45-60 seconds. If making regular soft pretzels, allow them to boil for approx 30 seconds then flip and allow another 30 seconds. With a strainer or slotted spoon, remove to a cooling rack to drain excess water from the pretzels. Once drained, approx. 1 minute, move back to the cookie sheet. Top with kosher salt. Place completed pan into the preheated oven and bake. Pretzel nibs take approx 12-15 minutes, depending on size. Pretzel Shapes take approx 18-20 minutes. We don’t typically brush ours with beaten egg, but you can do this if you would like. Before sprinkling with kosher salt, take 1 egg mixed well with 2 Tbsp water, and brush over pretzels. Top with salt and bake as usual. Serve with cheese sauce, japenos, mustard, or any of your favorite soft pretzel toppings. Enjoy!!! Farm Cheese
It seems like I say this a lot, "My favorite food storage recipe. . . ." What I really mean to say is that feeding your family is only as far away as your recipe book or your imagination! It is comforting to know that you can create food for your family from what you have laying around in the kitchen. Another of my favorite recipes is for what I have always been taught to call “Farm Cheese." It is very simple, and yet so very versatile. It starts with simple ingredients of milk and vinegar, and only takes a little bit of your time. You will also need a heavy bottom, non-aluminum pot and a candy thermometer. A very fine mesh strainer or cheese cloth. An old, clean linen napkin also works very well. The rest is very simple. Farm Cheese 8 Cups Milk - whole milk preferred, but any will work. Even 8 cups of mixed up powdered milk 1/4 to 1/2 Cup Vinegar Place the 8 Cups of Milk in a heavy bottom pot and heat on medium heat until the milk reaches 180 degrees F. Watch the milk carefully during heating so that it does not burn to the bottom. Turn off the heat and add your vinegar. Stir gently, then allow to sit until milk and whey separate. Allow to sit for 10 minutes or so. Strain through the strainer or cloth, saving the whey liquid to use in other recipes. If you want the cheese to be softer, don’t press it and don’t let it sit and drain. For a drier cheese, allow it to strain for additional time, checking occasionally to check consistency. Use immediately or store in the refrigerator for up to 5 days. NOTES: You can vary the softness and hardness of this cheese by changing up the type or amount of vinegar. In my experience, rice vinegar seems to make a softer cheese, while white vinegar makes a very hard cheese. Mine was more crumbly with white vinegar. This made it good for ravioli and sprinkling in quiche, but not so great in lasagna. It was horrid as a pizza topping. I find that Farm Cheese never melts like mozzarella cheese does on pizza, but if made softer, it can be similar to ricotta on the pizza, and goes great in other pasta dishes like lasagna or baked ziti. One very yummy vinegar to use is the leftover vinegar brine from a jar of jalepenos or banana peppers. We have used this and it is wonderful. It tends to make a much softer cheese with a nice pickled-pepper flavor. It goes great on top of Southwestern Quinoa bowls and even sprinkled on top of a taco salad. Experiment with red wine vinegar and others to see what you enjoy. Make sure to write down how much vinegar you use and your results. This will help you develop favorite recipes to use with your meals. |
Prepping Expert
AuthorJudith has over 30 years experience in food storage, herbs, essential oils, and prepping. She was a captain in the USAF-AUX, FEMA trained, Community Emergency Response Team member and NRA marksmanship award recipient. She shares her experiences with her readers offering tips and recipes. Disclosure
The information shared is our personal opinion and should NEVER be considered a substitute for professional medical, nutritional, or other expert advice. Information contained is not for the purposes of diagnosing, or treating any disease or medical condition. Any endorsement of products should not be considered an un-biased review since we are paid and compensated when you purchase products from this site.
Archives
March 2024
Categories
All
|
|||||||||||||||||||||||||||||||


 RSS Feed