|
Since many of our recipes to this point have been Gluten-free, I thought it was time to start uploading all our Gluten-FULL recipes as well. What better recipe to start with than a basic recipe that has an abundance of potential: My Traditional Whole Wheat Sourdough Bread recipe. This recipe is one I have used for years and uses only the basic storage ingredients. The nice thing about this recipe, too, is that if you are running low on salt or sugar, even oil, you can eliminate those and still come up with a halfway decent loaf of bread. I will say that the touch of sugar and salt do give it an added flavor, and the oil just makes the dough generally softer. Yet it can be made with just the starter, water, and added flour. This is a great recipe to use for making so many other goodies including soft pretzels, cinnamon rolls, sticky buns, or dinner rolls. The possibilities are only limited by your imagination. In fact, as I type this blog and tie up the loose ends on the recipe, a batch of Garlic Knots and loaf of Challah Bread for Sabbath are rising on the stove for nashing on during meals this weekend. What will YOU use it for? Blessings, Judith Traditional Whole Wheat Sourdough Bread Yield: 2 nice loaves or 2 batches of rolls 1 - 1 1/2 Cups sourdough starter 1 3/4 cup water 1 tsp salt 3 Tbsp sugar 2 Tbsp oil (I prefer Olive Oil) 6-8 Cups of Whole Wheat Flour Mix together the starter, water, salt, sugar, oil, and 2 Cups of the whole wheat flour. Mix well with a spatula or wooden spoon. Add more flour as needed and mix well. Continue adding flour until it can no longer be stirred in with your spoon or spatula. Sprinkle flour out onto the counter top where you will be kneading the dough. Pour the dough onto the floured counter, sprinkle more flour on top of dough. Mix with hands and add more flour as needed to make a soft, but not too sticky dough. You should be able to easily knead the dough without it sticking too much to your hands - this should not take more than 2-4 minutes. Keep extra flour close by as it may be needed to keep the dough from sticking to your kneading surface. Set your timer for 10 minutes and knead the dough for a full 10 minutes for the best consistency. This is a great workout for your arms! Yes, ten minutes really is needed to fully release the gluten in your whole wheat dough! There are times I even feel the need to knead for an additional few minutes to ensure the elasticity of the dough. When the timer goes off, shape your dough into the final product. Allow to rise for the amount required in the recipe for your final product. This could take from 1-7 hours, depending on final product and temperature of the room - a cooler room will take longer), or until nicely doubled. Please alot for this amount of time before serving in your prep time - in other words, if you want bread for breakfast and it's chilly in the house, make sure to make it up the night before to allow for proper rising time before baking a fresh hot loaf for morning! Loaves: Cut the dough in half before rising. Shape into loaves and place into greased loaf pans. Allow to rise until double, usually about 4-7 hours for loaves. Bake in a preheated 375 F oven for 40-45 minutes. Brush with olive oil or butter, allow to cool slightly before removing from pan. Cut, serve or store. NOTE: I often split the batch and use 1/2 to make pretzel nibs and 1/2 to make rolls or a loaf of bread! Recipe Is Great For: Soft Pretzels! Bagels Cinnamon Rolls Cinnamon Swirl Bread Garlic Knots Cloverleaf Rolls Dinner Rolls Hamburger and Hotdog Buns Sandwich Rolls Pizza Crust Whatever your imagination can come up with!!! Possibilities are endless! I have not been one to use white flour in a very long time. In fact, I can't recall the last time I honestly bought a bag of it from the store. I think it was about 5 years ago to make some recipe that "required" it. The white flour sat around for so long, that it turned into a block of white concrete in the New Jersey humidity! I ended up making the recipe that "required" it with whole wheat flour and it must have turned out okay because no one seems to recall a failed flour recipe! Sourdough starter is one of those recipes that I will never make with white flour. Although some people may claim that you can't make the starter without it, white flour has not been around nearly as long as sourdough has. In fact, sourdough is closest to the biblical recipe as one can get these days. At least until someone discovers a recipe card in the mid-eastern deserts, that is! It has been shown repeatedly that whole grains tend to have a better and often higher natural yeast content than any pre-ground, processed flour. This has also been my personal experience over the years. The starter I have created from whole wheat, faro or einkorn has been much more active, and healthier than anything I attempted "back in the day" with white flour. Because of this evidence, I much prefer to create our starter from the simple, old fashioned freshly ground whole grains. Here is the recipe that I have gotten accustomed to using. It is very simple to create because it uses two ingredients that many people will have on hand in their food storage: Water and grains ground into flour. ENJOY!!!! Basic Whole Wheat Sourdough Starter NOTE: Use this recipe for our Traditional Whole Wheat Sourdough To begin your starter: 1 cup whole wheat flour 1/2 cup room temperature, filtered water (about 70 degrees) A glass jar, crock or bowl that can be easily, yet loosely covered. I like to use a glass quart size canning jar, a metal ring and a coffee filter. Place the flour and water into the jar and stir until very well combined, making sure that there is no dry flour left. Cover with the coffee filter and place the metal ring on. Let the mixture sit at room temperature (about 68-75 degrees is optimal) for 24 hours. Day 2: There may or may not be activity showing as yet - activity would be little bubbles in the mix or there appearing to be more mix than the day before. It may just look like what you started with on day one. Either way, take 1/2 of the mixture, set it aside in a bowl (See below for ideas to do with the discarded starter so that you do not waste). To the mix remaining in the jar, add 1/2 cup of room temperature, filtered water and 1 scant Cup of whole grain flour. Mix well, recover, and let mixture rest at room temperature for another 24 hours. Day 3: By day 3 you should be seeing some activity - bubbles, evidence of expanding dough. This is the day you will start feeding the dough 2 times per day. Try to feed it as evenly spaced apart as possible - 12 hours. For each feeding, stir down the dough, then take a generous 1/2 cup of starter and mix it with 1 scant cup of whole wheat flour with 1/2 cup room temperature, filtered water. Stir thoroughly, cover, and set aside for approx 12 hours. Remember to use your discarded starter for something, or set it aside to use later with additional discarded starter. Day 4: Repeat steps for Day 3. Day 5: Repeat steps for Day 3. By the end of Day 5, you may start to see that the starter is “doubling" You should also see lots of bubbles, and it should have a tangy, tart, or “sour” but pleasant aroma. If it is not this active as yet, you may need to continue the feeding process for days 6 and 7. (On rare occasions, or in colder weather, it may take a bit longer to develop fully) -- When the starter has reached the point described on Day 5, you will want to give it one final feeding before storing in the refrigerator. Feed as usual, mix well, let the starter rest for 4-8 hours to see a generous amount of bubbles breaking the surface of the starter. Now you may place it in the refrigerator for “permanent” storage. Make sure to feed your starter at least once per week with 1 Scant cup of whole wheat flour and 1/2 cup water, just as you have fed it during the process. By removing all but 1/2 cup from the permanent container, setting aside the removed portion to make a loaf of bread, rolls, or other recipe. To the remaining 1/2 cup add your water and flour. I like to leave it out on the counter for about an hour to rest before putting it back into the refrigerator, just to give it a little time to start its process. Now you can enjoy fresh sourdough bread products any time you would like to! NOTE: If I allow the starter to set in the fridge for a week, I often see a brown or dark liquid on top of the starter. This is a sign that your starter is HUNGRY! Feed it! It is best that you not allow it to get to that point, though, so that you do not starve it to the point of inactivity. This liquid is commonly known as "hooch" and is a naturally occurring alcohol. YES, this should be pour off and discarded before feeding your starter. I find that if "hooch" happens more often, it means I need to feed it more often. More troubleshooting tips can be found here: I am always a fan of waste-not-want-not, so I do not dispose of our sourdough starter when we are starting a new batch every spring. When the recipe says to discard it, I always discard it right into a bowl and make pretzels, bagels, or muffins from it. BUT my favorite is to make whole wheat crackers and have them with some cheese. Here's my favorite recipe for a tasty snack: Well, the weather says we may get snow this weekend around here - so it is time to dig into the soup pot and pull out some warm and wonderful ideas to get ready for the "snow storm". Our Creamy Tomato Soup recipe is great
Creamy Tomato Soup 6 Cups Water 1 Cup Tomato Powder 1 Cup Freeze Dried Diced tomatoes, rehydrated 1/4 cup chopped chives 1/2 tsp onion powder 1/2 tsp garlic powder 1 tsp dry basil 1 Tbsp sugar 4 Tbsp Butter powder 4 Tbsp Sour Cream powder Salt and pepper to taste Bring the 6 cups of water to boil in a large pot. Add the Tomato Powder and stir to mix well. A whisk works wonders to mix the tomato powder in. Reduce heat to medium low. Add the Diced tomatoes, chives, onion and garlic powders, basil and mix well. Whisk in the butter and sour cream powders until creamy. Reduce to low and allow flavors to blend for about 10-15 minutes. Serve hot. Better than canned soup!!! This one was created on a whim one night when my husband said he was in the mood for a good old fashioned meal. I asked what he was in the mood for and he said something with gravy. I had been wondering if you could make a meatloaf out of the freeze dried meats from Thrive, and there were several recipes I found, but they all used the Freeze dried ground meat. I figured I would do like I did when I made meatballs a few weeks ago, and I crushed the meat chunks until it was almost powdered. Then placed it a bowl with the water, and followed the rest of my standard meatloaf recipe. It worked great. It was too soft to place in a square baking dish because it would not hold is shape. It also wasn't quite enough meat to bake in a large loaf pan, so I used two small loaf pans instead. I oiled them up a little bit, placed the meat mix in and baked! I served it with a side of mashed potatoes and some gravy made with our Chicken Bullion, as well as a healthy helping of Freeze dried corn cooked to perfection. It was definitely that old fashioned home cooked meal Jim had been looking for. I had a little of one loaf left over for the next day and I sliced it up to fry with some eggs. It just needed to heat through and brown up a little bit. OH MY GOODNESS! It was wonderful. It even tasted just like a slice of sausage. My next goal is to make it ahead, refrigerate one and freeze one. Just to see how it works. Will keep you posted. Give it a try and see what your family thinks - I hope you enjoy it as much as we did! Food Storage Chicken Meatloaf 2-5 servings 1 1/2 Cup Freeze Dried Chicken Chunks, crushed as small as possible so that it resembles dried ground meat (this is great for that powder at the bottom of the can!) 1 Cup water 2/3 Cups Oats 1/4 Cup Milk 2 Eggs 1 tsp Rosemary 1/2 tsp Garlic powder, or more to taste 1/2 tsp Onion powder, or more to taste 1/2 tsp black Pepper, or more to taste Salt to taste May also add any other spices or herbs you usually like to add to your meatloaf. In a large bowl, place the crushed chicken and 1 Cup water. Mix well and allow to rehydrate fully, then add the rest of ingredients to the bowl. Mix all ingredients well. Separate evenly and place each half into one of two prepared small loaf pans, pack each loaf firmly. Bake in a 375 degree F preheated oven for 20-25 minutes until baked firm. Remove from oven and allow to sit for 5 minutes to cool. Remove from pans, slice and serve!! This is excellent served as you would any meatloaf with gravy, mashed potatoes, and a side of corn! Also wonderful with a ketchup sauce like the diners serve. Serves 2 to 4 people. Want some sausage for breakfast? Place it in the fridge over night and slice it in the morning. Fry it in a little oil and serve it with your eggs. How about making sausage and egg sandwiches? Or maybe some sausage and gravy from your meatloaf? This makes a great, versatile meat product for every day AND a great home cooked meal. This one is a nice recipe for a chilly afternoon with that same old fashioned flavor as Mom's stuffed peppers and the convenience of a quick serve casserole. It goes great with some fresh baked rolls or garlic bread.
Tuck this one away, too, in the fridge for the next day as a make ahead and bake later meal. I love to use these kinds of casseroles or meals for Sabbath meals because I don't have to cook that day, just reheat and serve! Stuffed Pepper Casserole Serves 4-6 1 - 1 1/2 Cups Freeze Dried Chicken Chunks plus 3/4 Cup water (May also use THRIVE Beef, rehydrated) 2 Tbsp EVOO (Extra virgin olive oil) 1/2 Cup Freeze Dried Onion, rehydrated, or diced yellow onion 3 Cloves garlic, finely chopped 1 Cup Freeze Dried Red and Green Peppers plus 1/4-1/2 Cup water 1/2 teaspoon salt 1/4 teaspoon pepper 1 can (14.5 oz) diced tomatoes, undrained 2 Cups water and 2 tsp Chicken Bouillon 1 can (8 oz) tomato sauce 1 tablespoon soy sauce (optional) 1 teaspoon Italian seasoning 1 cup uncooked Instant Brown Rice 1 Cup Freeze Dried Cheddar, rehydrated, or 1/2 Cup Freeze Dried Cheddar plus 1/2 Cup Freeze Dried Monterey Jack Directions In 4-quart saucepan, sautee onion and garlic over medium-high heat 5 to 7 minutes, then add the rehydrated meat. Stir until heated through. Add bell peppers, salt and pepper. Heat through. (If you used fresh meat you may need to drain off some of the fat at this point.) Reduce heat to medium; add tomatoes, broth, tomato sauce, soy sauce and Italian seasoning. Stir until well combined. Heat to boiling. Add uncooked rice. Return to boiling; reduce heat to low. Cover and simmer about 25 minutes or until rice is tender. Place in a baking dish, sprinkle with cheese, and either cool for cooking later in the day or next day, or place immediately in a 350 degree F oven and bake for approx. 15-20 minutes. Serve hot with rolls. I was in a mood the other night. I was tired of the same-old-same-old and was very much in the mood for something for dinner that was easy, but filled with vegetables. And it was chilly outside. Going through our food storage, I figured a nice pot of vegetable soup would fit the bill. I started re-hydrating things, and before I knew it, we had dinner!
It sort of created itself as I went along. My original intention was to have a more broth-like soup, but the idea struck me to turn the potatoes into the creamy broth. I hope that you enjoy this one as much as we did. It was hot, packed full of veggies, and very filling. I have added a few ideas for variations on the recipe, in case you would like to try something different. Maybe one day you can have it as made, but the second day, turn the leftovers into a cheesey soup for dinner! CREAMY VEGETABLE SOUP SERVINGS 4 1/3 Cup Freeze dried Celery 2 Cups Freeze Dried Potato Dices 6 Cups Water 2 Tbsp Vegetarian Chicken bullion Place water in a soup pot, add the bullion, mix well, and bring to a boil. Add the celery and potatoes, reduce heat and simmer a few minutes. Then turn heat off and allow to sit. 1/3 Cup Freeze Dried Onions plus 2 Tbsp water in a small bowl, set aside. 2 Tbsp olive oil Garlic powder to taste 2-16 oz bags of California Mix (Broccoli, Cauliflower and Carrots) 1/2-3/4 Cup water In large saucepan, heat olive oil. Add the rehydrated onions and Garlic powder to taste. Sautee until onions appear clear, then add frozen vegetables and water. Bring water to a boil. Steam the vegetables with the lid on to conserve liquid. When soft and tender, using a potato masher, mash the vegetables slightly so that they are in smaller, bite sized pieces for soup. Set aside. 4 Tbsp Freeze Dried Sour Cream 5 Tbsp Freeze Dried Milk Powder 1 1/2 Cups water Shake well in a jar and set aside. Return to the Potato mix in the soup pot and with your hand blender, blend this mix until smooth. You may leave some chunks if desired. Once ready, scrape the onion/vegetable mix into the soup pot, mix well, and turn the heat to medium/medium high, depending on your stove, to bring it to a light boil without scorching the potato broth. Reduce heat to simmer and allow the flavors to blend for a few minutes. Pour in the milk mixture and heat through. Serve hot with fresh bread, or crackers. NOTE: You may use Freeze Dried Carrots, Broccoli, Cauliflower, but I find for this recipe the frozen do work best. Fresh would be great, too. VARIETY: You can add meat to this if you are looking for a higher protein meal. Just remember to rehydrate it before adding to the soup, then heat through. Other vegetables may also be added, such as corn, peas, or peppers. Maybe even some turnips fresh from your garden. Start with this as a soup base, and use your imagination. Cheese? Rice? This recipe may seem involved, but is actually quick to prepare - just like most dishes we serve here at home now with our THRIVE Freeze dried foods. It's great served with some hot rolls, a big salad from your survival garden, OR with a batch of Gluten Free Naan breads.
Curried Chicken Over Brown Rice 1 Cup Instant Brown Rice plus 2 Cups water 1 tsp Chicken Bouillon Add bouillon to the water in a pot. Bring to a boil, add THRIVE Instant Brown Rice, bring to a boil, reduce heat and simmer, covered, for about 8 minutes. Turn off heat and allow rice to sit while you cook the Curry. 1/2 Cup Freeze Dried Chopped Onion plus 3 Tbsp water 1 1/2 Tbsp EVOO 2 1/2 tsp Curry Powder 1/4 tsp cayenne 1/2 tsp salt 1/4 tsp black pepper 1/2 Cup Plain Yogurt or Kefir (I have also been known to use 1/2 Cup Sour Cream powder pre-mixed with water in a pinch. It works just as well.) 5 Tbsp Powder Milk and 3/4 Cup water (or 3/4 Cup half and half ) 2 Cups Freeze Dried Diced Tomatoes and 1 Cup water (or1-14.5 Ounce can diced tomatoes) 1 1/2 Cup Freeze Dried Chopped Chicken plus 3/4 Cup water 1/4 Cup fresh cilantro, chopped Place EVOO in a skillet and heat on medium heat. Add the rehydrated FD Chopped onions. Saute lightly. Add the other spices and stir thoroughly. Remove from heat. Add yogurt and stir thoroughly, careful not to allow it to curdle. Gently add the milk and stir. Add the Diced tomatoes and chicken and heat through. Serve over the cooked rice and sprinkle with chopped fresh cilantro. Need Something to Serve with Soups or Curry? Gluten Free Naan Bread Makes a Great Addition10/23/2016
We love naan bread served with curried foods, and with just about any kind of stew like dish. It just makes such a wonderfully light bread addition to any meal. This recipe isn't quite like the ones made in restaurants, but it is a nice substitute. These can go with so many different dishes by just switching out your spices and herbs. Play with it - have fun! Create something wonderful and share your flavor taste treats with us in the comments.
Gluten Free Naan Bread 1 Tbsp ground Chia seeds +1 Tbsp water, place in a bowl & sit a minute 1 Cup Gluten Free Flour 1 Cup Organic Whole Milk (Or 1 Cup water & 4-5 Tbsp THRIVE Powdered Milk)Salt to taste Spices: Fresh or dried dill, curry powder, onion powder, garlic powder Mix together all ingredients. Batter should be somewhat runny so that when you place it on the griddle it flows evenly. Heat an electric griddle to 350 degrees F. Pour about 1/3 cup batter onto hot griddle, spread thin with a spatula, keeping in a circle shape as best as possible. Allow to cook first side until top is no longer wet and flowing, without burning bottom. Flip and cook the second side just until done. Remove from griddle and continue until all batter is used up. Stack naan breads in a circular pattern on the serving plate to keep them warm and to make ready for serving. Serve with Curried chicken, humus, baba ganoush, or any of your favorite fillings. Also delicious spiced with southwestern spices and served as a soft taco shell or wrap. You can also vary the gluten free in gredients a bit for a slightly different flavor. Here are two alternate recipes that I have used with success - the one with coconut flour has a distinct coconut flavor and may not go with all main dish meals. Alternate Recipe 1 1 Tbsp ground Chia seeds + 1 Tbsp water, place these in bowl & sit a minute 1/2 Cup Almond Flour 1/2 Cup Gluten Free Flour 1 Cup Organic Coconut Milk (Or 1 Cup Organic whole milk, or 1 Cup water & 4-5 Tbsp Powdered milk, for creamier texture) Salt and herbs to taste Alternate Recipe 2 1 Tbsp ground Chia seeds plus 1 Tbsp water, place in bowl & sit a minute 1 Cup Almond Flour 1/8 Cup Gluten Free Flour 3 Tbsp Coconut Flour 3 eggs 1 1/2 Cups whole milk Salt and herbs to taste Gluten Free Crockpot Chicken and Dumplings Serves 6-8 people depending on apetite Filling 1/3 Cup butter 1/2 to 3/4 Cup Freeze Dried onions + 1/3 +/- Water, in a small bowl 1/4 Cup Gluten Free Flour 1/4 tsp Black Pepper 2 Cups water to which has been added 1-2 tsp of Chicken Bouillon (To taste) 3 Tbsp Powdered Milk + 1 Cup water 1 1/2 Cups Freeze Dried Chicken Chunks + 3/4 Cup Water, in a medium bowl 1 Cup Freeze Dried Corn + 1/3 Cup HOT Water 1 Cup Freeze Dried Peas + 1/3 Cup HOT water 1/4 Cup Freeze Dried Carrots + 1/4 Cup HOT water 1/2 Cup Freeze Dried Celery + 4 Tbsp Water 1 Cup Freeze Dried Potato Chunks + 1 Cup Water (Optional) Turn your crockpot onto warm just to prewarm the dish. In a large sauce pan, melt the butter, then add the onions and cook till onions are “clear”, to bring out their flavor. Remove from heat. Add 1/3 Cup GF Flour and black pepper, stir to mix well. May be a little dry, but try to mix in all the flour with the butter. Then add the water with the bouillon already dissolved. Mix well. Bring to a boil and allow to thicken. You don’t want this as thick as pot pie filling because it will be cooking for a time in the crockpot. It should be more stew consistency. When thickened, add milk mixture and stir through, then remove from heat and add re-hydrated vegetables and chicken. Gently pour mixture into the pre-warmed crockpot, then turn the heat to high. While it continues to heat up, mix the dumplings. Dumplings 1 1/2 Cups Gluten Free Flour 1 Tbsp Baking Powder 1 tsp Chicken Bouillon 1 Tbsp ground chia seeds with 2 Tbsp water added 1/4 - 1/2 tsp black pepper 1 Cup Whole milk (or 4 Tbsp Powdered milk plus 1 Cup water) 3 Tbsp butter Herbs for flavor: Optional, Some like to add 2 tsp Thyme leaves for added flavor In bowl, whisk together dry ingredients. Gently heat the milk until heated through, add butter. Turn off heat and allow butter to melt into milk. Mix into dry ingredients until just incorporated. Drop dough by spoonfuls onto hot filling in crockpot, leaving a small space between each dumpling to allow for rising. Cover and continue to cook on high until dumplings are cooked through, 45-60 minutes. Serve Hot. Makes about 6-8 servings depending on appetite. 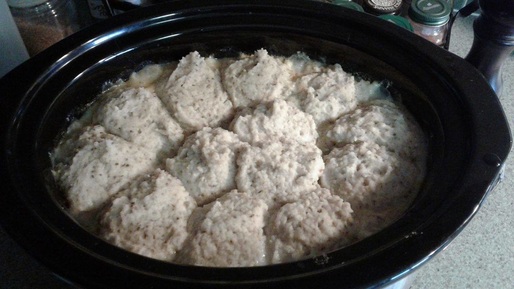 This picture was taken about midway through the cooking of the dumplings and, as you can see, they have expanded to fill the 1/4 inch space I had left between them. Now they will continue to rise and be lighter and fluffier as they expand. 1 1/2 Cups Freeze Dried Chopped Chicken plus 1 Cup water, mix well and set aside. Place the following ingredients together in a different bowl: 3 Cups Freeze Dried Asparagus (May also use Frozen or Fresh, if so, reduce the 2 Cups water for rehydrating down to 3/4 Cup, and steam the asparagus until tender) 1 Cup Freeze Dried Chopped Onion 1/4 Cup Freeze Dried Celery 1/8 Cup Carrot Dices Mix well then add 2 Cups water, mix thoroughly and set aside. Remember to reduce water to 3/4 Cup if using steamed fresh or frozen asparagus. In a separate bowl, place: 1 Cup Freeze Dried Potato Chunks or Dices Pour 1 3/4 Cups water over potatoes, stir well and set aside. Allow vegetables and chicken to rehydrate for approximately 10 minutes. NOTE: If you wish to have chunky asparagus in your soup, set 2 Cups of the Freeze Dried Asparagus aside in one bowl with the other vegetables along with 1 2/3 Cups water, and take the other 1 Cup of the Asparagus and place it in a separate small bowl with 1/3 Cup water and set aside to add to the soup later. 3 tablespoons EVOO 2 tsp dried parsley flakes 1 tsp Garlic Powder 1/2 teaspoon pepper 20 Oz Water 2 tsp Vegetarian Chicken Bouillon 1 teaspoon salt, Optional 2 cups half-and-half, cream or 2 Cups Water and 8 Tbsp. Instant Milk Powder MIX WELL BEFORE ADDING TO SOUP! (this is a little thicker than normal rehydration methods to make it more creamy than the standard recipe) Shaved Parmesan cheese, optional After 10 minutes, place the EVOO in a large soup pot and gently heat on medium heat. Add vegetable mix above and sauté. Sprinkle with parsley flakes, garlic powder, and pepper, stir thoroughly to blend flavors. Pour in the 20 Oz Water and add the Vegetarian Chicken Bouillon, mix well. Heat through and allow to cook for 15-20 minutes, until the vegetables are tender. Turn off heat. With a Stick Blender, blend the vegetable mix until creamy. Once pureed, add the chicken, potatoes, and additional rehydrated Asparagus (if desired). Allow to heat through. Taste the broth at this time to see if additional salt will be needed. Add if necessary, then gently pour in the Half and Half or the Milk Mixture, and stir through. Gently heat on low heat until serving temperature. Serve hot with shaved parmesan cheese or Freeze Dried Shredded Parmesan, if desired. Goes great with a loaf of fresh bread or Gluten free rolls!!! Need a flavor change? In the mood for something simple, and filling? How about a nice hot-from-the-oven Chicken and Rice Casserole with a creamy sauce. This one would go great paired with a fresh salad from your Survival Vegetable garden, or some hot steamy vegetables on the side. Not in the mood to worry about cooking up the veggies? Rehydrate some THRIVE Freeze dried broccoli, cauliflower, or your other favorite vegetable and toss it right into the meal for a simple-to-serve all-in-one meal. Chicken and Rice Casserole 1 whole onion, chopped, 3/4 Cup Freeze Dried Chopped Onion plus the water to rehydrate 1/4 Cup oil or butter, I use olive oil 1/4 Cup Flour - Gluten-Free Flour works great. 2 Cups Chicken Broth - 2 Cups water plus 2 tsp Chicken Bouillon Sautee onion in butter or oil, remove from heat and mix in flour; mix well. Add 2 Cups broth and whisk thoroughly. Replace on burner and on medium heat, cook til thickened. Remove from heat. NOTE: May also use Judi’s Creamy Chicken Soup Mix Recipe - my jar happens to be GLUTEN FREE. 1 1/2 Cups Instant Rice plus 1 1/2 Cups water 1 1/2 Cups Freeze Dried Chicken plus 3/4 Cups water Salt and Pepper to taste Preheat oven to 350 degrees F. Prepare baking dish by lightly greasing the bottom and sides. A 9 inch square works nicely for this recipe. You can also use a round casserole or pie plate if you prefer. Rehydrate the Freeze Dried Chopped Chicken, set aside. Cook the rice til done, then add the rehydrated chicken, mix in the creamy soup mix. Mix well. Pour into prepared baking dish. If desired, sprinkle with shredded cheese. Cook in 350F oven for about 20-30 minutes until heated through. Remove from oven. Allow to set five minutes before serving. Suggestions: Dress it up a little with some of your favorite re-hydrated Freeze Dried Shredded cheese 5 minutes before baking is finished to melt the cheese thoroughly. For more variety, add vegetables to the mixture before baking. Broccoli, Cauliflower, asparagus, or spinach would go nicely. Also is delicious topped with crushed crackers or potato chips. Sprinkle on top five minutes before cooking is finished, and serve. Have you been looking for a simple yet tasty recipe for gluten free dinner rolls that your family will enjoy? We have a recipe for you that uses just 8 simple ingredients, and the end result is a delicious roll that is perfect with soups, salads, and pasta dishes. This recipe can be whipped up and left to rise in just a few minutes, then risen and baked golden brown, brushed with butter and served hot in just about an hour and a half. We have served them brushed with plain melted butter and even with fresh pressed garlic and melted butter, for a nice hot garlic roll. Italian spices added into the dry ingredients would spice them up a bit to go with the evenings Spaghetti and meatballs, or some Southwestern spices to go with a hot and spicy casserole. Let your imagination run away with them and enjoy! GLUTEN FREE Dinner Rolls 4 Servings 1 Cup warm water (approx 100-110 degrees) 1/4 Cup Sugar 2 tsp Instant Yeast 2 1/2 Cups Gluten Free Flour 1 Tbsp Chia Seeds, ground (may also use 1 1/2 tsp xanthan gum) 1 tsp Salt 1 egg, room temperature 2 Tbsp butter, melted Mix together the warm water and 2 Tbsp. of the sugar. Add the yeast and allow to sit while you mix together the dry ingredients. Place the dry ingredients, including the balance of the sugar, in the mixing bowl. Mix thoroughly. With mixer on low speed, pour in water, sugar, yeast mixture, then add egg, and melted butter. Mix on medium speed for 3 minutes. Mixture should be slightly gooey, but not too sticky. Add a small amount more of flour if needed. Grease an 8 or 9 inch round baking pan. Scoop 8-9 mounds into the pan to look like a pan of dinner rolls. (Hint: Scoop one into the middle and then 8 around the outside edges for even spacing). Dip fingertips into water and smooth out the tops. Cover with a dry towel and let rise in a warm place 45 - 60 minutes. During the last few minutes of rising time, preheat the oven to 400 degrees F. When oven is ready bake for 25-28 minutes until tops are golden brown. Brush finished rolls with additional melted butter and serve hot. Serving suggestion: Brush with melted olive oil or butter to which has been added crushed garlic or garlic powder for garlic rolls. Also great hot right out of the oven and dipped into herbed olive oil. 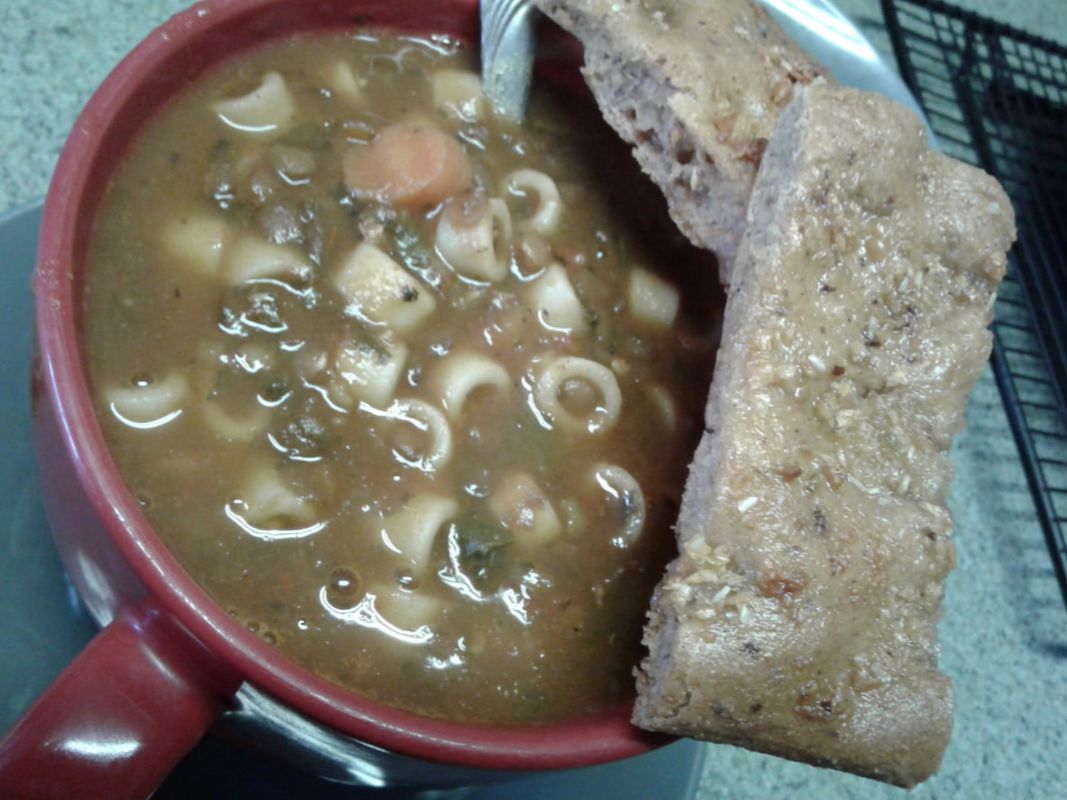 One way you can use this soup is as a type of Pasta Fajioi. YUM! With some Parmesan and fresh Focaccia. For a great flexible recipe, I love to toss together a big pot of Hearty Italian Lentil Soup. Why is it flexible? Because you can make this soup thick and hearty for those who like a more stew-like soup, or thinner for those who enjoy it a bit more brothy. Hearty Italian Lentil Soup also has such a rich Italian flavor that several people have commented that they would love to throw in some beans and pasta and make it more like a Pasta Fagioli. Another option? Imagine throwing in some frozen or even fresh Tortellini if you have them laying around. Or even a batch of Gnocchi, instead. Suddenly this recipe has so many more options available for including it in your 30, 45, or even 60 day menu plan. If you aren’t in a situation where freezer space is limited or unavailable, you can always make a double batch and toss some into the freezer in larger tubs for sharing with family or in single serving sizes for lunches work or quick meals in a pinch. Some even like to enjoy it as a late night snack. One of our favorites with the leftovers, after it has sat in the fridge for a day or two, and the lentils have helped it to thicken nicely, take the soup and pour it over some boneless chicken in the oven. Allow the chicken to cook through and top with cheese then serve. Delicious! Now you see why we call this one so flexible. It can be used in so many different ways that it’s one you will definitely want to print for your home storage cookbook. Hearty Italian Lentil Soup Prep and Cooking Time: 2-3 hours (most of this is simmering time, prep time is only about 20 minutes) Servings: 6-10, depending on serving size 1 Cup Chopped onion 1/3 Cup Carrot Dices 1 Cup Tomato Powder 1 Tbsp Chicken Bouillon 1 Cup Lentils 1 1/2 Cup Chopped Spinach Organic Spice Blend: 1 tsp. Dry Thyme 2 tsp. Dry Oregano 2 tsp. Dry Parsley 1 tsp. Dry Basil 1 Tbsp. Garlic Powder 2 tsp Onion Powder Black Pepper to taste Salt Optional - we eliminate the salt because of the salt in the bouillon) 1 to 1 1/2 Gallons Water 2 Tbsp Olive Oil Option one: Pour 1 gallon of water into the pot, add all dry ingredients to the pot, and stir well. Bring to a boil, then turn to simmer, allowing to simmer for 30-60 minutes, until lentils are cooked through. Stir soup occasionally during simmering and add more water if it looks as though vegetables and lentils have absorbed too much. The longer the lentils cook, the more tender they will be. Allow to sit for a while to blend flavors. Best served the next day to allow flavors to mingle, but can be served as soon as Lentils are tender. Option Two: Rehydrate onions with 1/3 C. water from the one gallon of water set aside. In a separate container, rehydrate carrot, spinach, and Tomato powder in about 2 cups of water from the gallon. When Onions are rehydrated, add a little olive oil to the pan and heat. Add onions and sauté for a few minutes. Add the rehydrated carrot, spinach, and tomato powder then add the balance of the water. Sprinkle in bouillon, spices, and lentils. Bring to a boil, then turn down to simmer for 30 minutes. Remove from heat and serve, or allow to set for a bit for flavors to blend more thoroughly. Option 3: Place olive oil in pan and lightly sautee the FD onions. Add the herbs and spices. Lightly sautee to allow flavors to blend. Add water, then bouillon, carrots, and tomato powder. Mix well, bring to a boil, reduce heat, and allow to simmer 30 minutes. Add lentils, and allow to continue to simmer for an additional 1 to 1.5 hours, testing the lentils for desired tenderness. When done, turn off heat and stir in spinach, gently. If necessary, reheat the soup to desired serving temperature. Serve hot with parmesan sprinkled on top.
Another great food storage recipe with flexibility is our Stormy Day Spicy Bean Soup - and spicy, by the way, is relative. Depending on who has their hands on the jar of cayenne pepper, this can be a mildly spicy meal or one really hot soup! And not because you left the burner on high!
In this one, again, we like to use our Anasazi beans to make it quicker to prep and cook up as well as to reduce the intestinal distress that sometimes comes with eating beans. Stormy Day Spicy Bean Soup is a good pot of soup to whip up to go with a fresh pan of corn bread or even to toss some tortilla chips on top for garnish. It is delicious served with or without fresh cilantro, but I have to say I enjoy it more with the fresh herb sprinkled on top. And of course, a hot soup like this always likes to be dressed with some THRIVE Shredded Cheese Sprinkled on top. Stormy Day Spicy Bean Soup 1 C. freeze dried Chopped Onion, in a small bowl 1 C. Freeze Dried Green Bell pepper, in a separate small bowl 1-2 Tbsp freeze dried Chili Peppers, in bowl with freeze dried Green Bell Peppers 1 C. freeze dried Sweet Corn, in a separate small bowl 2 Tbsp Olive Oil ¾ C. Tomato Powder 8 tsp. Vegetarian Bouillon (either the "beef" or "chicken" styles will work well) 2 C. Freeze Dried Black Beans, prepared according to package directions (we prefer Anasazi Beans for their quick cooking time and great taste) 9 C. Water, measured and ready for use Spices: 3 Cloves Garlic 1-2 tsp. chili powder 1 Tbsp Oregano 1 tsp Cumin Black pepper to taste Cayenne Pepper to taste Garnishes: Lime juice or fresh limes for flavor and garnish Fresh Cilantro for garnish, if available Freeze dried Shredded Cheddar or Freeze dried Shredded Monterey Jack Cheese, rehydrated Instructions: With the vegetables each set aside in their own small bowls, add 1/3 C water to each bowl from the 9 C. measured out. Allow the vegetables approx. 5 minutes to rehydrate. Place 2 Tbsp olive oil in pot, turn heat to medium high, and add rehydrated onions and peppers. Sautee briefly, then add the rest of the 9 cups of water, the corn, tomato powder, bouillon, and prepared beans, stir to mix well. Add the spices and simmer for one hour to allow flavors to mingle. Serve hot with tortilla chips or corn bread. Garnish soup with shredded cheese and a slice of lime, if available, or a drizzle of lime juice from storage, and a sprig of fresh cilantro.  If you have already seen or tried our Perfect Gluten Free Pie Crust recipe we have, then you saw I mentioned a Hearty Chicken Pot Pie. This filling is also Gluten Free and uses just a little bit of the THRIVE Gluten Free Flour to make the Roux and thicken the filling for a nice, old fashioned pot pie like Gramma used to make. This one is packed full of great freeze dried products and lots of veggies for a delicious dinner for at least four. It can be made in a round pie plate or even a square baking dish. For ease of printing, we have even included the recipe for the THRIVE Gluten Free Pie Crust at the end. GLUTEN FREE Homemade Hearty Chicken Pot Pie Filling 1/3 Cup butter 1/2 to 3/4 Cup Freeze dried onions + 1/3 +/- Water, in a small bowl 1/3 Cup THRIVE GF Flour 1/4 tsp Black Pepper 1 3/4 Cups water to which has been added 1-2 tsp of Vegetarian Chicken Bouillon (To taste) 2 Tbsp Powdered Milk + 2/3 Cup water 1 1/2 Cups Freeze Dried Chicken Chunks + 3/4 Cup Water, in a medium bowl 1 Cup Freeze Dried Corn + 1/3 Cup HOT Water 1 Cup Freeze Dried Peas + 1/3 Cup HOT water 1/4 Cup Dried Carrots + 1/4 Cup HOT water 1/2 Cup Freeze Dried Celery + 4 Tbsp Water 1 Cup Freeze Dried Potato Chunks + 1 Cup Water (Potatoes are Optional) NOTE: If I am looking for a hearty, thick pot pie filling, I use the amount of vegetables and meat listed. If looking for a little more saucy filling, reduce potato chunks, peas, corn and chicken by 1/4 Cup each, and slightly reduce the amount of water used for rehydrating these items. Preheat oven to 425 degrees Fahrenheit. In a large sauce pan, melt the butter, then add the onions and cook till onions are “clear”, to bring out their flavor. Remove from heat. Add 1/3 Cup THRIVE GF Flour and black pepper, stir to mix well. May be a little dry, but try to mix in all the flour with the butter. Then add the milk and whisk together well. Add the water with the bouillon already dissolved. Mix well. Replace pot on burner and cook on medium-high to high heat until mixture thickens like gravy. Remove from heat and add re-hydrated vegetables and chicken. Pour into prepared crust, carefully place top crust on top of pie and seal edges well to prevent dripping into oven as it bakes. Poke holes in top crust to release steam while cooking, then place in a 425 oven and bake for 30-40 minutes, until crust is golden brown and pie is hot and bubbly. Remove from oven and set for 10-12 minutes to allow filling to set before serving. NOTE: Is best to place a drip pan below the pie as it bakes, just in case the pie drips and to hopefully prevent smoke in the kitchen! :-) THRIVE PERFECT GLUTEN FREE PIE CRUST Gluten Free Pie Crust 2 Cups THRIVE Gluten Free Flour 1/2 tsp Himalayan Sea Salt 1/2 Cup Butter, softened, NOT melted 1 Egg 2/3 Cup Water (start with 1/3 and then add 1 Tbsp at a time until dough is right consistency) Preheat oven to 425. In a bowl, mix together THRIVE GF Flour and salt. Mix in softened butter until crumbly. Add egg and 1/3 cup water, mix well. As needed, add 1 Tbsp additional water until dough is the consistency of soft pie crust. This dough is not likely to be dry, like old fashioned pie crust, and may be too sticky for rolling pin. NOTE: Experience shows that when it is as dry as old fashioned crust, it crumbles and does not hold together well when transferring to the pie plate. I prefer this dough, softer, like a stiff cookie dough, so that it may be spread with the fingers. Making a dessert pie and want the crust a little sweet? Add your sugar to the flour and salt mixture. How about a savory crust for a pot pie or dinner pie? Add the desired spices with the dry ingredients and mix thoroughly. Divide the dough into two pieces, slightly less than 2/3 of dough for the bottom of the crust and slightly more than 1/3 for the top crust. Place large piece of dough in the bottom of a 9 inch pie plate, flatten with the palm of the hand, then spread the dough evenly throughout the pan and up the sides, leaving a high enough edge to seal the top crust. Prick the bottom with the tines of a fork so that steam may escape and crust will not bubble up. Place in a preheated 425 degree oven for approx. 8-10 minutes, not allowing it to brown or cook fully. While crust is baking, liberally sprinkle GF Flour or Oat flour on wax paper or parchment. Place the small piece of dough on the floured paper and flatten with palm of hand. Sprinkle top with flour and then gently press with hands to the size of the top of the pie plate. When Pie crust bottom is ready, add filling to crust. GENTLY cover the top of the pie with the top crust, trying to close all the edges with the crust so that the filling does not spill over in the oven. Prick the top of the crust to allow steam to escape while baking. Place pie in the oven and cook according to pie recipe directions. Remember to cover the outer edges with foil to prevent burning if the baking time is long, like for an apple or pot pie. 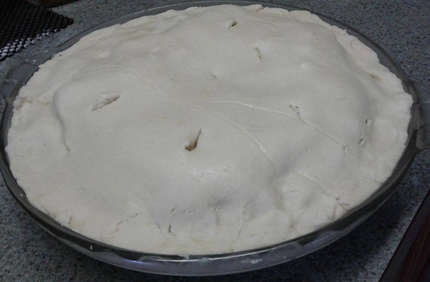  These two photos are pre-baked. I wanted to be able to show how the crust fits easily on top. Make sure to poke holes to let steam escape as it cooks. 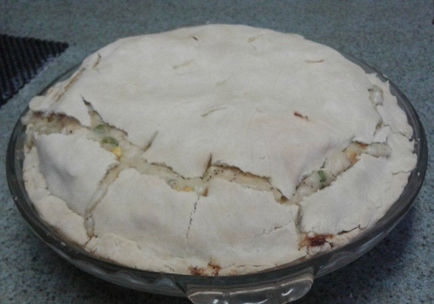 The crust didn't feel too dry when I rolled and pressed it out, but the finished product shows that I must have added just a tiny bit too much flour. Not the perfect pot pie model - but it sure did taste delicious! This recipe amazes me because it tastes just like an old fashioned "normal", wheat filled pot pie, yet it is all gluten free! Some recipes are meant to be eaten fresh right from the oven, while others are great to put away, already to go for later or the next day. This recipe is one that can go either direction, eaten fresh or refrigerated for later, depending on your need. We often use casserole recipes for times when we know we are going to be busy and have little time to cook the next day. Mixing them ahead and sticking them in the fridge makes the next day’s preparations a lot less hectic and more relaxing for the family.
Our THRIVE Risotto with Brown Rice, Chicken, and Spinach is one of those easy to toss together, and great to stick in a covered dish away for later. After a long day at work or running errands, just pop it in the oven for about 30 minutes at about 425 degrees F and you have a great dish to toss on the table with a fresh salad or even some garlic dinner rolls. Risotto with Brown Rice, Chicken, and Spinach 1 1/2 Cups Instant Brown Rice 2-3 Cups water 2 1/2 tsp Vegetarian Chicken Bouillon Bring rice to a boil, reduce heat to simmer and allow rice to cook, thoroughly, while you prepare the rest of the ingredients. Stir occasionally to prevent burning. 3/4 Cup Freeze dried Parmesan Cheese, rehydrated (additional for sprinkling on the top or for serving) 3/4 Cup Freeze Dried Mozzarella Cheese, rehydrated 1 1/2 Cups Freeze Dried Spinach + 1/2 Cup water, mixed gently in a bowl 1/2 - 1 Cup Freeze Dried Onion + 1/6-1/3 Cup water, mix in medium bowl 1/2 Cup Freeze dried Green Onions + 1/8 Cup water, mix in small bowl 1 1/2 Cups of Freeze Dried Chicken Chunks + 3/4 to 1 Cup water, mix in a medium bowl 1 Lemon, Cut into thin slices (Optional) 3 Tbsp butter or olive oil 5 cloves Garlic, chopped 1/4 Cup fresh parsley, chopped, or 1 1/2 Tbsp dry Parsley 1/2 Cup Dry White Wine (may also use grape juice) Optional 2 Tbsp Lemon Juice Additional 3 Tbsp Butter, melted Salt and Pepper to taste Cook Rice in water with Bouillon until soft. Set aside, covered. Rehydrate the onions, scallions, and spinach each in a separate bowl with their appropriate water. Next, rehydrate chicken in the 3/4 to 1 Cup of water for approx. 10 minutes. While that is rehydrating, place the first 3 Tbsp Butter or Olive Oil in a large fry pan and heat on medium high heat. Add the garlic, rehydrated onions, scallions, and lemons. Saute lightly, then add the spinach and parsley and saute just until heated through. Reduce heat and add the rice, and chicken to the spinach mix, and mix through, gently. Pour Parmesan cheese, lemon juice and melted butter into the pot and stir thoroughly, to mix. Season with salt and pepper, if desired. Serve immediately. NOTE: This recipe is great for Shabbat (Sabbath Meal) - make it on Prep day and place it in a 9 inch round pie plate or 8-9 inch baking square dish, sprinkle with additional Parmesan cheese and cover. Reheat, covered, for approx. 25-35 minutes in a 425 oven the next day! You may need to drizzle about 1/3-1/2 cup of water over the rice before baking to ensure it does not dry out in the oven. |
Prepping Expert
AuthorJudith has over 30 years experience in food storage, herbs, essential oils, and prepping. She was a captain in the USAF-AUX, FEMA trained, Community Emergency Response Team member and NRA marksmanship award recipient. She shares her experiences with her readers offering tips and recipes. Disclosure
The information shared is our personal opinion and should NEVER be considered a substitute for professional medical, nutritional, or other expert advice. Information contained is not for the purposes of diagnosing, or treating any disease or medical condition. Any endorsement of products should not be considered an un-biased review since we are paid and compensated when you purchase products from this site.
Archives
March 2024
Categories
All
|
||
 RSS Feed