|
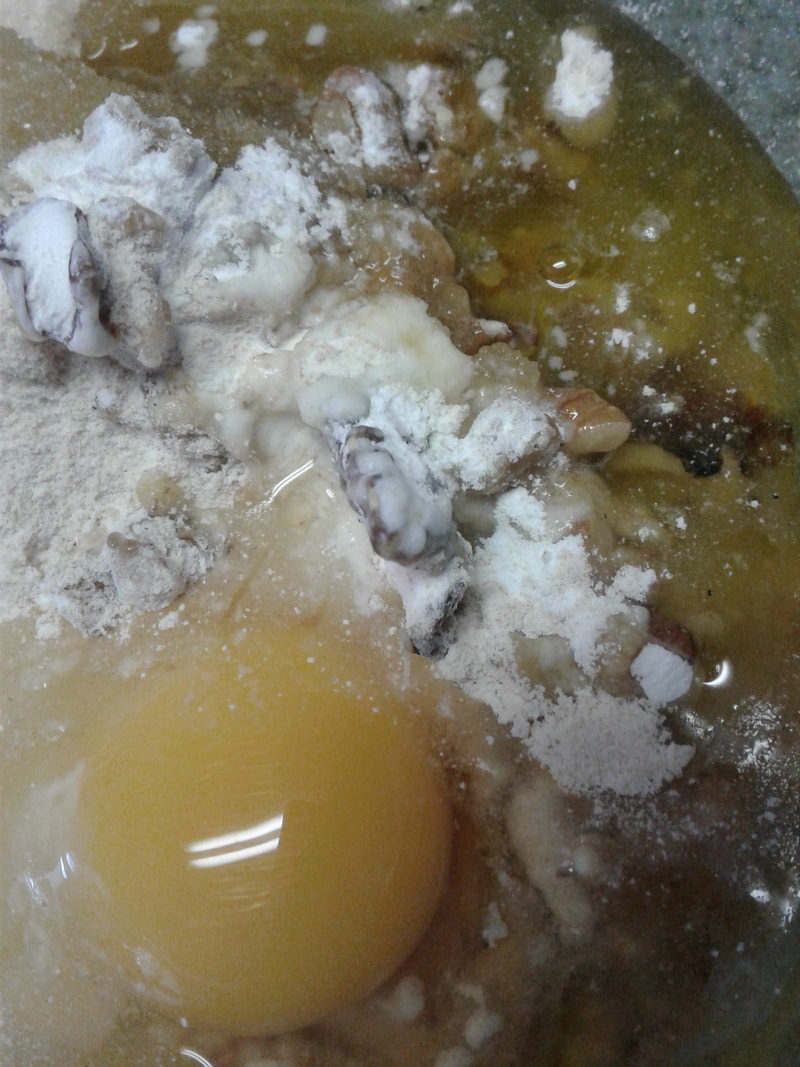
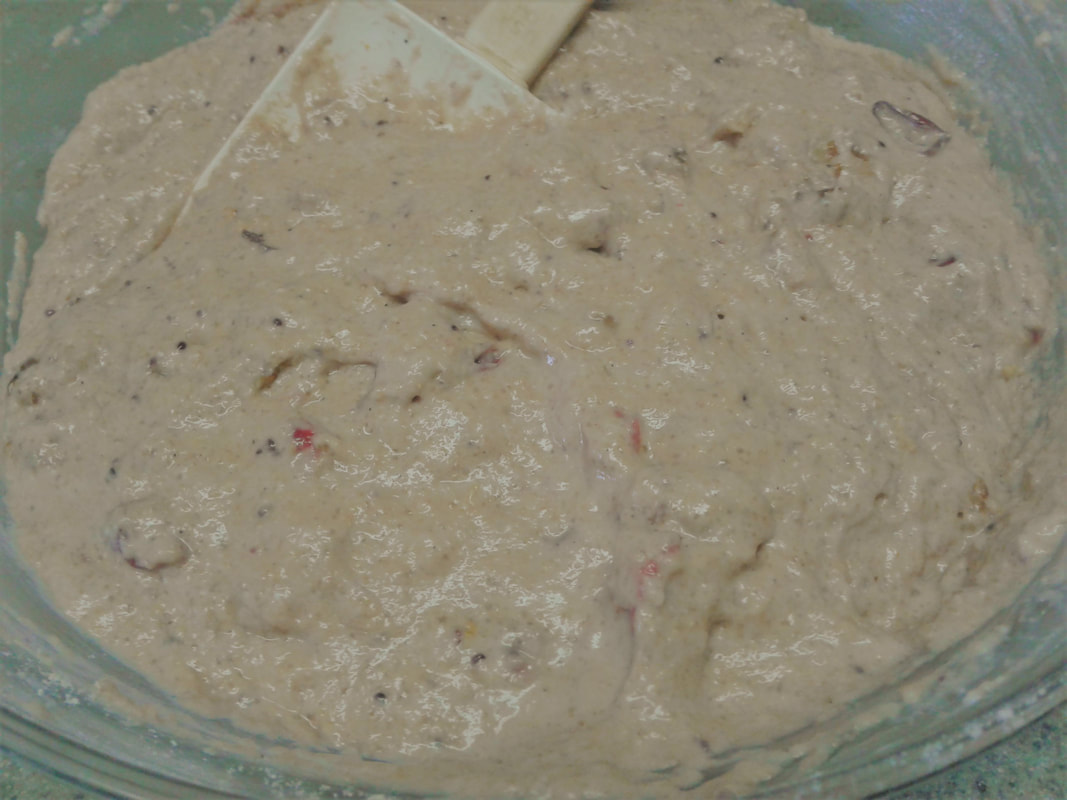
A long time ago, in the Depression era, many people learned to use everything they possibly could from their kitchen, not wasting a single thing. It was a necessity to do so. As times change for each of us, we will find we need to start thinking more like families did back then. For some time now I have been wanting to pass along ideas that will reduce your waste from your kitchen by using things you might normally toss in the trash. One big idea we do reduces the waste going out to the trash and to your compost. One of my favorites we covered in a blog and video. If you have seen my video or read our blog about Garbage Soup, then you know exactly what I am talking about. We don’t waste anything from our kitchen if we can avoid it. From sticking half-way fresh bags of greens into the freezer to dehydrating those greens for use in soups; from tossing veggie scraps into a bag for homemade broth to saving apple cores to make vinegars; you will always find something “from the trash” turning into something NEW in our kitchen. Because of this, and because many people do not think of doing these things at all these days, I have been wanting to create a series based on that old saying, “Waste not, want not.” Although we already have three messages that could fit into this series, today’s message will be the first official one, and it involves cranberry mash. About two weeks ago, I started to feel a bit off and recognized I needed a good cleanse of my body. We won’t go into HOW I recognized it! I just did! To accomplish what I needed, I knew I needed cranberry in my system. Having bought several super-sized bags of them in the fall, I grabbed a handful, tossed them into a pot, boiled them, crushed them, and allowed them to steep until cool. After a couple of hours (I got distracted as usual!), I strained the juice and put the mashed cranberries into a bowl in the fridge. I was able to take the juice and add it to my daily water intake as desired and drank the cranberry water for several days. I did need to make a second batch a couple of days later since I wasn’t quite “there” yet. After two big batches like this, I had over 2 cups of crushed cranberries sitting in the fridge in a covered dish. The funny thing is the recipe I use to make the cranberry water/juice, tells you to throw away the cranberry mash! NO WAY!!! I LOVE cranberries, for one, and WASTE NOT, WANT NOT!!! There are SO MANY things you can do with that cranberry mash. Why someone would tell you to throw it away, I cannot fathom!!! What ideas can we come up with? To start: 1) Make a cranberry sauce by adding apples, oranges, walnuts, or whatever else you enjoy in your cranberry sauce in the fall. I have even seen people mix blueberries, strawberries and cranberries together as a sort of sweet and sour “fruit salad.” Serve it as a side dish, a little snack in the afternoon, or as a condiment for a meat-meal you are preparing! You could also pour it over a lovely bowl of fresh, homemade vanilla ice cream! The possibilities are amazing, and that is just to start! 2) How about a semi-sweet, hot cranberry sauce and pour it over top some freshly baked chicken or turkey! Put the mash back into a little saucepot and add a touch of honey or organic sugar. Heat and allow to thicken to form a syrupy sauce. 3) Puree it and add it to smoothies. 4) Separate it into 1/2 or 1 cup serving sizes to be added to other recipes in the future. For now, freeze these dollops in pre-measured portions for use as needed. 5) Fruit roll-ups or leathers 6) Dehydrate the mash for use later. 7) But HERE is what I did this week with ours!!! MUFFINS!!! Muffins are SO SIMPLE! I just tossed together 2 Cups whole wheat flour, 3 tsp baking powder, 1 egg, 1/2 Cup sugar (you can add up to 1 Cup, but we don’t eat things terribly sweet!), plus some oil, 1 Cup of the cranberry mash, a touch of vanilla and cinnamon, then some chopped walnuts. I mixed lightly to combine everything evenly. Because it was still way too dry, I added milk, a little bit at a time, until the batter was the right consistency for baking into muffins. I scooped the batter into 12 greased muffin cups and baked at 350 for about 20-23 minutes. Make sure to check them with a toothpick for doneness. Remove from oven when ready and SERVE! These would be great with butter, cream cheese, orange marmalade, lemon curd, or your favorite topping or spread! The mashed fruit becomes a part of the liquid you used to make these lovely, tasty and very moist muffins! That is why you wait to add the milk until you find out how moist the mixture is. Using the cranberry mash was very similar to using apple sauce or pumpkin puree in the recipe. The best part is you don’t just have to make muffins. You could make cranberry bread, pancakes, cookies, and so much more! The possibilities for eating your “trash” can be endless if you just imagine what you can do with it! No, I am not advocating for you to go out and pick through your trash today and bring scraps back inside! But I AM asking you, before you throw it out, stop, think, and imagine – imagine what you COULD make with what you are tossing. Are there some scraps that just end up in the trash or compost anyway? DEFINITELY! An example of this would be any spoiled products, especially bad or moldy produce! The other day I pulled out a bag of carrots that had a few blackened, slimy gross things growing in it! THIS ended up in the trash! There was NO HOPE in saving those “creatures.” Yet, for those things you CAN re-purpose? Please, think ahead and try it! You will find amazing ways that you can expand your food storage possibilities and extend the life of your home storage. We ended up not only with my cleansing tea for almost a whole week, but also 2 breakfasts worth of muffins! There is still one full cup of cranberry mash in the freezer, too, for another creation in a week or two. It will be fun over the next blogs to show you how we make our food supply stretch. Do you have any ideas you would like to share? Please feel free to send them to me! Blessing and Shalom….Judith First we have the cranberry mash used in the recipe. Next, I have to say, on this particular day I had the small bits and pieces left in the bag of walnuts that I had been saving for such an occasion as this! Once all the ingredients were added into the bowl, I mixed it thoroughly and look at that batter! Perfect!  NOM-NOM-NOM!!!!
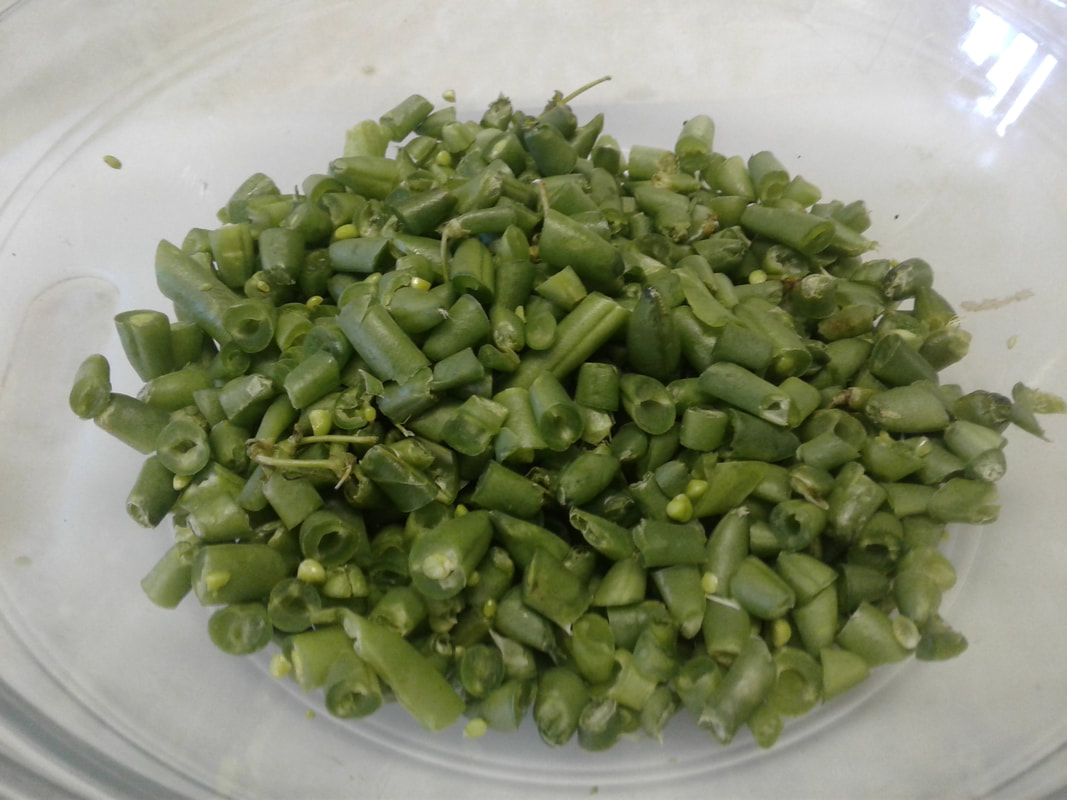
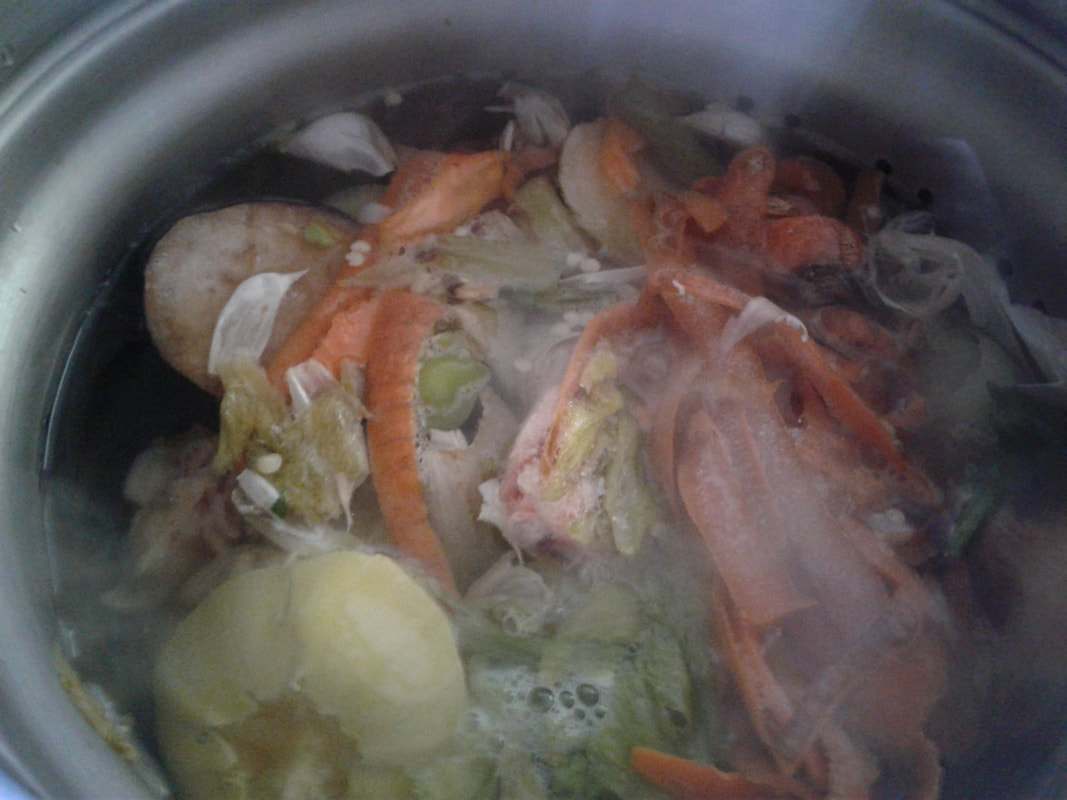
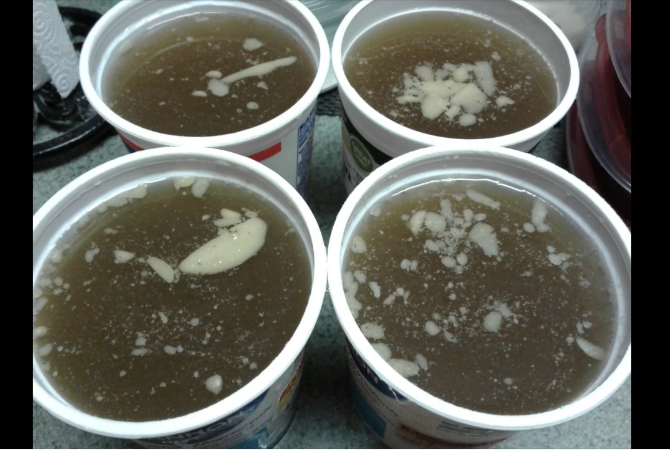
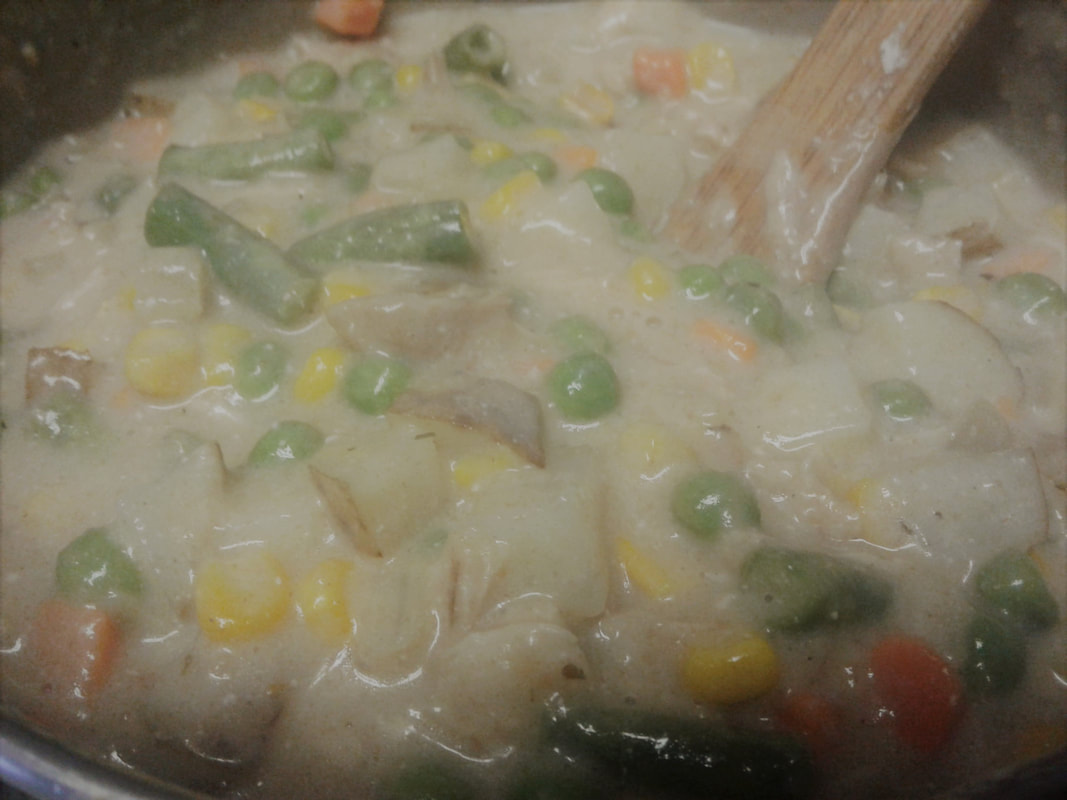
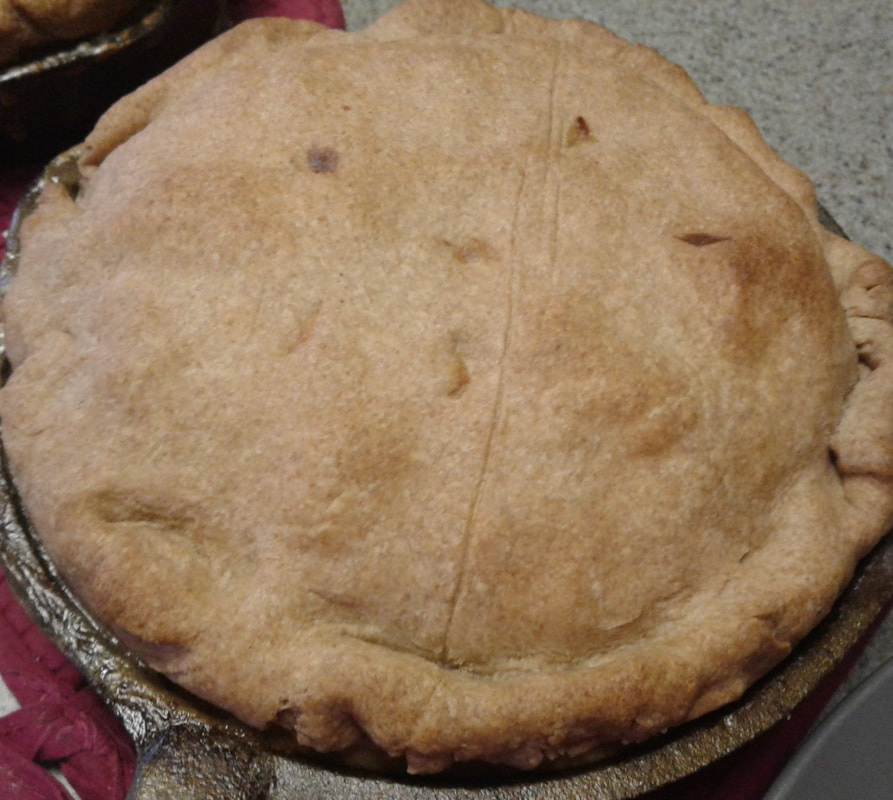
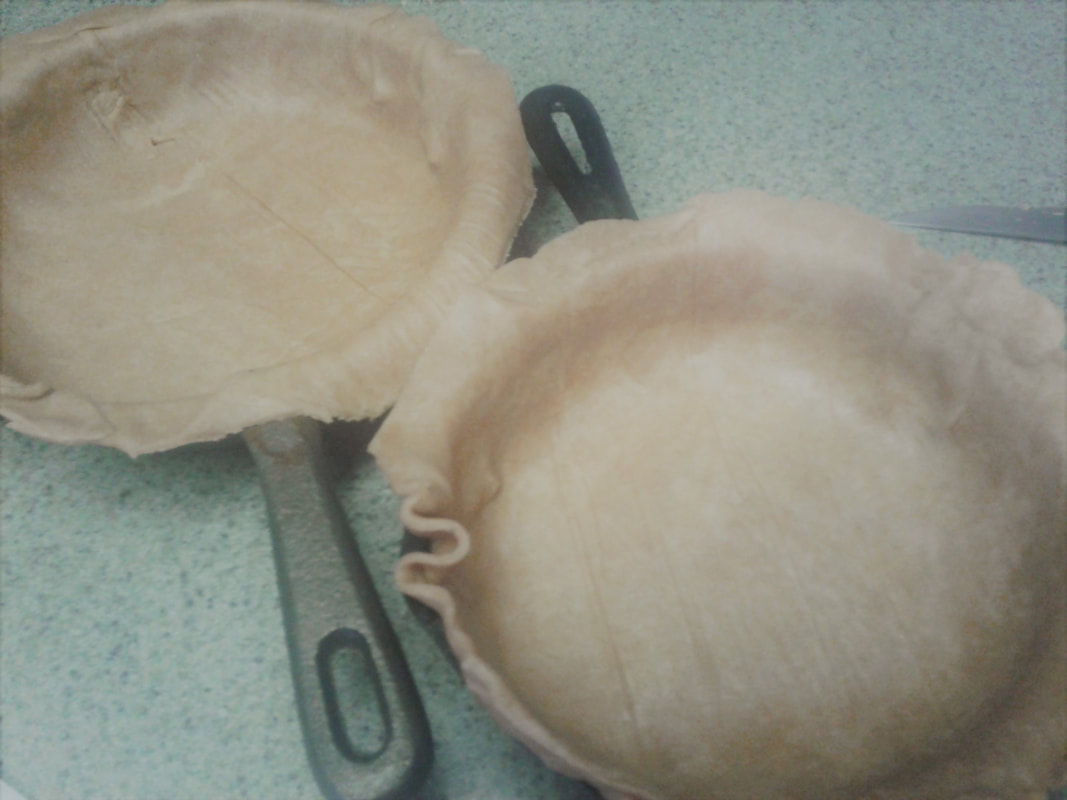
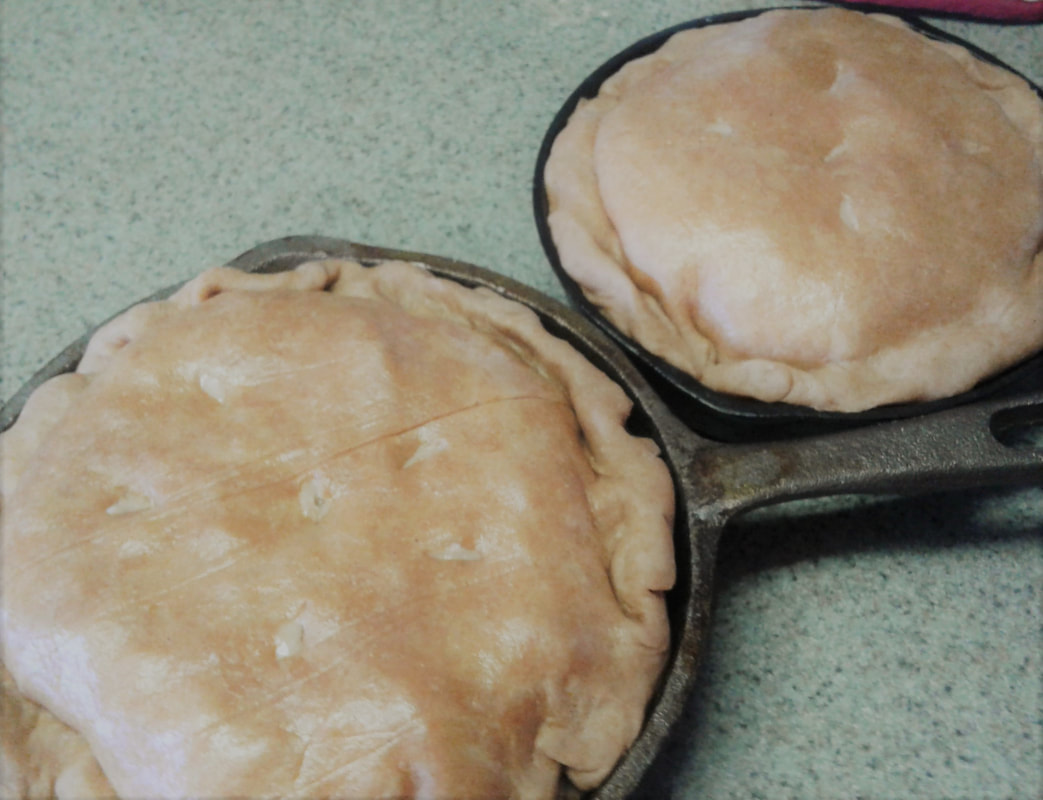
Cranberry Walnut Muffin Noshing time!!! If you hit any search engine and ask that question, you may find different explanations or recipes for what Garbage Soup is. In our house, it is the name given to what is left after you simmer a pot of vegetable scraps all day long with a handful or two of herbs. It is actually a simple product to make and then reserve or preserve for use later in the kitchen. Especially if you save your vegetable scraps in the freezer over a period of time. This is what we do for a month or two, and sometimes we will even throw in some chicken bones for a bone broth. It is so simple to do – we keep a gallon sized zipper storage bag in the freezer and then, whenever we cut up vegetables, any pieces of scrap that are not moldy or rotting get tossed into that bag in the freezer. We toss in literally every type of vegetable we can: eggplant, green beans, squash of any and every kind, corn, tomato, potato, carrot, onion, garlic, celery, pea pods, peppers, broccoli, cauliflower, and more. I have even tossed in some hot pepper scraps like jalapenos, too. This is particularly delicious if we have a cold or sore throat! It helps clear the head and heal our throats! When the bag is full, I will take a large soup pot, fill it with water, pour in the bag of vegetable scraps, bring the water to a good rolling boil, and reduce to simmer. This is the time I tend to throw in any herbs that I want to add. Oregano, basil, salt, pepper, cilantro, parsley, and even garlic powder (especially if there isn’t any garlic scrap in the bag). I like to start this whole pot in the morning so that it has plenty of time to simmer all day long. In the evening, I strain the vegetable chunks out and any bones if we have added them. One trick I tend to do is use the strainer for the pasta pot for this because it is very easy to just lift out the basket full of scraps and dump them! To do this, you simply pour your scraps from the bag right into the strainer and then very gently lower the strainer into your soup pot when you are starting in the morning. If you commonly compost your scraps, you CAN still do that when the broth is done simmering – there are some who recommend dumping it all, including animal bones, into the compost heap. We do not – bones can attract rodents, bears, and coyotes to the yard which we prefer to discourage (for OBVIOUS reasons!!) The broth is allowed to cool and then we pack it into containers for the freezer. I like to store it in 2-3 cup containers because that is often the amount of broth we need in any recipe we make. Then the containers are placed in the freezer until needed! Remember to label them with the date and contents so that you remember to rotate your freezer storage. Some people do pressure can various broths as well – for this, you should check with your local co-operative extension for the current recommendations on this topic. Checking with them will help ensure your family’s health and safety. Garbage soup is a wonderful treat if you are chilled in winter, maybe instead of an afternoon snack, or in place of a cup of tea or coffee. Also great for anyone feeling a bit under the weather. It is a wonderful comfort food and packed full of deliciousness with all that vegetable flavoring and herbs. Blessings and Shalom. Judith Garton For a video on how I made one big batch of Garbage Soup, visit our channel through the video below - and remember to subscribe and click notifications! For details or description of each photo, please click to reveal the caption. 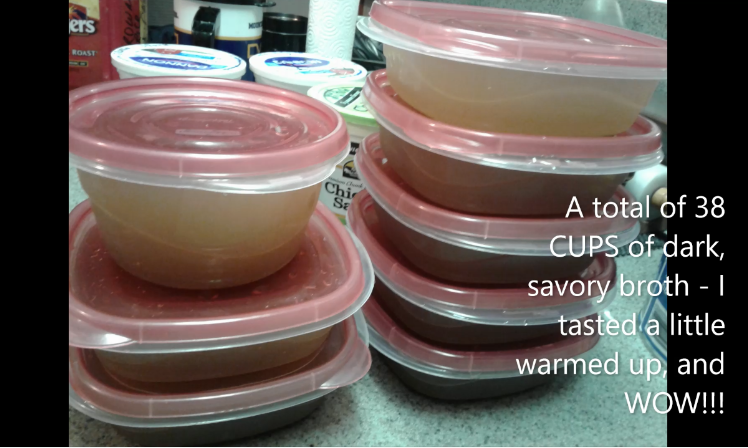 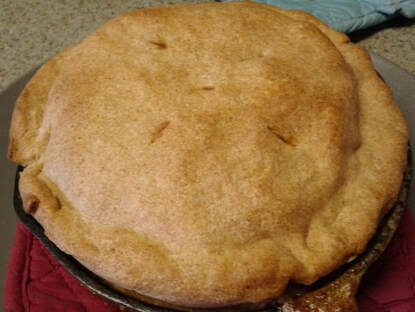 4-8 servings, depending on appetite and sides (Salad, fruit, etc) 1-batch double crust pie crust dough Filling: 1/3 Cup butter 1/2 diced onions 1/3 Cup Flour (I use Whole Wheat in all our cooking) 1/4 tsp Black Pepper Salt to taste, if desired 1 3/4 Cups Broth 2/3 Cup Milk (I have been known to use 2 1/4 cups of broth, plus enough powdered milk to make it creamy! Makes a richer filling) 1 1/2 Cups Chicken Chunks 1 Cup Corn 3/4 to 1 Cup Peas 1/4 Cup diced Carrots 3/4 Cup cut green beans 1/2 Cup diced Celery 1 Cup Potato Chunks, lightly cooked. NOTE: I prefer frozen vegetables, less squishy. I also take a short cut and use a bagged mix from the grocery store that has a balance of green beans, peas, carrots and corn. Sometimes I throw in a little extra corn. Then just add celery and diced potatoes. If desired, play around with your veggie and chicken amounts, depending on tastes. I prefer to have MORE veggies and meat, so that the filling doesn't run out when cut! Directions: Preheat oven to 425 degrees Fahrenheit. In a large saucepan, melt the butter, then add the onions and cook till onions are “clear.” Remove from heat. Add 1/3 Cup Flour and black pepper, stir to mix well. May seem dry, but try to mix in all the flour with the butter. Then add broth. Mix well. Replace pot on burner and cook on medium-high until mixture thickens like gravy. Remove from heat and add milk. Mix well. Then add vegetables and chicken. Stir until well combined. Separate dough into two pieces: 1 - a little over 1/2 of the pie crust mixture, and a slightly smaller piece for the top crust. Roll out the larger piece, then place into baking dish. Ensure there is enough of an overlap on the top edge to be able to close your top when placed on pie. Roll out the top crust to the proper size for your baking dish. Pour filling into prepared crust, then carefully place top crust on top of pie. With damp fingers, seal edges well to prevent dripping into oven as it bakes. Poke holes in top crust to release steam while cooking. Place in a 425 oven and bake for 30-45 minutes, until crust is golden-brown and filling is hot and bubbly. Remove from oven and let sit for 10-12 minutes to allow filling to set before serving. NOTE: Experience shows it is best to place a drip pan below the pie as it bakes, just in case filling oozes out, and to hopefully prevent smoking up your kitchen! :-) Pie may ALSO be made in individual serving sizes!!! We have started doing it this way by using two smaller sized cast iron skillets - I deeply love the crispy bottom created by using the cast iron skillet! It also pops out easily onto a plate for easy serving.
|
Prepping Expert
AuthorJudith has over 30 years experience in food storage, herbs, essential oils, and prepping. She was a captain in the USAF-AUX, FEMA trained, Community Emergency Response Team member and NRA marksmanship award recipient. She shares her experiences with her readers offering tips and recipes. Disclosure
The information shared is our personal opinion and should NEVER be considered a substitute for professional medical, nutritional, or other expert advice. Information contained is not for the purposes of diagnosing, or treating any disease or medical condition. Any endorsement of products should not be considered an un-biased review since we are paid and compensated when you purchase products from this site.
Archives
March 2024
Categories
All
|
|||||


 RSS Feed