|
This one is a nice recipe for a chilly afternoon with that same old fashioned flavor as Mom's stuffed peppers and the convenience of a quick serve casserole. It goes great with some fresh baked rolls or garlic bread.
Tuck this one away, too, in the fridge for the next day as a make ahead and bake later meal. I love to use these kinds of casseroles or meals for Sabbath meals because I don't have to cook that day, just reheat and serve! Stuffed Pepper Casserole Serves 4-6 1 - 1 1/2 Cups Freeze Dried Chicken Chunks plus 3/4 Cup water (May also use THRIVE Beef, rehydrated) 2 Tbsp EVOO (Extra virgin olive oil) 1/2 Cup Freeze Dried Onion, rehydrated, or diced yellow onion 3 Cloves garlic, finely chopped 1 Cup Freeze Dried Red and Green Peppers plus 1/4-1/2 Cup water 1/2 teaspoon salt 1/4 teaspoon pepper 1 can (14.5 oz) diced tomatoes, undrained 2 Cups water and 2 tsp Chicken Bouillon 1 can (8 oz) tomato sauce 1 tablespoon soy sauce (optional) 1 teaspoon Italian seasoning 1 cup uncooked Instant Brown Rice 1 Cup Freeze Dried Cheddar, rehydrated, or 1/2 Cup Freeze Dried Cheddar plus 1/2 Cup Freeze Dried Monterey Jack Directions In 4-quart saucepan, sautee onion and garlic over medium-high heat 5 to 7 minutes, then add the rehydrated meat. Stir until heated through. Add bell peppers, salt and pepper. Heat through. (If you used fresh meat you may need to drain off some of the fat at this point.) Reduce heat to medium; add tomatoes, broth, tomato sauce, soy sauce and Italian seasoning. Stir until well combined. Heat to boiling. Add uncooked rice. Return to boiling; reduce heat to low. Cover and simmer about 25 minutes or until rice is tender. Place in a baking dish, sprinkle with cheese, and either cool for cooking later in the day or next day, or place immediately in a 350 degree F oven and bake for approx. 15-20 minutes. Serve hot with rolls. Easy Potato and Egg Casserole, is one that may quickly become a favorite for the family.
If you are tired of plain eggs, and just don't want a quiche, why not try this great recipe? A simple way to make potatoes and eggs without all that standing over the stove! Potato and Egg Breakfast Casserole Feeds 4-6 as is. Need a bigger recipe? Double it and bake it in a 13X9X2. Just remember to increase your baking time accordingly. 2 Cups Freeze Dried Potato Dices plus 3 Cups HOT water 1 Cup Freeze Dried Cheddar plus 2-3 Tbsp water 1/4 Cup Freeze Dried Onions plus 1/2 Tbsp water 1/4 Cup Freeze Dried Dices Chili Peppers plus 2 Tbsp water 1/4 Cup Olive oil 6-8 eggs or 12-16 Tbsp Freeze Dried Scrambled egg mix plus water as per package directions 1/2 Cup Milk Salt and pepper to taste Add water to potato dices in a bowl and let set for 10 minutes. Add water to Cheddar and let set for 10 minute. Add water to Onions and Chili peppers in the same bowl and let set. Mix up eggs and milk or Freeze Dried Scrambled eggs, water, and milk. Take potatoes, and drain excess water if any, and mix with 1/3 of the cheddar cheese. Mix together well. Add onions and chili peppers, olive oil and salt and pepper to taste. Press into the bottom and sides of a greased pie plate (9 inches works well). Make sure this “crust” is pressed firmly. Place in a preheated 450 degree oven and bake for approx. 15-18 minutes until golden brown on the bottom. Remove from oven and pour the egg mixture over top. Replace in oven for 8 minutes. Sprinkle with cheddar cheese and replace in the oven for another 5-10 minutes or until a knife inserted in the center comes out clean. Serve hot with fresh fruit or juice. Delicious! I was in a mood the other night. I was tired of the same-old-same-old and was very much in the mood for something for dinner that was easy, but filled with vegetables. And it was chilly outside. Going through our food storage, I figured a nice pot of vegetable soup would fit the bill. I started re-hydrating things, and before I knew it, we had dinner!
It sort of created itself as I went along. My original intention was to have a more broth-like soup, but the idea struck me to turn the potatoes into the creamy broth. I hope that you enjoy this one as much as we did. It was hot, packed full of veggies, and very filling. I have added a few ideas for variations on the recipe, in case you would like to try something different. Maybe one day you can have it as made, but the second day, turn the leftovers into a cheesey soup for dinner! CREAMY VEGETABLE SOUP SERVINGS 4 1/3 Cup Freeze dried Celery 2 Cups Freeze Dried Potato Dices 6 Cups Water 2 Tbsp Vegetarian Chicken bullion Place water in a soup pot, add the bullion, mix well, and bring to a boil. Add the celery and potatoes, reduce heat and simmer a few minutes. Then turn heat off and allow to sit. 1/3 Cup Freeze Dried Onions plus 2 Tbsp water in a small bowl, set aside. 2 Tbsp olive oil Garlic powder to taste 2-16 oz bags of California Mix (Broccoli, Cauliflower and Carrots) 1/2-3/4 Cup water In large saucepan, heat olive oil. Add the rehydrated onions and Garlic powder to taste. Sautee until onions appear clear, then add frozen vegetables and water. Bring water to a boil. Steam the vegetables with the lid on to conserve liquid. When soft and tender, using a potato masher, mash the vegetables slightly so that they are in smaller, bite sized pieces for soup. Set aside. 4 Tbsp Freeze Dried Sour Cream 5 Tbsp Freeze Dried Milk Powder 1 1/2 Cups water Shake well in a jar and set aside. Return to the Potato mix in the soup pot and with your hand blender, blend this mix until smooth. You may leave some chunks if desired. Once ready, scrape the onion/vegetable mix into the soup pot, mix well, and turn the heat to medium/medium high, depending on your stove, to bring it to a light boil without scorching the potato broth. Reduce heat to simmer and allow the flavors to blend for a few minutes. Pour in the milk mixture and heat through. Serve hot with fresh bread, or crackers. NOTE: You may use Freeze Dried Carrots, Broccoli, Cauliflower, but I find for this recipe the frozen do work best. Fresh would be great, too. VARIETY: You can add meat to this if you are looking for a higher protein meal. Just remember to rehydrate it before adding to the soup, then heat through. Other vegetables may also be added, such as corn, peas, or peppers. Maybe even some turnips fresh from your garden. Start with this as a soup base, and use your imagination. Cheese? Rice? This recipe may seem involved, but is actually quick to prepare - just like most dishes we serve here at home now with our THRIVE Freeze dried foods. It's great served with some hot rolls, a big salad from your survival garden, OR with a batch of Gluten Free Naan breads.
Curried Chicken Over Brown Rice 1 Cup Instant Brown Rice plus 2 Cups water 1 tsp Chicken Bouillon Add bouillon to the water in a pot. Bring to a boil, add THRIVE Instant Brown Rice, bring to a boil, reduce heat and simmer, covered, for about 8 minutes. Turn off heat and allow rice to sit while you cook the Curry. 1/2 Cup Freeze Dried Chopped Onion plus 3 Tbsp water 1 1/2 Tbsp EVOO 2 1/2 tsp Curry Powder 1/4 tsp cayenne 1/2 tsp salt 1/4 tsp black pepper 1/2 Cup Plain Yogurt or Kefir (I have also been known to use 1/2 Cup Sour Cream powder pre-mixed with water in a pinch. It works just as well.) 5 Tbsp Powder Milk and 3/4 Cup water (or 3/4 Cup half and half ) 2 Cups Freeze Dried Diced Tomatoes and 1 Cup water (or1-14.5 Ounce can diced tomatoes) 1 1/2 Cup Freeze Dried Chopped Chicken plus 3/4 Cup water 1/4 Cup fresh cilantro, chopped Place EVOO in a skillet and heat on medium heat. Add the rehydrated FD Chopped onions. Saute lightly. Add the other spices and stir thoroughly. Remove from heat. Add yogurt and stir thoroughly, careful not to allow it to curdle. Gently add the milk and stir. Add the Diced tomatoes and chicken and heat through. Serve over the cooked rice and sprinkle with chopped fresh cilantro. When I was little, my mom used to make a tuna salad with onions, celery, mayonnaise, peas, and just a couple of chopped hard boiled eggs. Oh, and tuna of course. Every one of my friends thought it was weird, and it seemed like we were the only family in the whole neighborhood that put peas in their tuna salad. BOY! Did I love that recipe, though. It was great on a hot summer day with lettuce, tomato, sliced onions on a nice wheat or rye bread. I still remember how good it tasted! In recent years, what with mercury contaminations and radiation worries, we have gotten away from eating tuna fish, but every now and then I still would love a tuna sandwich. One day I got the bright idea to try mom’s old recipe, but with THRIVE Feeze Dried Chicken. WOW! Was I surprised! I made my homemade mayonnaise recipe, rehydrated all the appropriate vegetables and the freeze dried chicken, diced some fresh onions because I had them on hand, tossed it all together in a bowl, mixed it well and chilled it for several hours. We served it on gluten-free bread made on Gluten Free Flour, with fresh lettuce, tomatoes and sliced onions as well as some pickled hot banana peppers and YUM! Was it perfect. It doesn’t taste exaclty like mom’s because, let’s face it, there will always be a taste difference between fish and chicken - no fish taste with chicken. But next time I am craving mom’s old fashioned tuna salad with peas, I know I can whip up this recipe and feel like a kid again. Easy Chicken Salad Servings 4-6 3/4 - 1 Cup of Freeze Dried Chicken 1/3 Cup Freeze Dried Celery 1/2 Cup Freeze dried Peas 1/2 Cup Freeze Dried Green Onions 1/2 Cup Freeze Dried Chopped onions or fresh onion chopped 1 Cup Water (An extra 1/2 Cup may be needed for best rehydration depending on preference) Place all these ingredients into a large bowl, and mix well. Cover and let sit for 15-20 minutes to fully rehydrate. 2-4 hard boiled eggs, peeled and chilled, then chopped Sprinkle of Onion powder, Garlic powder, Black pepper, and salt to taste 3/4 Cup Mayonnaise (I use our recipe for Homemade mayo!) Drain off any excess water from the meat and vegetables, if there is any. Shake the colander thoroughly so that your finished salad won’t end up runny. Place back into your large bowl, add the mayonnaise and mix thoroughly. May be served right away, but is always best chilled 1-2 hours or over night. Great served with sliced tomato, sliced onion, sliced pickled hot pepper rings, on homemade bread! Wrap it in lettuce or scoop with chips, or enjoy in a wrap!!! This salad will be perfect no matter how you serve it. ENJOY! Gluten Free Crockpot Chicken and Dumplings Serves 6-8 people depending on apetite Filling 1/3 Cup butter 1/2 to 3/4 Cup Freeze Dried onions + 1/3 +/- Water, in a small bowl 1/4 Cup Gluten Free Flour 1/4 tsp Black Pepper 2 Cups water to which has been added 1-2 tsp of Chicken Bouillon (To taste) 3 Tbsp Powdered Milk + 1 Cup water 1 1/2 Cups Freeze Dried Chicken Chunks + 3/4 Cup Water, in a medium bowl 1 Cup Freeze Dried Corn + 1/3 Cup HOT Water 1 Cup Freeze Dried Peas + 1/3 Cup HOT water 1/4 Cup Freeze Dried Carrots + 1/4 Cup HOT water 1/2 Cup Freeze Dried Celery + 4 Tbsp Water 1 Cup Freeze Dried Potato Chunks + 1 Cup Water (Optional) Turn your crockpot onto warm just to prewarm the dish. In a large sauce pan, melt the butter, then add the onions and cook till onions are “clear”, to bring out their flavor. Remove from heat. Add 1/3 Cup GF Flour and black pepper, stir to mix well. May be a little dry, but try to mix in all the flour with the butter. Then add the water with the bouillon already dissolved. Mix well. Bring to a boil and allow to thicken. You don’t want this as thick as pot pie filling because it will be cooking for a time in the crockpot. It should be more stew consistency. When thickened, add milk mixture and stir through, then remove from heat and add re-hydrated vegetables and chicken. Gently pour mixture into the pre-warmed crockpot, then turn the heat to high. While it continues to heat up, mix the dumplings. Dumplings 1 1/2 Cups Gluten Free Flour 1 Tbsp Baking Powder 1 tsp Chicken Bouillon 1 Tbsp ground chia seeds with 2 Tbsp water added 1/4 - 1/2 tsp black pepper 1 Cup Whole milk (or 4 Tbsp Powdered milk plus 1 Cup water) 3 Tbsp butter Herbs for flavor: Optional, Some like to add 2 tsp Thyme leaves for added flavor In bowl, whisk together dry ingredients. Gently heat the milk until heated through, add butter. Turn off heat and allow butter to melt into milk. Mix into dry ingredients until just incorporated. Drop dough by spoonfuls onto hot filling in crockpot, leaving a small space between each dumpling to allow for rising. Cover and continue to cook on high until dumplings are cooked through, 45-60 minutes. Serve Hot. Makes about 6-8 servings depending on appetite. 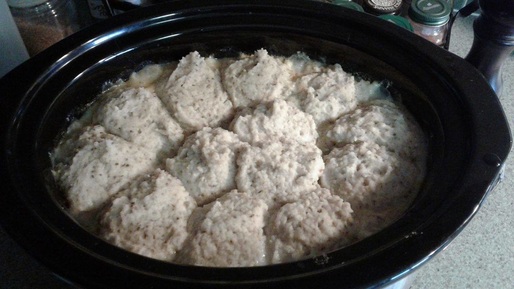 This picture was taken about midway through the cooking of the dumplings and, as you can see, they have expanded to fill the 1/4 inch space I had left between them. Now they will continue to rise and be lighter and fluffier as they expand. We had one of those odd hot autumn days a couple weeks ago. The kind that reminds you suddenly of summer, and the temperature made us feel that we just weren't in the mood to heat up the kitchen with a hot meal being cooked. So early in the day, I decided to make something a little different. I grabbed different cans from the pantry and stared at them for a bit until it hit me - chicken salad. Easy quick to mix and let sit until evening. I wanted something a little different in flavor, though, and then I saw the Freeze Dried Chili Peppers, Freeze Dried Corn, and that bag of corn chips from the cupboard. That's when I got the idea to throw together a Mexican Spiced Chicken Salad and serve it with corn chips and pickled jalapenos. This one was easy to make and makes a great meal that can be mixed ahead, set all day to meld, and be pulled out when you are ready to sit down to the table. Served with corn chips, potato chips, or even in wraps, this would also be great for nights when you need to eat in a hurry. Quick and Easy Mexican Chicken Salad Servings 4-6 3/4 - 1 Cup of Freeze Dried Chicken 1/2 Cup Freeze Dried Sweet Corn 1/2 Cup Freeze Dried Chili Peppers 1/2 Cup Freeze Dried Green Onions 1/2 Cup Freeze Dried Chopped onions or fresh onion chopped 1 Cup Water (An extra 1/2 Cup may be needed for best rehydration depending on preference) Place all these ingredients into a large bowl, and mix well. Cover and let sit for 15-20 minutes to fully rehydrate. While the meat and veggies are rehydrating, mix together: 2 Tbsp Tomato Powder 2 Tbsp Dry Cilantro, or 1/4 Cup fresh chopped 1 Tbsp Chili Powder Sprinkle of Onion powder, Garlic powder, Black pepper, and salt to taste 3/4 Cup Mayonnaise (I use our recipe for Homemade mayo!) Make sure to mix thoroughly. Drain off any excess water from the meat and vegetables, if there is any. Shake the colander thoroughly so that your finished salad won’t end up watery. Place back into your large bowl, add the mayonnaise mixture and mix thoroughly. May be served right away, but is always best chilled 1-2 hours or over night. Serve with salsa, fresh diced tomatoes, chopped onions, salsa, sour cream, guacamole, or sliced avocados. Wrap it in lettuce or scoop with corn chips, eat in taco shells, or enjoy in a wrap!!! This salad will be perfect no matter how you serve it. ENJOY! I enjoy having this recipe around in a jar for whenever I am in the mood for something different. It is easy to make with products from your food storage, and keeps for a month or two if it lasts that long. It is even better for you and the kids than those sugary cereals you could be buying at the grocery store.
Granola is great with milk in the mornings, sprinkled over fresh fruits like berries, melons, or even sliced apples. How about serving it over a bowl of ice cream or your favorite frozen yogurt? Mix it in with your kefer or yogurt for a hearty afternoon snack or filling balanced breakfast. It is even a quick and easy crunchy snack to just grab and nash. One of the reasons I enjoy this recipe is because it is versatile, can be changed by adding different nuts or dried fruits and is packed full of nutritious seeds and grains. Also, uses your favorite honey rather than sugar for sweetening. Do you want a slightly stronger flavor? Add a little bit of molasses along with the honey for a darker, richer taste. No matter how you mix it up, it is still tasty, filling, and packed full of goodness. Higher Protein Gluten Free Granola 1 Cup Quinoa 1 Cup Quick Cook Oats 1/4 Cup ground flax 1/4 Cup ground Chia seeds 1/2 Cup Shredded Coconut 1/2 Cup Peanut Flour 3/4 Cup Honey, melted 1 Tbsp Oil Preheat oven to 300 degrees. Put quinoa on a cookie sheet with sides. Place in preheated oven and roast for about 7 minutes. Remove and pour into bowl. Add the rest of the dry ingredients. Mix well until coated with Peanut Flour. Drizzle honey over the mixture then drizzle oil over. Mix well until thoroughly coated. Lightly oil the same cookie sheet used before, and spread granola mix in a thin layer on the cookie sheet. Place in the oven and cook for about 15 minutes. Remove, stir, bringing the sides into the middle and mixing well. Place back in oven for 10 minutes, checking occasionally to ensure it is not burning. Remove from oven and allow to cool thoroughly before placing in an airtight container or bag. Served as a topping over ice cream or fresh fruit, or as cereal in the morning with cold milk. Granola can also be eaten as a snack or packed for travel. Granola can be easily varied by adding different spices, flavorings like almond or maple, and adding dried fruits and nuts. It is a versatile recipe to add to your storage portfolio and can be whipped up in no time at all. Recipe is also easily doubled, but may need an additional pan to be baked in to make sure you spread it thinly and evenly for even baking.  Around this time of year, squash and pumpkins are everywhere. This is great time to grab a bunch and put up some pumpkin or squash puree in the freezer or canning cupboard for use over the winter season. And, what better treat to serve while you enjoy the fresh smell of chilly Autumn air than a tasty slice of pumpkin bread? Well, I guess you could eat those wonderful fudge brownies I posted earlier, but if you aren't a big chocolate fan or aren't in the mood for those, our gluten free pumpkin breads are another great choice! These loaves can easily be frozen, too, for later - if they last that long! This recipe is extra special as it is made without eggs. Great for your home storage cookbook or recipe box. For those looking for a dairy free recipe, this one's not it. It does work better with milk for some reason than with almond or other nut milk. You are welcome to try it that way, if you like, and let me know what your results were! Would love to hear. Gluten Free, Egg Free Pumpkin Bread 2 Loaves 3 1/2 Cups Gluten Free Flour 2 Cups Sugar ( I used 1 1/2 Cups) 2 tsp Baking soda 1 tsp salt 2 tsp Pumpkin Pie Spice 1-16 oz can of Pumpkin Puree (Organic comes in 15 ounce can. I used this plus 1/4 Cup extra milk) 1 Cup Olive Oil 2/3 Cup milk 1 tsp Vinegar Preheat oven to 350 F degrees; oil 2-9X5 loaf pans. I also like to line my pans with parchment paper for easy removal of loaves. If using non-stick pans, no need to oil them. Mix all dry ingredients together well. In a separate bowl, mix all the wet ingredients. Pour the wet into the dry and mix together just till well combined. Do not over beat. Separate the batter evenly between the two pans and place in the oven for 45-50 minutes until a toothpick inserted in the center comes out clean. Cool in the pan 30 minutes, then remove and cool on a wire rack. Place in a bag or container for storage. Delicious with a slab of cinnamon butter slathered all over it, or a little dollop of cinnamon sour cream made with some milk or water and Sour Cream Powder. 1 1/2 Cups Freeze Dried Chopped Chicken plus 1 Cup water, mix well and set aside. Place the following ingredients together in a different bowl: 3 Cups Freeze Dried Asparagus (May also use Frozen or Fresh, if so, reduce the 2 Cups water for rehydrating down to 3/4 Cup, and steam the asparagus until tender) 1 Cup Freeze Dried Chopped Onion 1/4 Cup Freeze Dried Celery 1/8 Cup Carrot Dices Mix well then add 2 Cups water, mix thoroughly and set aside. Remember to reduce water to 3/4 Cup if using steamed fresh or frozen asparagus. In a separate bowl, place: 1 Cup Freeze Dried Potato Chunks or Dices Pour 1 3/4 Cups water over potatoes, stir well and set aside. Allow vegetables and chicken to rehydrate for approximately 10 minutes. NOTE: If you wish to have chunky asparagus in your soup, set 2 Cups of the Freeze Dried Asparagus aside in one bowl with the other vegetables along with 1 2/3 Cups water, and take the other 1 Cup of the Asparagus and place it in a separate small bowl with 1/3 Cup water and set aside to add to the soup later. 3 tablespoons EVOO 2 tsp dried parsley flakes 1 tsp Garlic Powder 1/2 teaspoon pepper 20 Oz Water 2 tsp Vegetarian Chicken Bouillon 1 teaspoon salt, Optional 2 cups half-and-half, cream or 2 Cups Water and 8 Tbsp. Instant Milk Powder MIX WELL BEFORE ADDING TO SOUP! (this is a little thicker than normal rehydration methods to make it more creamy than the standard recipe) Shaved Parmesan cheese, optional After 10 minutes, place the EVOO in a large soup pot and gently heat on medium heat. Add vegetable mix above and sauté. Sprinkle with parsley flakes, garlic powder, and pepper, stir thoroughly to blend flavors. Pour in the 20 Oz Water and add the Vegetarian Chicken Bouillon, mix well. Heat through and allow to cook for 15-20 minutes, until the vegetables are tender. Turn off heat. With a Stick Blender, blend the vegetable mix until creamy. Once pureed, add the chicken, potatoes, and additional rehydrated Asparagus (if desired). Allow to heat through. Taste the broth at this time to see if additional salt will be needed. Add if necessary, then gently pour in the Half and Half or the Milk Mixture, and stir through. Gently heat on low heat until serving temperature. Serve hot with shaved parmesan cheese or Freeze Dried Shredded Parmesan, if desired. Goes great with a loaf of fresh bread or Gluten free rolls!!! Need a flavor change? In the mood for something simple, and filling? How about a nice hot-from-the-oven Chicken and Rice Casserole with a creamy sauce. This one would go great paired with a fresh salad from your Survival Vegetable garden, or some hot steamy vegetables on the side. Not in the mood to worry about cooking up the veggies? Rehydrate some THRIVE Freeze dried broccoli, cauliflower, or your other favorite vegetable and toss it right into the meal for a simple-to-serve all-in-one meal. Chicken and Rice Casserole 1 whole onion, chopped, 3/4 Cup Freeze Dried Chopped Onion plus the water to rehydrate 1/4 Cup oil or butter, I use olive oil 1/4 Cup Flour - Gluten-Free Flour works great. 2 Cups Chicken Broth - 2 Cups water plus 2 tsp Chicken Bouillon Sautee onion in butter or oil, remove from heat and mix in flour; mix well. Add 2 Cups broth and whisk thoroughly. Replace on burner and on medium heat, cook til thickened. Remove from heat. NOTE: May also use Judi’s Creamy Chicken Soup Mix Recipe - my jar happens to be GLUTEN FREE. 1 1/2 Cups Instant Rice plus 1 1/2 Cups water 1 1/2 Cups Freeze Dried Chicken plus 3/4 Cups water Salt and Pepper to taste Preheat oven to 350 degrees F. Prepare baking dish by lightly greasing the bottom and sides. A 9 inch square works nicely for this recipe. You can also use a round casserole or pie plate if you prefer. Rehydrate the Freeze Dried Chopped Chicken, set aside. Cook the rice til done, then add the rehydrated chicken, mix in the creamy soup mix. Mix well. Pour into prepared baking dish. If desired, sprinkle with shredded cheese. Cook in 350F oven for about 20-30 minutes until heated through. Remove from oven. Allow to set five minutes before serving. Suggestions: Dress it up a little with some of your favorite re-hydrated Freeze Dried Shredded cheese 5 minutes before baking is finished to melt the cheese thoroughly. For more variety, add vegetables to the mixture before baking. Broccoli, Cauliflower, asparagus, or spinach would go nicely. Also is delicious topped with crushed crackers or potato chips. Sprinkle on top five minutes before cooking is finished, and serve. |
Prepping Expert
AuthorJudith has over 30 years experience in food storage, herbs, essential oils, and prepping. She was a captain in the USAF-AUX, FEMA trained, Community Emergency Response Team member and NRA marksmanship award recipient. She shares her experiences with her readers offering tips and recipes. Disclosure
The information shared is our personal opinion and should NEVER be considered a substitute for professional medical, nutritional, or other expert advice. Information contained is not for the purposes of diagnosing, or treating any disease or medical condition. Any endorsement of products should not be considered an un-biased review since we are paid and compensated when you purchase products from this site.
Archives
March 2024
Categories
All
|
 RSS Feed