|
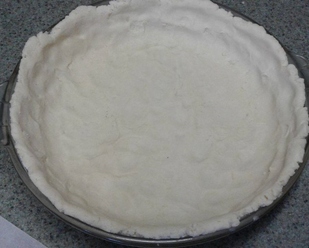
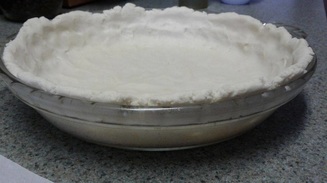
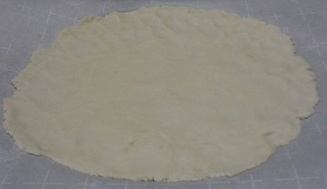
For years I have use an almond meal gluten free pie crust when making baked goods, and it was okay, but it was never quite like the old fashioned pie crust that Dad used to make. A while ago I decided to try Dad’s old handwritten recipe, but substitute THRIVE Gluten Free Flour for the white flour, butter for the lard (YUCK! Unclean lard!), and Himalayan Pink sea salt for the iodized salt. I also knew that I would need to add something to pull it together and bind the ingredients. I wasn’t looking for a grainy look, so I knew I didn’t want to toss in my usual ground Chia Seeds to hold it all together. Instead, I decided to toss in an egg and see what would happen. I knew I would be using this recipe to make Gluten-free Hearty Chicken Pot Pie, so I also was not interested in anything sweet. Definitely leaning more toward a savory crust. This was one of the most unnerving experiments in the kitchen, but one with some of the best results ever tested in our kitchen. Not only the best results, but consistent results because it has worked the same way each time. I like to try to keep things as simple as possible, and this recipe is no exception. This one can be easily altered to use with fruit pies, savory pies, and we are even looking at using it for making calzones, stromboli, and maybe even breakfast tarts filled with eggs and vegetables. With a simple, plain flavor to the initial recipe, you can easily add sugar for sweet pies, herbs for savory ones, and even Italian spices for the calzone or stromboli. Try this crust recipe with THRIVE Gluten Free Flour and send us your ideas of how you used it for your family! (NOTE: This recipe was originally created using THRIVE Gluten Free Flour, but is easily altered to use other brands as well. You may need to cut down just a little on the amount of flour, and add a little more as needed if it is too soft to work with). GLUTEN FREE Pie Crust 2 Cups THRIVE Gluten Free Flour 1/2 tsp Himalayan Sea Salt 1/2 Cup Butter, softened, NOT melted 1 Egg 2/3 Cup Water (start with 1/3 and then add 1 Tbsp at a time until dough is right consistency) Preheat oven to 425. In a bowl, mix together THRIVE GF Flour and salt. Mix in softened butter until crumbly. Add egg and 1/3 cup water, mix well. As needed, add 1 Tbsp additional water until dough is the consistency of soft pie crust. This dough is not likely to be dry, like old fashioned pie crust, and may be too sticky for rolling pin. NOTE: Experience shows that when it is as dry as old fashioned crust, it crumbles and does not hold together well when transferring to the pie plate. I prefer this dough, softer, like a stiff cookie dough, so that it may be spread with the fingers. Making a dessert pie and want the crust a little sweet? Add your sugar to the flour and salt mixture. How about a savory crust for a pot pie or dinner pie? Add the desired spices with the dry ingredients and mix thoroughly. Divide the dough into two pieces, slightly less than 2/3 of dough for the bottom of the crust and slightly more than 1/3 for the top crust. Place large piece of dough in the bottom of a 9 inch pie plate, flatten with the palm of the hand, then spread the dough evenly throughout the pan and up the sides, leaving a high enough edge to seal the top crust. Prick the bottom with the tines of a fork so that steam may escape and crust will not bubble up. Place in a preheated 425 degree oven for approx. 8-10 minutes, not allowing it to brown or cook fully. While crust is baking, liberally sprinkle GF Flour or Oat flour on wax paper or parchment. Place the small piece of dough on the floured paper and flatten with palm of hand. Sprinkle top with flour and then gently press with hands to the size of the top of the pie plate. When Pie crust bottom is ready, add filling to crust. GENTLY cover the top of the pie with the top crust, trying to close all the edges with the crust so that the filling does not spill over in the oven. Prick the top of the crust to allow steam to escape while baking. Place pie in the oven and cook according to pie recipe directions. Remember to cover the outer edges with foil to prevent burning if the baking time is long, like for an apple or pot pie. |
Prepping ExpertAuthorJudith has over 30 years experience in food storage, herbs, essential oils, and prepping. She was a captain in the USAF-AUX, FEMA trained, Community Emergency Response Team member and NRA marksmanship award recipient. She shares her experiences with her readers offering tips and recipes. Disclosure
The information shared is our personal opinion and should NEVER be considered a substitute for professional medical, nutritional, or other expert advice. Information contained is not for the purposes of diagnosing, or treating any disease or medical condition. Any endorsement of products should not be considered an un-biased review since we are paid and compensated when you purchase products from this site.
Archives
March 2024
Categories
All
|


 RSS Feed