|
You have heard me say it in videos and in blogs, Waste not, Want not. With more and more claims being made about "supply chain issues" we need to use up everything that we can and truly implement this thinking in our homes and lives! It needs to become second nature to us, especially with food. THIS was another one of those times for me.
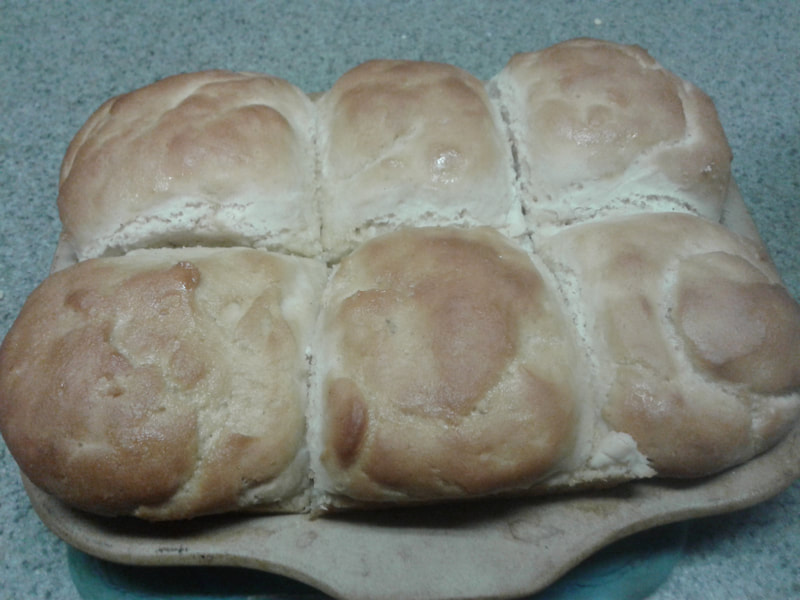
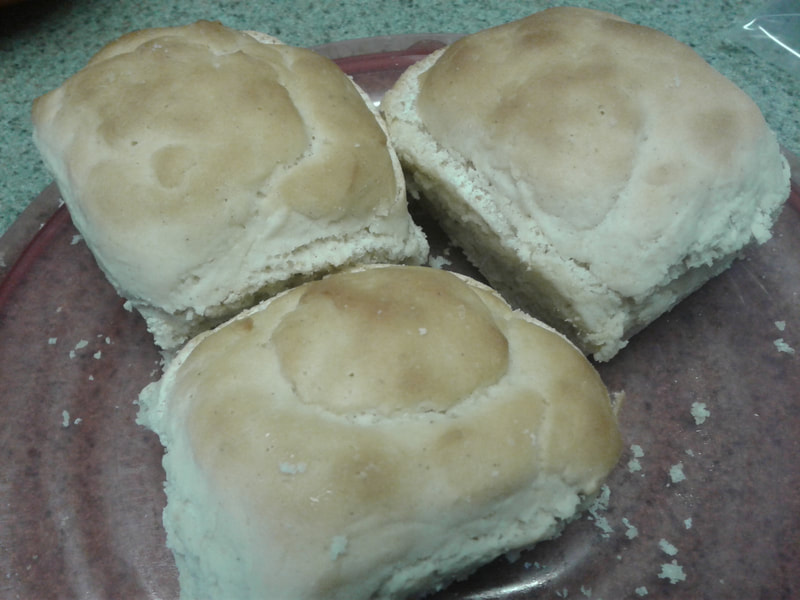
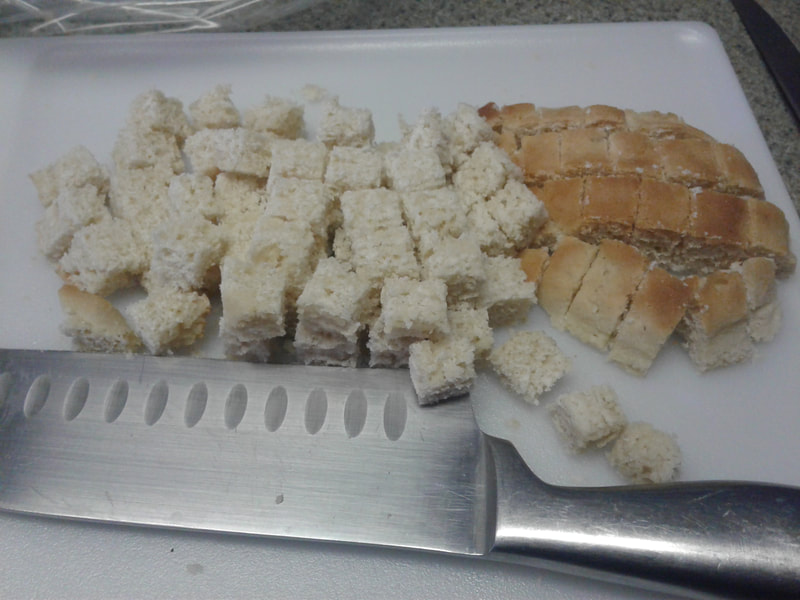
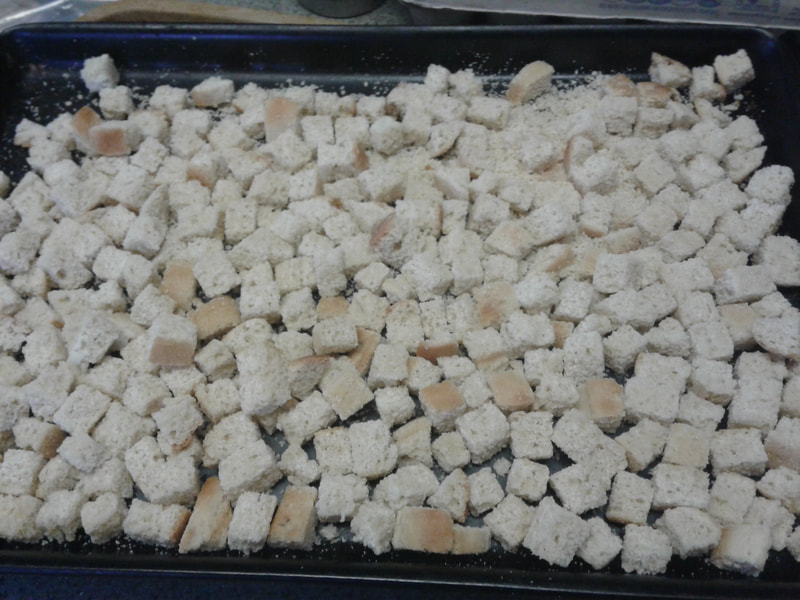
Last week, I made the most wonderful gluten-free dinner rolls from my favorite GF yeast roll recipe. It isn't my recipe, actually, it is someone else's - but it never fails me. They are fluffy, tasty, buttery, and perfect right out of the oven! Sometimes, they can be a little dry the next day, but reheated with some butter or EVOO, they are great again. I will say, if you wait a week from baking, they can be VERY dry! And there is nothing you can do to make them go down easy except maybe throw them in your soup! Sadly, that is exactly what I did this time! Oops! The good news is am getting back into the habit of thinking waste not, want not about everything that is left over. I could behave like a typical American consumer here and just throw them away in the trash, or toss them out for the birds. However, I have learned that where we live it is not likely the BIRDS will get them first. It will be some undesirable creature like mice, raccoons, or even a bear who wanders in for a taste treat! We don't want to attract anyone like that. With gluten-free flour prices as high as they are, I prefer to utilize them as much as possible in whatever way I can! What options do I have? 1) I could easily make them into bread crumbs for meatloaves, meatballs, or breading meats for dinners. They crush easily when they are this dry, and the crumbs can be toasted in the oven. Afterward, they will be frozen in an airtight container or zipper bag, ready to be used. 2) CROUTONS! YUM! How many times have you wanted to enjoy a nice salad with croutons? I find gluten-free ones are either too expensive or not available in our stores. A little toss with oil and herbs and we can make our own if we desire! 3) Bread cubes for stuffing! And this is what we are planning to do with these leftovers right now. I cut each roll into three thin pieces, then diced them into cubes. I toasted them in the oven for a bit until golden brown. And then they are going in the freezer when they are cool. Next week is Thanksgiving, and we will be using them to stuff a couple of Cornish Hens for our special dinner! Wherever you might have thought to use stale bread before eating gluten free is where you can use these rolls, too. For stuffing, they might fall apart a bit more than regular wheat breads do, but stuffing is very forgiving. With all the butter, celery, onions, and other ingredients you might toss in, it becomes very mold-able as you shape it into a baking dish or stuff it in a bird. As long as it tastes delicious, that is all that matters! The next time you have leftover gluten-free rolls, remember to think of them with the Waste not, Want not attitude and use them up the same way you would have used wheat rolls! AND ENJOY! Blessings and shalom!
0 Comments
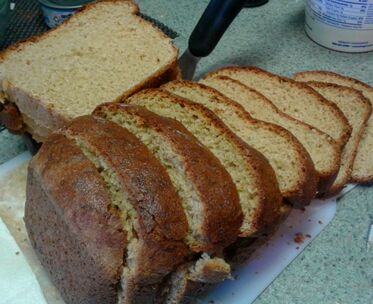
Not my best loaf, but it worked! AND it was still yummy. This one was an impromptu loaf tossed together at the last minute, a product of my “waste not, want not” teachings and my ability to think on the fly. We need to get more adept at doing these things for our families as more and more products might become scarce or expensive in our grocery stores and local markets. We won’t want to waste what we DO have in our pantries.
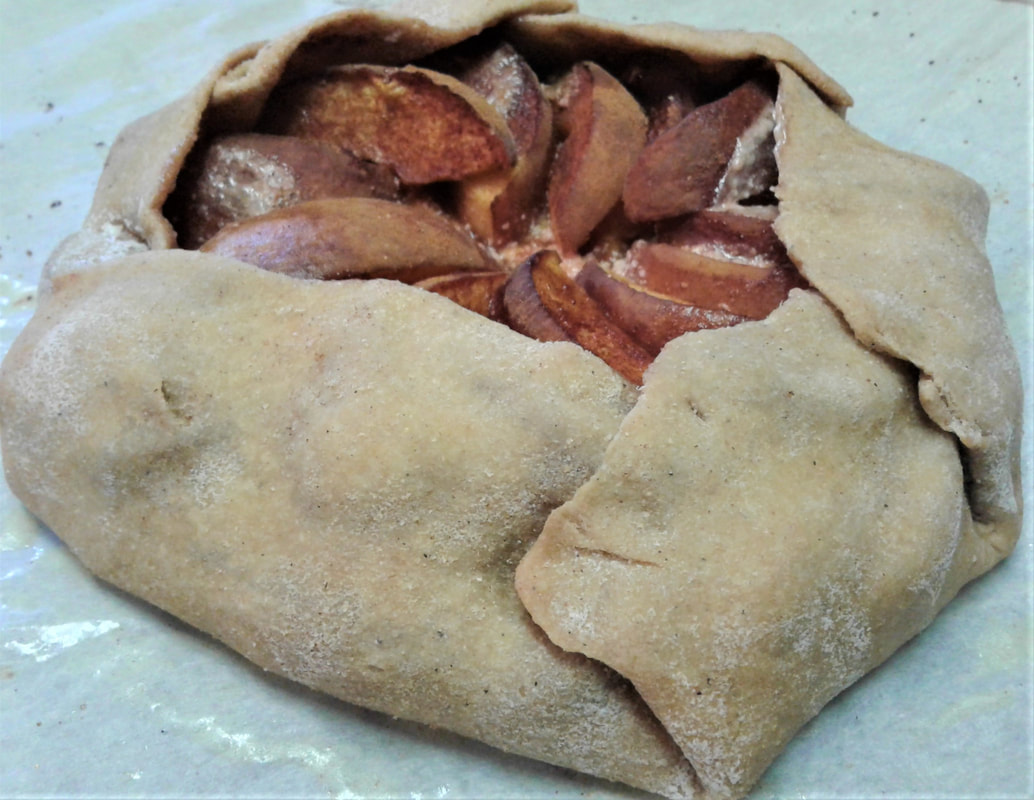
Let me say, too, someone will invariably point out that I used garbanzo flour with my whole wheat flour, and will insist I can't call my loaf WHOLE WHEAT because of it. That may be a technicality to consider, however, this loaf can easily be made with or without that ingredient. I am actually thinking ahead to those who might need a very simple, basic recipe to use. Now that we have cleared that up, HERE is how it happened: Jim was mixing up a batch of Korean pancake batter for brunch, and accidentally added too much water. From where I was sitting, trying to type, I could hear the batter sloshing in the bowl and was about to say something when he spoke first. I told him not to worry, that I could fix it! I have this “thing” where I will do whatever I can to fix ANYTHING! If I CAN, that is. I popped into the kitchen, grabbed the bowl he was using, and poured out about half of the very runny batter into a smaller bowl for him to mix up the Korean pancakes. SOME people might just pour the leftovers down the drain or into the trash. But that would be wasteful! Plus, my brain had automatically switched into gear when I first heard that sloshing, and from my chair to our kitchen, I realized I had TWO choices – 1) I could try and make it into a sourdough starter, or 2) I could whip up a quick loaf of simple bread! I easily ruled out #1 when I wiggled the spatula around in the bowl, though. I could smell that Jim had already added the sesame oil and soy sauce to the batter – which means it would not work for sourdough starter. So, a loaf of bread it is! I scraped all that extra batter into the mixer bowl for the Kitchenaid, then added a little scoop of garbanzo bean flour I had created in my new Pampered Chef Deluxe Cooking Blender the day before. I wanted this addition to increase the protein content a little. Then I added more whole wheat flour (about 4 cups), some salt and sugar, 1 pkt of instant yeast, and let it mix! Once it was done mixing in all the ingredients, I made sure to have the mixer knead for about 6 minutes to release a good amount of gluten! Then, shaped it into a loaf, tossed it into a bread pan, let it rise (covered) for about 4 hours or so, and cooked it for dinner. I will say, I needed to lower the temperature at least 10 degrees and add a little to the cooking time because of our higher elevation. It cooked too quickly on the outside, and the crust is very dark and crispy. The inside was just about perfect. Next loaf I will make the needed adjustments. It smelled wonderfully coming from the oven, and was delicious with our salads and chicken for dinner. We even had it the next morning for grilled cheese sandwiches, and one more meal for Jim as hamburgers! I won't waste the great blessings Yahweh has given us, especially since we have seen our share of lean times. Tossing the batter in the trash or down the drain was not an option for me. We need to gear our hearts and minds up to this type of thinking more and more – like our grandparents, great grandparents, or for some of you really young ones, your great-great grandparents! They didn’t call themselves “Preppers” – they didn’t need a title. They simply called themselves wise enough to know better. And they did know better – to be prepared and preserve food for lean times. Blessings. -- Judith Garton My Simple Bread Recipe This one is about as easy as it gets! 5-7 Cups of whole wheat flour (OR OPTIONAL: 4-6 Cups whole wheat and 1 Cup finely ground Garbanzo bean flour) 1 tsp salt 1 Tbsp sugar or honey 1 pkt. Instant Yeast (I use Fleishman’s or Kroger) 2 Tbsp oil (I normally use EVOO) 2 to 2.75 Cups warm water (approx. 110 degrees) To the mixer bowl, add about 6 cups of flour, and any dry ingredients (yeast, salt and sugar, if using sugar). Mix together gently (Low setting), to fully distribute dry ingredients. Add in the oil and 2 1/2 cups of water (if using honey instead of sugar, add this now, too). Mix together until all the flour appears mixed in. If the dough is too dry, add a little more water, only 1 Tbsp at a time. If the dough is too moist, add a sprinkle of flour. You want the dough to be slightly sticky. Knead the dough in the mixer for 6-8 additional minutes, until soft and elastic. Dough should be slightly sticky. Grease your loaf pan, then remove dough from mixer bowl. Form into a loaf and place in prepared pan. Cover with a damp towel and let rise until doubled, 1-4 hours. Bake in 350 oven for approx.. 1 hour, until loaf sounds hollow when thumped on the top. For my elevation of 3400 ft above sea level, we need to lower the temperature 10 degrees or so and bake a little longer. Making that note for those who might need this information. When done, remove from oven and brush the top with butter. Allow to cool for about 30 minutes before slicing. Slice and serve! ~~~~~~~~~~~ Have any questions about the recipe or article? Or would you like to know where to purchase products? Please contact us and let us know! Don’t forget to comment and leave us your feedback! A huge part of being prepared is knowing what to do with nothing, or what seems like nothing. I have mentioned before about thinking on the fly, and this is an example of that. My husband would call it strategic planning! One time you need to use this is when you are faced with a bunch of ingredients in the pantry, but you aren’t sure what to make from the strange menagerie you find. It is comforting to have ideas on the back burner that are versatile and flexible. Even better if they are very creative and taste great! I have a file folder of these to use when my brain is stumped or foggy. Here is an example. The Galette. It is a neat little free-form pastry, sort of like a pizza, but the crust-edge is folded up over the fillings. It can be a meal, a side dish, OR even a dessert! You can stuff it with whatever you want and can imagine. A galette can be made with pie crust or a yeast crust, like pizza. I have made them stuffed with carmelized onions, feta and tomato, sausage and cheese, and now even as a dessert. Running out of time preparing dinner for the first night of Sukkot the other day, I hadn’t put much thought into a dessert. I normally make a pumpkin roll with cream cheese filling, crust-free pumpkin pie or a plain old fashioned pie with crust – but I had forgotten to buy whip cream to go on top! Ooops…. I knew we were having our traditional meal of chicken pot pie. And, as we have downsized our meal portions quite a bit, individual pot pies baked in cast iron skillets was my plan. This would leave pie crust dough leftover and I was stilled befuddled at what to make for dessert. I looked into the refrigerator to grab the onion for the potpie filling, and realized the peaches were going south. They were very soft, bruised and about to be tossed. Waste not want not, right? So, I decided dessert MUST incorporate peaches! As I closed the door I spotted an open package of cream cheese with half a pack left! And that was ALL I needed for my brain to kick into high gear – dessert was going to be a cinnamon-peach dessert galette with cream cheese filling! A simple treat that would use these items that were almost ready for the trash, and the leftover pie crust from the recipe used in making chicken potpies! A win-win situation. No waste! After making the pot pies, I rolled out the rest of the pie crust into a nice circle. Then sprinkled cinnamon-sugar mixture lightly on the crust-center, leaving about 1 inch undusted around the perimeter. Next, I mixed together a scant Tbsp of sugar, 1/2 tsp of vanilla extract, and the cream cheese (approx. 4 oz). I spread this over the cinnamon sugar sprinkle, then sliced the peaches and arranged them on top of the cream cheese. For a filling more like that in a cheese danish, you would need to use 8 oz of cream cheese, the vanilla, sugar, and add 1 egg yolk. Then mix that well and bake in the 400 F degree oven for 25-30 minutes. I sprinkled a little more cinnamon-sugar on top of the peaches, then folded the edges on the peaches in typical galette style. It turned out to be about 6 inches in diameter. I baked this at 400 F degrees on parchment covered baking sheet for about 25-30 minutes, until the peaches were soft. After removing from the oven, I placed it on a cooling rack to cool. I stuck it in the refrigerator for a bit, too, after it was cool - just to chill it a bit. So simple! You could do this also with apricots, cherries, apples, pears, or even store bought pie filling. It can be changed-up by serving with or without ice cream or whip cream, or even baking with or without cream cheese. If desired, you can drizzle powdered sugar icing over it, or even a little maple syrup! This one was 2 medium servings, or 4 small. Perfect for the two of us! How did it taste? It was DELICIOUS! I wish I had made two - one for the next morning! Print the PDF for your home storage plan - starting using the flexible recipe now or set it aside in a notebook or file folder for those times when you are stumped like I was. Just remember to make it a part of YOUR Strategic Planning for days when YOU are making much ado about nothing! Blessings. -- Judith
This morning, like every morning, social media wants to know what is on my mind...I decided I am going to tell my social media EXACTLY what is on my mind today -
Toilet paper and chicken wings. Yes, you read that right – because that is what is on my mind. Over the last week I have seen SEVERAL people share a new version of "tattle on your neighbor" happening on social media posts in groups. The groups I have seen that were targeted have been homeschool groups, homesteading groups, and canning groups. There may be others. Interesting array of groups if you ask me.... The messages being shared say something to the effect of, "Are you concerned that someone you know is becoming too prepared? We care about preventing extremism on (the social media website)...." Then it goes on to explain how others have been helped by reporting their friends and loved ones. And YOU, TOO can be helped as well. Just follow their instructions. I just want to know why they have not asked ME - because YES, I AM concerned about a lot of people who, over the last 18 months, have become WAY TOO PREPARED. I mean WAAAAAAAAAAAY, too prepared. For WHAT? Honestly, I am not sure for what....it was CLAIMED it was for "lockdown." But WHO in their right mind needs 50 bulk packages of toilet paper from Costco? And where did all the chicken wings disappear to over the last 18 months? Because SOMEONE is hoarding them like crazy, and I think social media needs to investigate. Then there was a 30-something individual we saw locally last year, who had TWO CARTS filled to over-flowing at the Dollar General one day. It was filled with Pop Tarts, CapN Crunch, Corn Pops, EVERY Flavor of Cheerios, mac n' cheese, canned corn beef hash, and every other kind of prepared or frozen food you could imagine. And each cart was easily piled 2 feet above the top rim. I think THEY are someone FB needs to check into – because they were WAY TOO PREPARED for what appeared to be a Super Bowl sleepover party, in the off-season. How about the people who bought cases and cases of isopropyl alcohol? Peroxide? They were WAY to prepared for something, too. But again, what? The list could go on and on, but seriously, who do they think they are to decide WHO is too prepared – and for what? I have spoken before about the countless reasons why people are preparing their gardens, pantries and what ever else they need to prepare. I have shared repeatedly how I have had to LIVE on what I had stored – for anywhere from a few months to as long as two years. If I didn’t have the sense to prepare and store those things in advance, how would I have fed my children? MY PETS? My family? How would I have been able to help OTHER families in need? Just this past winter with us stuck at home for up to 7 weeks we learned more lessons as we discovered there were still holes in our “plan.” We did not have powdered or frozen milk to use in our food preparations! Praise God for our dear neighbor who picked up our grocery orders for us so that we could fill in those holes! I made sure to order a little extra milk each week as well as some powdered milk online, too. Should it happen again that we are iced in, we will be prepared. Somehow social media moguls are convinced that we are evil demons because we want to ensure we can take care of ourselves in times of need – as is happening now in Louisiana with the recent hurricane Ida situation. How many people there will have the charcoal or gas to cook on their grill, or food to eat until their power is able to be brought back? How many will have food they can share with others in this time of need? In our times of need, we considered doing exactly what social media and others are trying to force on people now – rely solely on the government. However, their plan is not infallible. During the times when I needed to rely on food storage and such for my family too much income was coming into the home, or we owned too many “assets” to qualify for aid. I bet they never thought of that, did they? Not everyone qualifies for their socialist agenda. There are criteria needing to be met or you are denied, putting you and your family right back in the same situation. Being a “prepper,” to me, means nothing more than being ready for whatever happens. Weather, financial, or any other issue which may arise. It is a way of life which is lived to help preserve life. Speak up – and speak out against these claims against your desire to protect and preserve yourself and family. We also have several excellent examples to hold up before us as we get our pantries in order. Noah - who put up food on the ark to preserve his family after the flood began. Joseph - who taught the people about the differences of feast and famine. Even the Exodus was a prepper situation - they left with provisions, their dough starter, and wealth of Egypt as they entered the desert. Yahweh will help us through tough situations, but having extras on hand for needs that arise is sensible and comforting. Do not let social media pressure you into thinking otherwise. And if someone you know pushes you for preparing some things for your family, why not ask them how many rolls of toilet paper did THEY buy last year! Blessings and shalom. I have a little trick I would like to share with you today for dehydrating greens, such as dandelion, kale, spinach and escarole. Some of you may have watched the video on YouTube I titled, Garbage Soup. That is where I toss all kinds of old veggies or cuttings into a bag in the freezer until I have a gallon bag full. Then I put them in a pot with several gallons of water, and simmer them to create a delicious vegetable broth. It is a simple habit to build that helps reduce your family waste and gives you a kitchen staple you have created yourself. No more buying stock or broth from the store for recipes. I have another example to share with you today of the old-fashioned adage, waste not, want not! Pretty much every grocery trip, we buy a bag or two of spinach to eat sauteed, in omelets, soups or as salads. Sometimes we also buy kale or turnip greens. We grow our own escarole and dandelion greens, too. We always have the best of intentions when we grab those greens – we intend to eat them right away. But often we end up with more than we will eat in a week, and greens can go south very quickly. What do I do with them when they are starting to look a little weary? One of two things… a) I simply wash them & shake them dry. If you have a salad spinner, you can use that because they get the leaves very nicely dry. Next, I lay the leaves in a thin layer on the drying racks. You want to have good air circulation, so don’t lay them on thick. You may chop them lightly to reduce drying time if you would like. Set the dehydrator for the proper temperature (125 F if not humid, 130-135F if humid), and let the greens dry completely. This will likely take several hours. I like don’t like to set this up in the evenings because I do check on them multiple times to see if any greens have stuck together. This is better for me as a morning task. When checking, you want to make sure to pull apart any thick areas of leaves so that there is no hidden moisture. Moisture could trigger your greens to mold in storage. Then, simply allow them to dry completely. b) If I am short on time and can’t prep them for dehydrating right away, I often just grab the bag, close it tightly, and toss it into the freezer for a few days until I CAN dehydrate them. Taking greens, like spinach, from the freezer is sometimes a little easier for me to fit them into my day for drying. I can break the frozen greens into smaller pieces and sprinkle them on the mesh drying trays, rather than the racks. Again, making certain that the greens are laid out in a thin layer. I set the dehydrator a bit higher at the beginning for frozen greens. I start out at 135F degrees because they are already humid coming out of the freezer – they will seem to have a bit more moisture than fresh greens. After a couple of hours, I reduce the temperature to 125F degrees, and allow to dehydrate until completely dried. A lot of people do not know what to do with this dried spinach once it is done. It is so easy to use in soups, sprinkled on salads, in casseroles, made into powder to be added to smoothies, tossed into muffin or sweet bread mixes – it works best in blueberry or zucchini muffins and breads. The possibilities are endless! Please note that your dried spinach is recommended to be stored 6 months or less based on optimum conditions. But if you keep a rotation of jars in your pantry, always adding the newest to the back of the shelf, you will have a constant supply of greens hidden in your food supply! Just think of the hidden nutrition you could be adding to your meals! Can you also dehydrate spinach in your oven? Yes – if your temperature goes as low as 150F degrees you can! Above this temp your spinach will likely cook, rather than dry. But if you haven’t been able to pick up a dehydrator for yourself as yet, this might be a great option for you to try! I hope this sparks you to start storing dried greens for YOUR family as well! Blessings and Shalom! A few years ago, I discovered a great way to help discourage vine borers on my squash plants and cucumbers. Then, CHIPMUNKS happened. A couple years in a row they have decimated my bean seedlings as well as many other plants I would put into the ground. Looking for a way to discourage or prevent their attacks, I decided to try my trusted solution for vine borers to see if it would work against other creatures. This year on just about anything going into the vegetable garden I was going to use - squash socks. I mentioned them in our video and blog on how to use TP tubes for seed starting! I have also discussed them before in other videos, blogs and social media posts. Up here at our elevation, we are just getting deep into full blown garden season – both flower garden AND veggie garden have ended the spring plantings, and I will be starting second crops of several items this coming week. We still have a few veggies and fruits needing to be direct seed, as well. It is tough sometimes because we are usually quite a bit behind the rest of you – every spring I see YOUR gardens already producing lots of yummy veggies while we are just getting things into the ground. We live above 2500 feet in the Appalachians and things work differently up here - we have to wait a week or so after everyone else is already done putting in their plants and seeds before we even start. Most people use Mother’s Day as their marker, but up here we often frost the week after Mother’s day. Some years we can start planting around the 20th of May, finishing up getting everything into the ground by June 1st or so. Other years we may still be planting the 3rd week of June. This also affects when we will get invaders we want to do away with. Just like every other year, I had to fight my impatience this year to put things in the ground right away. But FINALLY! It was time a couple weeks ago and I started putting in squash plants, cucumbers, loofah, and direct seeding green beans. Then I planted tomato and pepper seedlings right after that. If you have seen my posts on social media, you have heard me rant about our plants being nipped off just after sprouting – mostly by those ridiculous chipmunks. So, because of the chipmunks, and even some slugs, we needed protection on just about everything this year. I prefer to deter as much as possible without using chemicals or DE. Diatomaceous earth can be a great help, but it can affect and kill some GOOD bugs as well as bad. I am very careful with using it. These squash socks are a great solution to protecting many plants without using any treatments at all, plus they also help with chipmunks and larger slugs. Throughout the year, in a grocery bag hanging in the pantry, I place all the mesh veggie bags we can save. Veggie bags just like these. Come springtime, depending on length of that mesh bag, I cut it into sections using scissors – each produce bag yields 3 or 4 sections. Here’s what I do: for the squash plants, I usually cut a nice section of bag long enough to protect the section of vine at the base, nearest the ground. Beyond this first section, as the vine creeps along the soil, you can cover sections of the vine with soil to help protect other sections from the vine borers – the vine may also set additional roots along the way, drawing up more water and nutrients to feed the squash growing along it. With our Cushaw and zucchini plants, I took the seedlings from their TP tube pots, placed that soil plug into the mesh sleeve I created, slid that sleeve into the hole I had dug, then covered the roots with soil – leaving the “squash sock” about an inch below the surface. For the first planting of green beans, however, I dug the hole directly in the garden, set the bottom edge of the bag a bit below the surface, placed seeds in that hole, then covered seeds with soil. As the beans grow, they will grow up through the bag and it will help to protect them. Why not just wait until they sprout to put the socks on the seedlings sprouting from the ground? Because last year, the chipmunks and possibly some squirrels dug up all our bean seeds as I planted them. THIS will make them more difficult to dig up. As plants grow inside the sock, chipmunks won’t be able to lop them off and eat them, either. This will also deter rabbits that sometimes sneak in. The good news is that it is working tremendously – the green beans are already almost a foot tall! They are doing so much better this year, and it appears they ALL came up. As usual, the squash plants are doing well, too – the Cushaw seem to be doing the best and are well protected! One big warning I need to pass along – after growing season, pull up your squash socks. Especially if you are going to machine till in the fall or next spring, PLEASE!!! They cannot be reused because they are too brittle the next year anyway. If left lying around they also can become a hazard for wildlife wandering into the garden for leftovers like seeds or greenery left behind after harvest. I just toss them into a grocery bag and into the trash. Also don’t leave them in the ground thinking they will break down – they really won’t. Although they are made of a plastic that ought to deteriorate after a certain time, I have never seen this happen. Plus, when you go to till your veggie beds, those socks will tie themselves around your tiller tines and make a HUGE mess. Yes, I speak from experience! In fact, my little tiller recently dug up a white mesh bag from the very first year I used them to protect squash plants! It tied itself around the tiller and made a dreadful mess – and was also evidence of how long it might take for them to break down! I have been using these bags for 4 growing seasons now and love them for protecting plants and now seeds, too. I do have to say, in all the time using them, I have not had a single plant die or be infected by vine borers at the base of the plant. Not one! I HAVE had a couple of butternut plants get attacked down the line where I didn’t remember to cover the vines with soil. Now you have a simple, easy, free, recycling idea to help protect your garden AND increase your production for your family. I hope this idea helps. Blessings and shalom! Today let’s take a few minutes to talk about toilet paper tubes. Yes, you heard me right! At the advice of a friend last year, I started saving TP tubes for seed starting. I had never heard of this before, so I definitely had not done it before. I have used egg cartons and a lot of other containers, but this was new to me. I decided to keep a simple grocery bag hanging in the bathroom cupboard. When the roll was empty, I just dropped the old tube in that bag and in springtime, VIOLA! A bunch of free seed pots to use. I wasn’t sure how they were going to work, so I didn’t want to start ALL my seeds in them, just in case. I only used them for some of our cucurbit seeds – butternut, pie pumpkin, and cushaw. However, I have to admit – now I wish I HAD used them for everything!!! I wasn’t sure I was going to like them, yet as time went on and things began to grow, I discovered I LOVE them! I am now planning to start saving them for even more plantings. We are going to need a 2nd planting of green beans, cucumbers, and maybe even zucchini in a few weeks. I also want to start growing little “patches” of herbs like chamomile, dill, oregano, sage, and basil, as well as a crop of autumn peas. I am hoping we can save enough tubes by fall for some other cool crops, too. Before I go into any how-to portions, let me go over a few of the pros and cons I found with the TP tubes. Then I will explain how I used the tubes, kept track of them and what was planted in each. TP Tube Pros: ~ Easy to fill with soil – I placed a bunch in a larger container, and just shoveled soil into them. Then I moved the filled tubes into their more permanent seed tray. ~ DEEPER soil than egg cartons provide, even if only using half tubes. This helped the roots grow deeper and are more hardy than seedlings in any past year. ~ they are easily kept together in categories or seed types by using old veggie tubs to hold them. ~ Helped the soil maintain a good level of moisture to aid sprouting. ~ When planting into the garden soil, tubes peel away easily if you want to plant without. ~ When planting with the tube, it held together well enough to be planted with the plants; then deteriorated easily into the soil. Takes about a month total to be gone in our soil. ~ Soft enough for roots to poke through if they need to. Cons: ~ A couple of the tubes fell apart in my hand as I was trying to plant in the garden. Not enough to discourage me, though. ~ When I set outside the clear tubs holding which held tubes, the tubes DID pick up and hold a bit TOO much water during a big rainstorm. Caused me concern about seed and root rot. However, the next days were hot and sunny, so rot never happened. Those are the only things I did not like! They are a big win for us for gardening going forward. Several videos I watched showed that you can use paper towel tubes, too. I was not comfortable with these, though, and didn’t feel they would work for us – the brand we use is manufactured with a heavy glue holding the last paper towel to the tube. I don’t know what is in that glue and don’t want to take any chance it contains anything bad for the worms, garden or us. Especially worms – It took several years and great blessings to get a good, healthy community of worms in our gardens. Online and in other’s videos you will see a lot of ideas on how to organize your tubes. I like to use things we have laying around or that will just end up in the trash – you know recycle or upcycle everything we can! I save large plastic tubs from bulk greens we buy for salads as well as from other fruits and veggies. Often, I simply use these tubs by adding soil and planting directly into them. For this project, though, I took the TP tubes, cut four slits from the bottom, up about 3/4 of an inch. Then folded the bottoms closed to hold the soil. (See photos) If you would like to tuck the fourth flap under a corner of the first flap, it does then to stay flatter when you fill it with soil. Also, creasing the tube to the top along that same line as you cut the slits will help shape the tube into a little square – these fit nicely in the tubs. Finish by organizing them in the tubs and, if different types of seeds, remember to label the sections of pots with sticks or on the outer surface of the veggie tub. We own an Epson Labeler which has come in very handy this year in the garden! It prints the perfect size labels to attach to skinny sticks for marking the pots. I do not glue or tape the bottoms. I don’t want to mess with the glue, for one, and tape in the garden would just be a mess and more trash in our soil. Having them simply folded somewhat loose makes the bottoms easily opened to expose the roots as I plant them into the soil. I also liked the loose bottoms on tubes that would be directly planted into the soil. The roots could break through more easily and set deeply into the garden soil. Another quick thing I did to ensure I didn’t get anything mixed up if the tubes shifted in our plastic tubs was to place a piece of paper, cut to size, in between each section. In one plastic tub, I had six of each squash variety. So each section of six was labeled on the front with our labeller, then I separated each section of six by a simple notecard. Cardboard cut to size would also work. The cushaw were the first seedlings read to go into the garden. I simply took the container with me into the garden, pulled each tube from the tub, peeled the tube off then, planted the seedlings. For the Cushaw, since they are a LARGE squash, I wanted to ensure that they set good strong root systems with nothing hindering their growth. With this my first year using TP Tubes, I wasn’t sure how easily the tubes would deteriorate. A day or so later, I planted butternut and others that were also started in toilet paper tubes, only these I left the tubes on. And NOW I know! The tubes deteriorate fairly quickly in our garden soil and were almost gone after about 2 weeks in our soil! For those I wanted to try without, I broke away the TP tubes very easily by unwinding the tube like one of those grocery store biscuit cans! The roots were thick and strong inside, which held the soil in a sort of plug. I stuck the plug inside a “squash sock,” then planted that into the ground, and VIOLA! The cushaw are growing on their own now! I can’t wait to see their first blossoms come in a few weeks’ time. Already thinking of cushaw and butternut in soups, breads, pies, and even autumnal DÉCOR! BTW, when you save a lot of TP tubes, it may seem like a daunting task to fold all those bottoms, but in reality, it doesn’t need to be. Start early in the winter getting them ready for spring plantings. Pick a day or evening when you are just sitting watching TV or listening to podcasts. Grab your bag of tubes, a pair of scissors and an extra bag or bucket to toss the folded pots into. Then fold while you enjoy your latest programming! Most people I know remember to save the little 4 or 6 pack planters that hold the annuals or perennials added to gardens in spring. We wash and reuse those which aren’t broken. Over the years, though, many of these have ended up in the trash, leaving me with several trays with no little 4 or 6 packs. NEXT planting, I plan to re-use several seed starter trays and fill them with TP tube starts rather than 4 or 6 packs. I am hoping this will provide another way to minimize cost and maximize production from our garden. And that’s it in a nutshell! Or rather in a toilet paper tube! If you are looking for a way to cut some corners or costs, I would say that saving the TP tubes is an idea that can easily be incorporated into your gardening plan. Happy gardening! Blessings and Shalom! from Judith Garton We enjoy adding greens to our winter soups. Kale, spinach, escarole, mustard, dandelion. They all go nicely in many of the recipes we enjoy. Sometimes it is nice to just toss them into even creamy asparagus or potato soup. Yes, I know, it might give soup a funny green colour, but it is nice to know it is a quick and easy way to boost the nutritional content of your winter meals.
For years I have simply tossed the bags of greens into the freezer and let them sit until we needed them. Part of our issue was budget and not being able to afford extra jars. Another part was the inavailability of jars on the market. I now have more jars to use and more shelf space in our pantry, too! I have been saving a lot of jars and lids over the last year which can be used for short term storage, and now have a new plan! I don't need to use all our canning jars, but will build our food quantity and variety! Starting next week, I will be removing all those blanched greens from the freezer and start dehydrating them. I will be storing them in sealed jars in the pantry for the same use. Why am I doing this? There are several reasons. 1) Dehydrating will increase the shelf life by enough time that we can use them next fall as soup season starts. 2) I am running out of freezer space! With our finances being blessed to be a bit better over the last number of months, we have been able to put up more foods in our food storage. And have built more shelf space in the pantry. Having a fuller freezer and pantry is such a great blessing we have been looking forward to. 3) These greens can now be hidden in other foods, too, such as smoothies, sweet breads or muffins! These are just a few ideas. Most of all, the dehydrated greens will end up taking up less space over-all. I can fit several bags of greens, once dehydrated, into one jar. That will take up less than one-sixth of the space the frozen bags took up. Maybe next week I will have some photos to share with you as the process begins. As spring progresses, I will even be dehydrating NEW greens as well - dandelion and mustard will hopefully be ready soon for harvest. Then spinach and hopefully even escarole in several weeks. Being able to produce our own pantry stable short-term storage reduces our need to rely on others for taking care of our needs as life gets more interesting. Blessings and Shalom - Judith Literally, just like that, overnight, everyone became preppers.
For years we have listened to people claim preppers are radicals, self-focused, isolationists. Yet spring of 2020 proved that they aren’t as nutty as people thought. Have you heard me say that before? Probably – because for years I have heard it about myself. Yet, how many times did you go to the store over the last number of months and find the paper product shelves empty with NO toilet paper shipment anywhere in sight? What about canned foods, foods in jars, and canning jars had vanished? It seemed for us, most of our local stores had PLENTY of fresh produce and frozen veggies, but meats and all the prepared foods were completely gone. All because of a virus and government control. The lock-downs and quarantines are only one of the reasons why people have, for years, looked to storing foods for longer term. Some will say that prepping, is ONLY for times like this – when the world looks like it is going to Hades in a Hand-basket. Well, I am here to tell you that food storage and prepping are for ANY emergency or sudden need. I will give you a personal example. When my parents moved from Tucson, AZ to far western New York state, their first full winter was a DOOZY! Dad used to talk about how they had gotten 18 FEET of snow up by their house. I will say, that was over the course of the whole winter, but it was a bad year. Even when it melted, it didn’t melt all the way. At one point, my folks hadn’t been able to leave the house for a few weeks or so. Suddenly, Mom called me one day and said, “Judith! I finally get it! Three weeks without leaving the house and I realize – we need food storage! Help me out! What do I buy first???” Mom and Dad were TIRED of eating Campbell’s soup two and three meals per day. We spent some time that day putting together a list for her, dad, the dogs AND the cats! A quick note here: I happen to believe that if you are willing to take on the responsibility of animals, you ought to have foods storage for them, too. Not just pets, either, as even livestock will need to be fed during times of trouble. I didn’t just help mom put together a list of foods to buy her next trip to the store. I asked her what she had IN the pantry and in the freezer – already. And we walked through some healthier meals for the two of them using what they have on hand. My folks were pretty resourceful, so it seemed odd to me that they couldn’t think things through. I think it was just that they were so used to eating more prepared foods and instant dishes. Habits they had developed over the years because both worked full time jobs. Once I helped mom see how much she already had, it made it easier for her to see what things to stick things in her weekly grocery bill and restock their pantry shelves for the next snowstorm or emergency. Whether flood, tornado, hurricane, loss of employment, or pandemic. Whatever situation or emergency might affect your ability to run to the store to purchase your normal food items becomes a reason for you to keep food storage ready. In my adult lifetime, I have had to live on food storage at least four times. All of those times involved a financial issue or hardship. Yet I know others who have had to do it because of being cut off from supplies – for example, a family’s home was on the other side of where a bridge washed out. It took over 3 months to repair. They had to use food storage until they could leave again. My mother experienced even more times where she was trapped. After dad died, she was stuck for a few weeks at a time alone because of snowstorms and drifts blocking the roads enough that she could not get to town. Because she was ready with both supplies and recipe ideas, it was much less a hardship for her than it was early on. There are a number of reasons for having preparedness supplies in your home other than Armageddon. If you stop and think about your home state, you can easily see the weather patterns, fire hazards, flooding, and other dangers that could leave you trapped and needing to live on what you have stored. Evaluate your situation, get things stocked and ready now, and when the next adventure comes along, your stress may be greatly reduced because you are ready and able to feed your family, in spite of conflict going on around you. Blessings and Shalom. Not exactly a prepper portion, but...
Sharing a funny little trick I did the other day that might help others. Everyone talks about how easy it is to clean a cooking pot of burnt on gunk with boiling water and baking soda. Well, last week, after a few little Thanksgiving mishaps, our burner drip pans were a MESS! I was trying to scrub them in the sink, thinking how much I could use a nice steel wool scrubby or old-fashioned powdered cleanser to get them clean. As I stood there using elbow grease and dish soap, a thought hit me: What about that boiling water and baking soda method for pots and pans? So, I grabbed a deep pot that would fit a few, added water, placed the burner drip pans one at a time in the water, sprinkled in some baking soda on top of it, then added another one, doing the same thing until three were in the pot. I only added three so that I could use the fourth burner to cook the pot. I set it on the burner and brought it to a strong boil, then turned it down to medium to keep the boil while allowing it to simmer a bit. After about 5 minutes, using tongs, I pulled them out one at a time and scrubbed each with my standard dish sponge. I was amazed at how clean they came! Are they perfect? I have to say, no – that is why you won’t see a photo here. They still need some deep scrubbing to get some deep set-in burnt spills, but it should be easier now that they have been boiled. I wish I had thought of this years ago – It would have made it so much easier so many times. I hope that maybe this idea will help you make your clean-up easier, too – especially if you spill Thanksgiving Turkey juice all over the top of YOUR stove like I did! Now, if only I had a pot big enough to fit the entire enameled, stove top! Blessings and Shalom! |
Authors
Judith has over 30 years experience in food storage, herbs, essential oils, and prepping. She was a captain in the USAF-AUX, FEMA trained, Community Emergency Response Team member and NRA marksmanship award recipient. She shares her experiences with her readers offering tips and recipes. DISCLOSURE: Were a business and may be paid or given free samples of products and services and therefore any information or article contained on this site should not be considered unbiased. Also, these articles may reflect our personal opinions and are provided as news and information only and should never be a substitute for professional, legal , medical or financial. consultation and advice. Conduct your own due diligence and verify the accuracy of each article.
Archives
November 2021
Categories |
||||||



 RSS Feed